
Different ways in which you can message your customers:
The purpose of this manual is to guide you on the different ways in which you can message your customers. The different ways include:
- Bulk messaging customers.
- Bulk SMS and emails from the customer list.
- Bulk emails by means of import files.
- Notifying customers that a high site is down or high site maintenance is taking place.
- Messaging individual customers.
- From the customer list.
- From the customer profile.
- Tickets
Please note, you will need the helpdesk and SMS gateways set up to be able to message your customers. For more information on this, you can refer to:
- Webinar: Mailbox Scraping
- Guide: Helpdesk Setup Guide
- Blog: Notification Rules
- Blog: Notification Templates
1. Bulk messaging
1.1. From the customer list
Messaging from the customer list will enable you to message a specific group of people i.e. all customers who pay via debit order or customers in specific groups etc. To do this, go to your customer list, use the filter options at the top of the screen to determine which customers you would like to message.

You will also need to take into account the “Show Customers” section. If there are only 10 customers listed on the screen, then only 10 customers will receive this message. If you want all customers in your filtered list to receive this message, then you will need to change this section to all. In other words, the purple section needs to read: “Show all Rows“

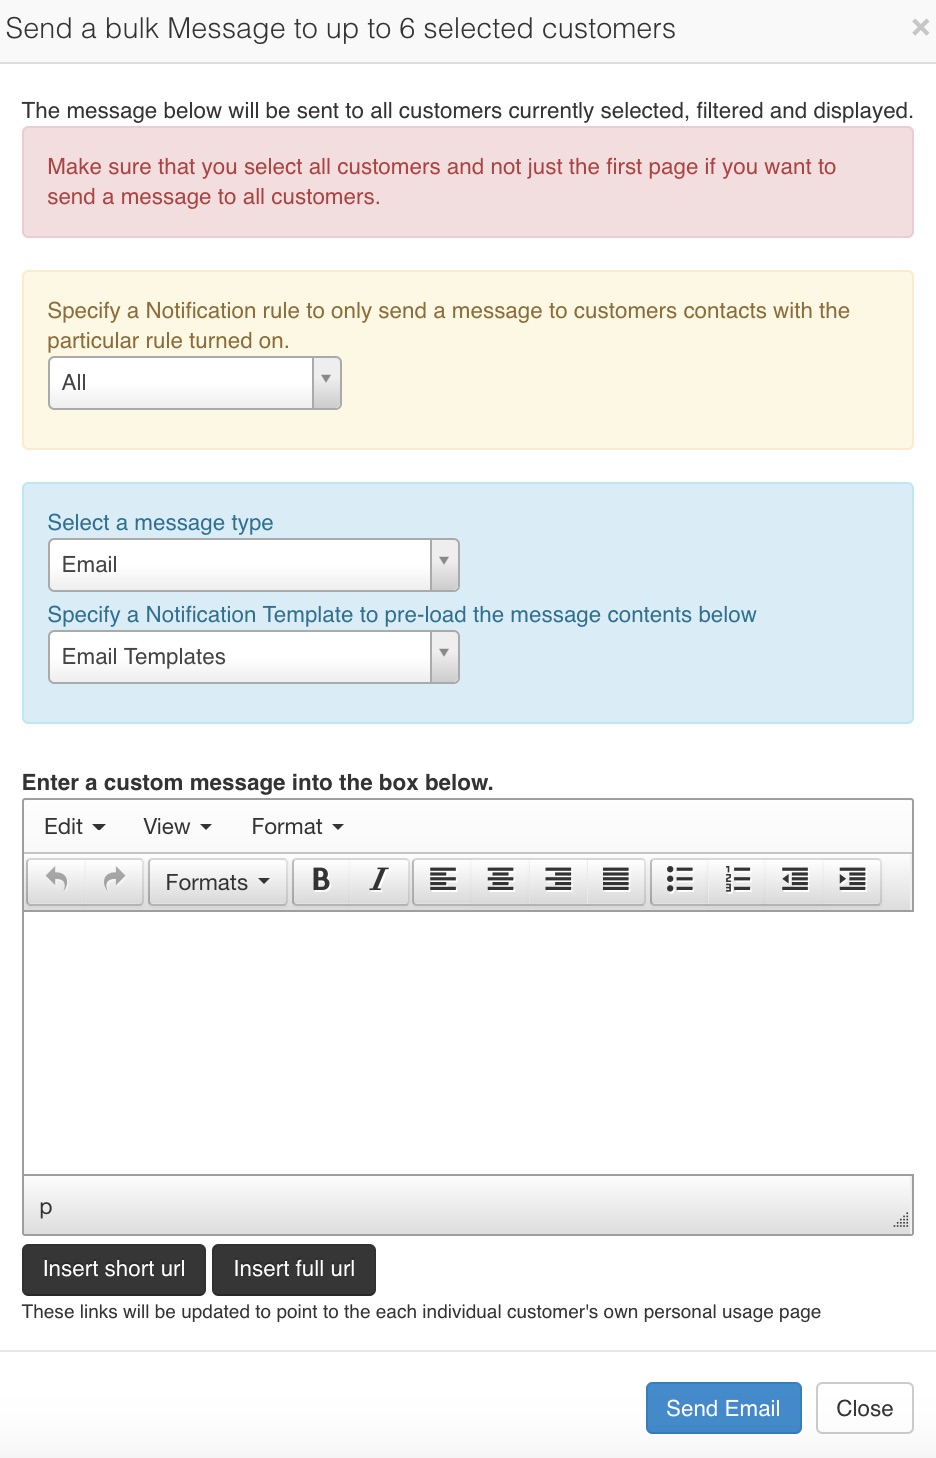
After selecting your group of customers, click on the “Message” button. You will now see the following screen:
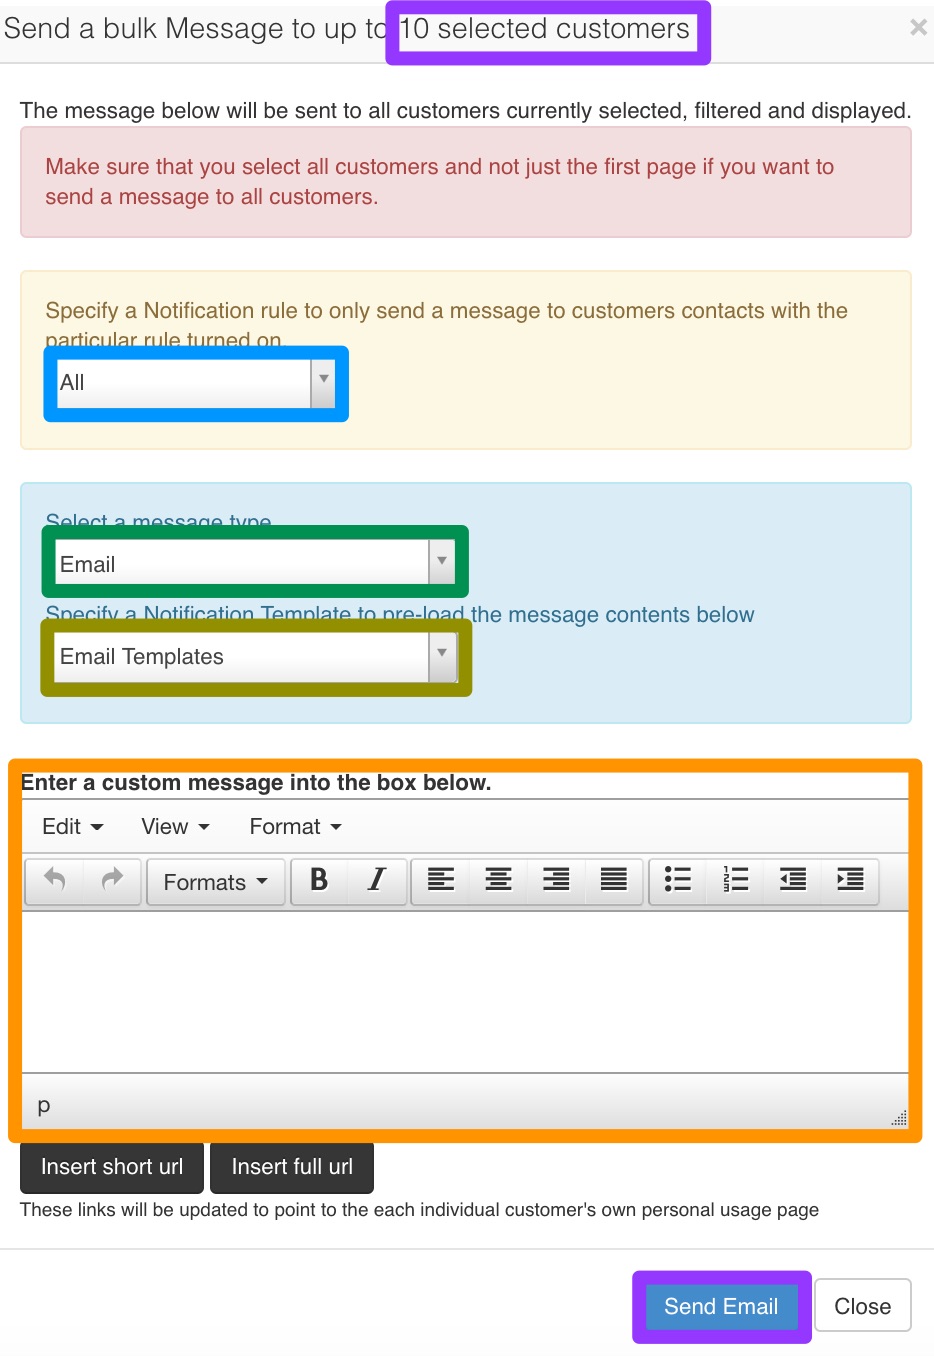
| Purple: | In this section, you will be able to view how many customers will receive your message. |
| Blue: | Here, you will be able to determine who should receive the notifications i.e. only contacts who should receive billing notifications. This is set up under additional contacts. Notification rules include the following:
|
| Green: | Next, you will need to determine whether you would like to email or SMS these customers. Please note to be able to SMS your customers, you need to have your SMS gateways enabled in your HeroTill instance. |
| Yellow: | In this section, you will be able to determine which notification the customer receive. For more information on notification templates, please refer to the: Notification Templated Guide |
| Orange: | If you need to change something in the notification template or you would like to create your own message for the customer, you can do that in this section. |
After making the relevant changes, click on the “Send” button.
1.2. Bulk emailing specific customers
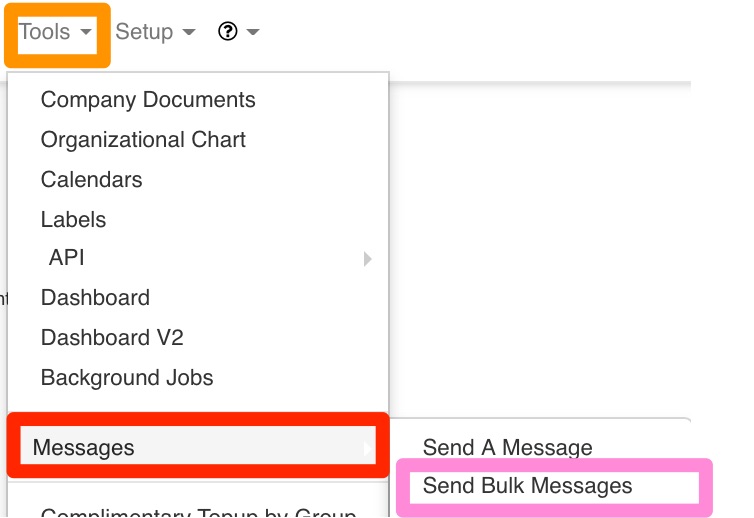
To bulk email a specific group of customers, you can go to “Tools” – “Messages” and then click on the “Send Bulk Messages” option.
On the next page, you can add your CSV file, field delimiter and field enclosure. After your document with the account name and email address, you will be able to add a subject and message to your customers.
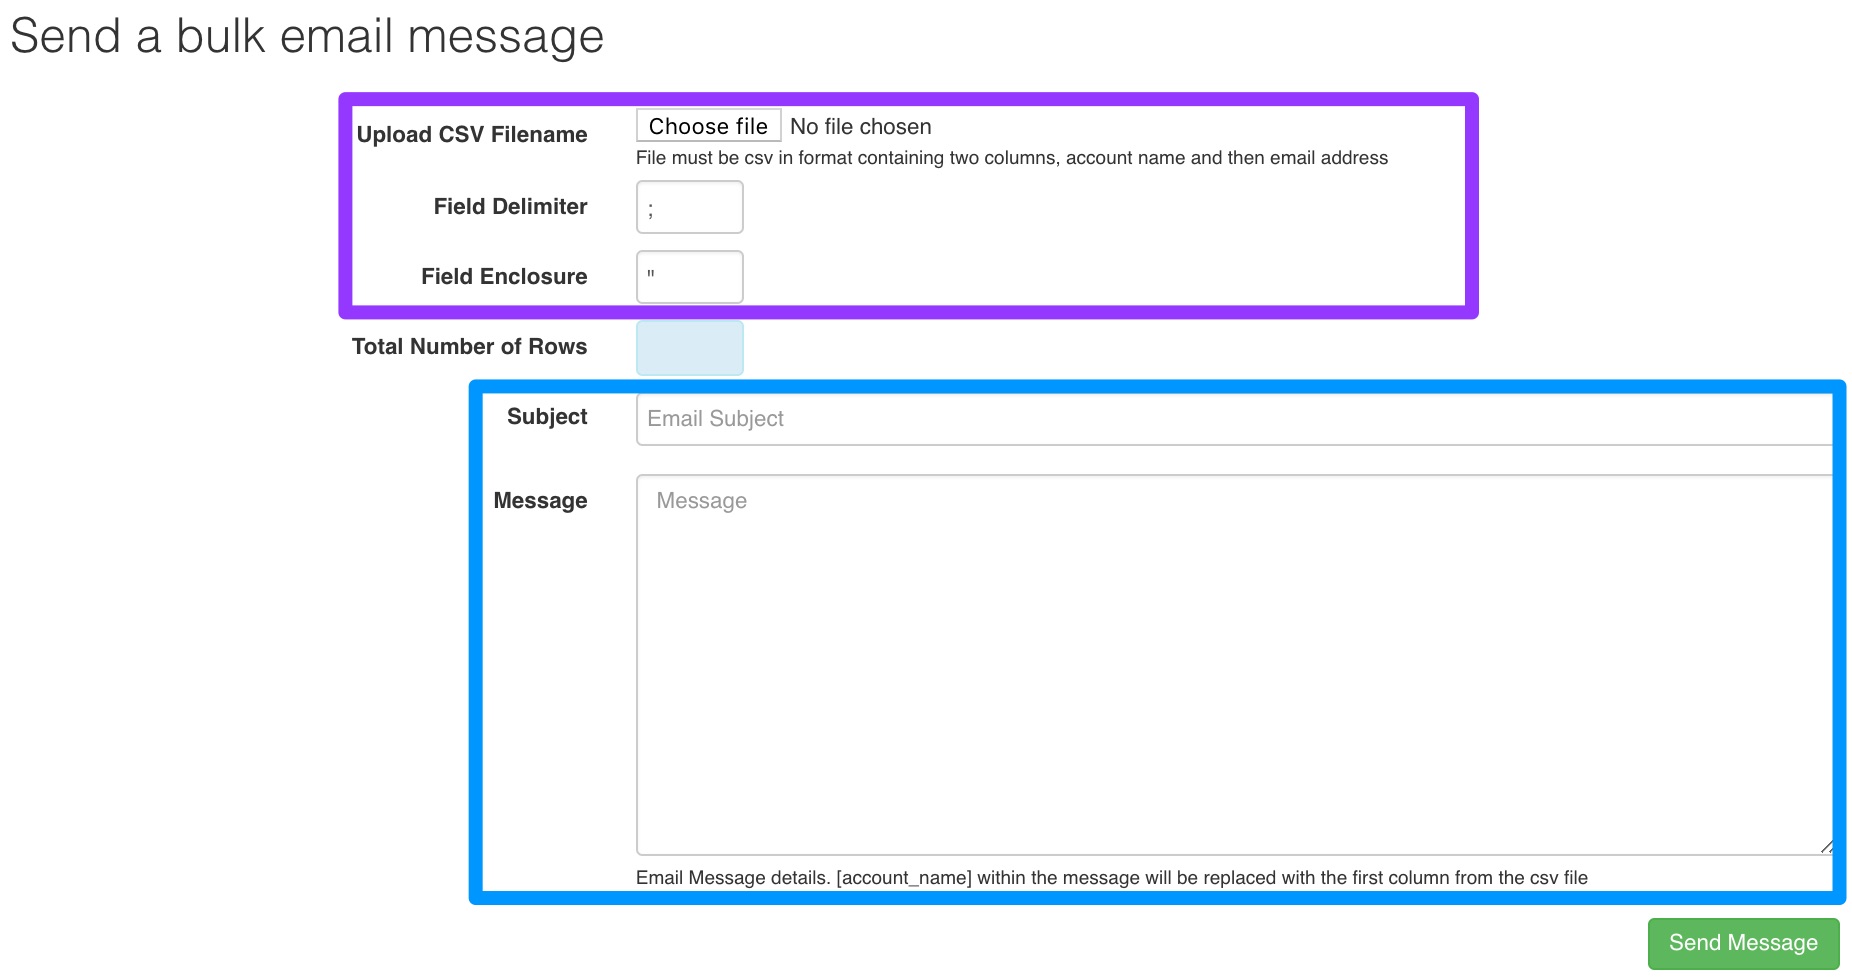
Remember to click on the “Send Message” button.
1.3. High Site outages
You will also have the option to let certain customers know that their high site is currently undergoing maintenance. To do this, go to “Devices” and then click on the “MikroTik NAS Users” option.

On the next page, look for the relevant MikroTik NAS User. Once you have chosen the relevant user or users, then your list will automatically be filtered. Remember to ensure that you change the show section to all to ensure that you send the message to all relevant customers.
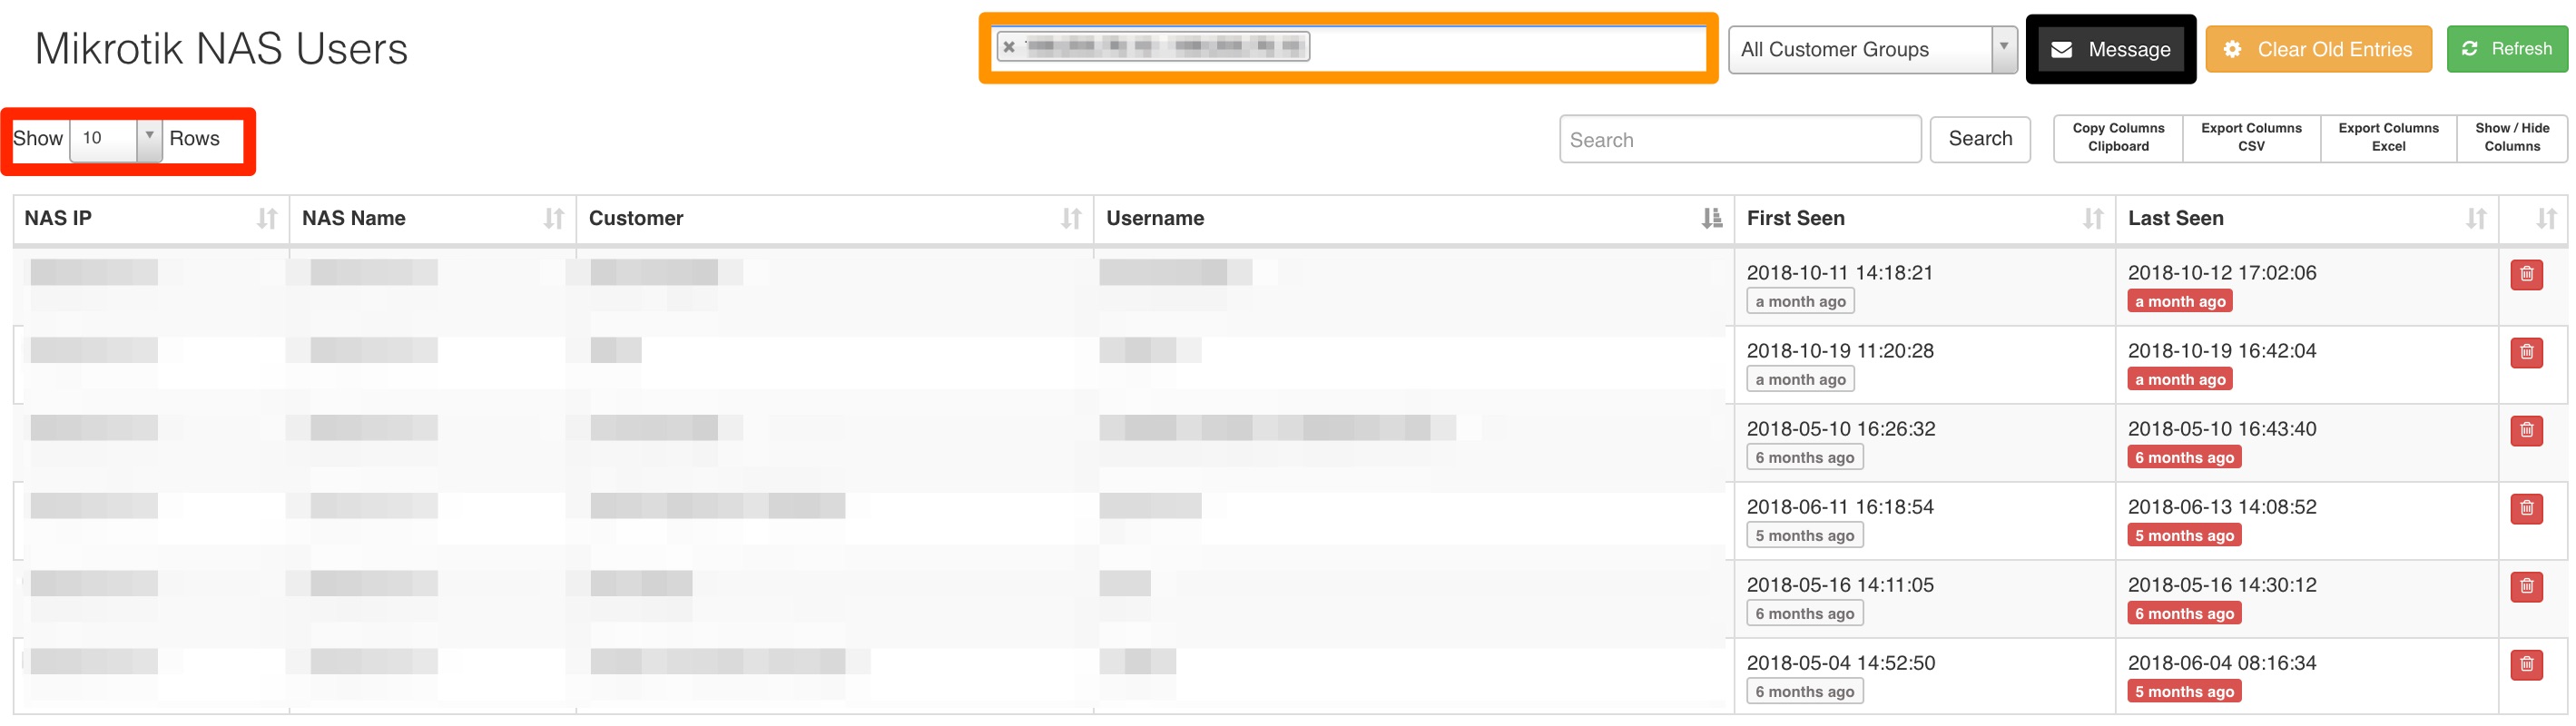
Once you are happy with your list, click on the message button. On the pop-up screen, follow the instructions and then send the message.
For more information on the pop-up screen, please refer to section 1.1.
2. Individual messaging
2.1. From the customer list.
To message individual customers from your customer list, you will need to search for the specific customer using the search function.

After finding the specific customer who you would like to message, click on the Message button. You will now be able to complete the settings on the pop-up screen:
2.2. From the customer profile
On the customer profile, there are two different places from which you can message your customer:
- The helpdesk tickets widget
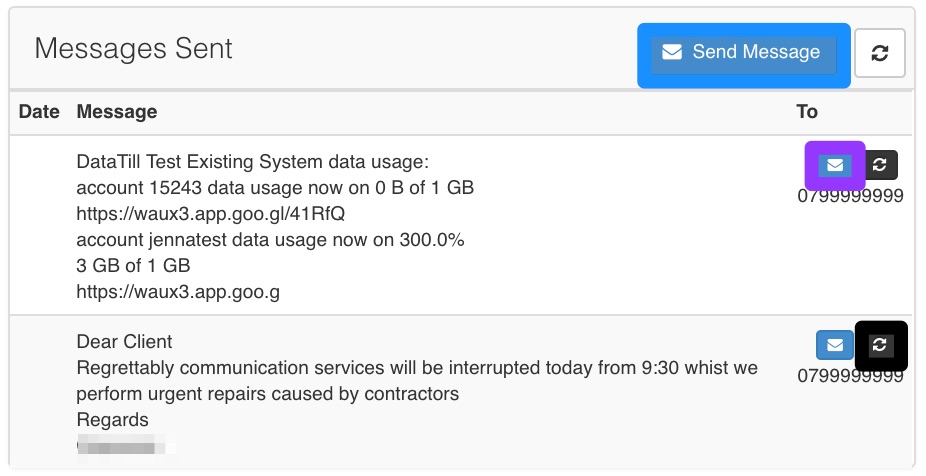
- The messages widget.
Quick access buttons can also be found for these two functions at the top of the screen:

2.2.1. Creating a ticket
In the helpdesk tickets widget, you have the option to quickly add a new ticket or to open and edit a previous ticket linked to the customer’s account.
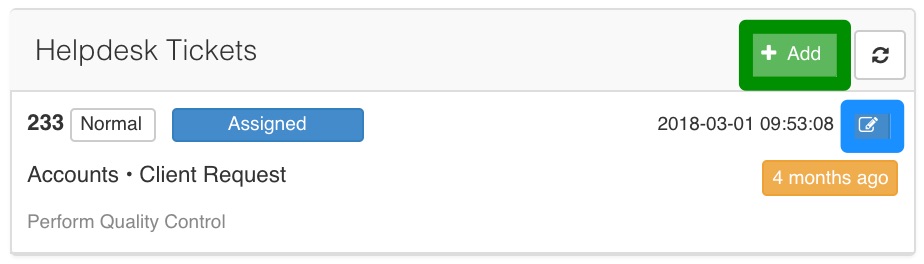
For more information, you can refer to Helpdesk ticket usage
2.2.2. Sending a message
To quickly send an SMS or email to the customer, you can go down to the messages widget. From here you can:
- Send a new message,
- View a previously sent message or
- Resend a message
If you are sending a new message, you will need to click on the Send Message button. You will then see the following pop-up screen:
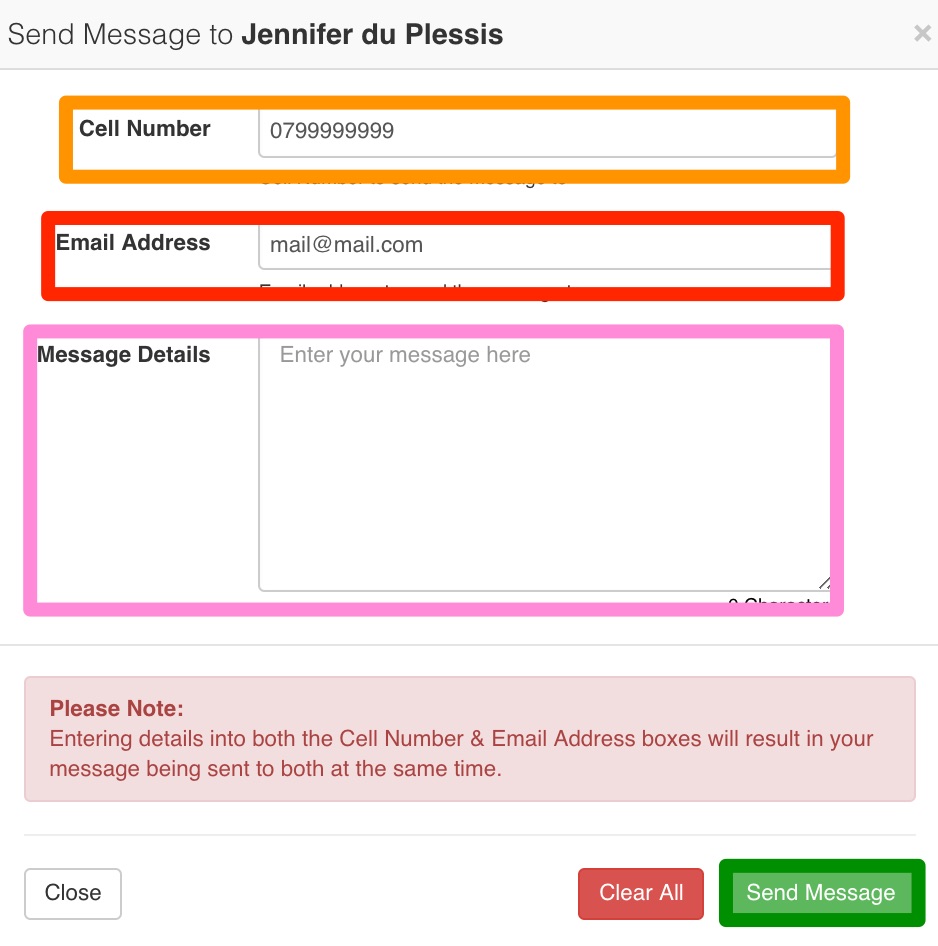
| Orange: | Here, you can see the cell phone number to which the SMS will be sent. If you do not wish to SMS the customer, you can simply remove the number and leave the field blank. |
| Red: | In this section, you will be able to view the email address to which the email will be sent. If you do not wish to send the customer an email, you can simply leave the field blank. |
| Pink: | Here, you will be able to add the message that you wish to send to your customer. |
Remember to click on the “Send Message” button when you are ready to send the message to the customer.