Overwriting recurring billing entries
HeroTill now allows for recurring billing entries to be overwritten or removed from customer profiles. This will mostly be used in the case that you quickly need to do a bulk price change for specific non-data recurring billing items i.e. VoIP, hosting etc.
It is important to remember that when you import this CSV template, that the system will look for all recurring billing entries that have the same name and product combo as in your recurring billing. In other words, when you say “Johnny (JOH001), Hardware”, it will delete all recurring entries for Johnny’s hardware purchases – regardless of the prices, dates and quantities.
Please be diligent when completing this process as once you have overwritten a recurring billing entry, the old entry will be deleted. This process cannot be undone and it is advised that you use this functionality with extreme care.
1.1. Permissions needed:
All admin users with the following permissions will be able to enable or overwrite and delete recurring billing entries:
|
Permission |
Read |
Write |
| System |
X |
X |
| General Manager |
X |
X |
1.2. How to enable the import tool:
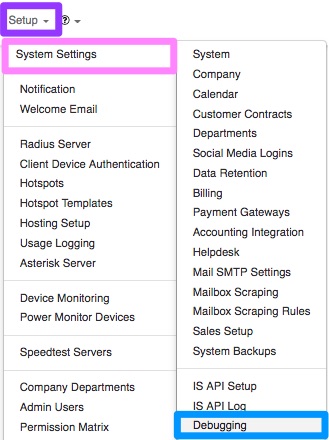
To enable this function, you will need to go to “Setup” – “System Settings” and then click on the “Debugging” option.
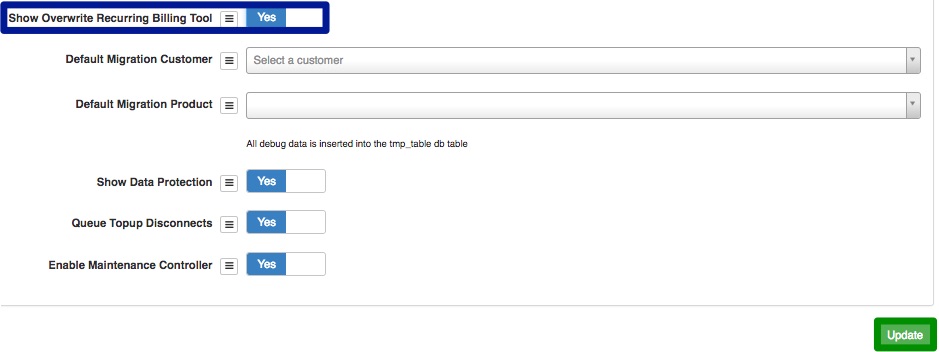
Scroll down until you reach the “Show Overwrite Recurring Billing Tool“ option and switch the toggle button to “Yes“. Remember to click on the “Update” button after making any changes.
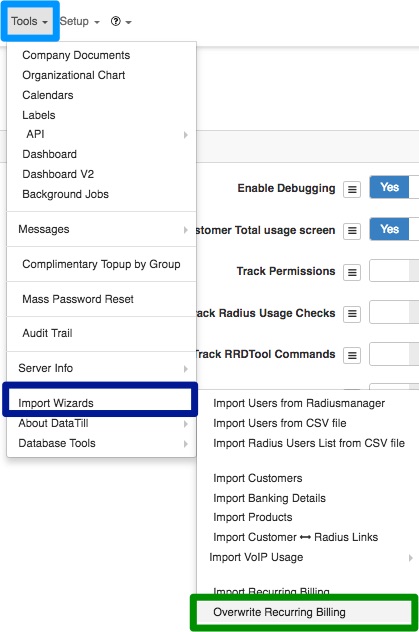
After you have enabled this option, go to “Tools” – “Import Wizard” and then click on the “Overwrite Recurring Billing” option.
You will now see the following screen:
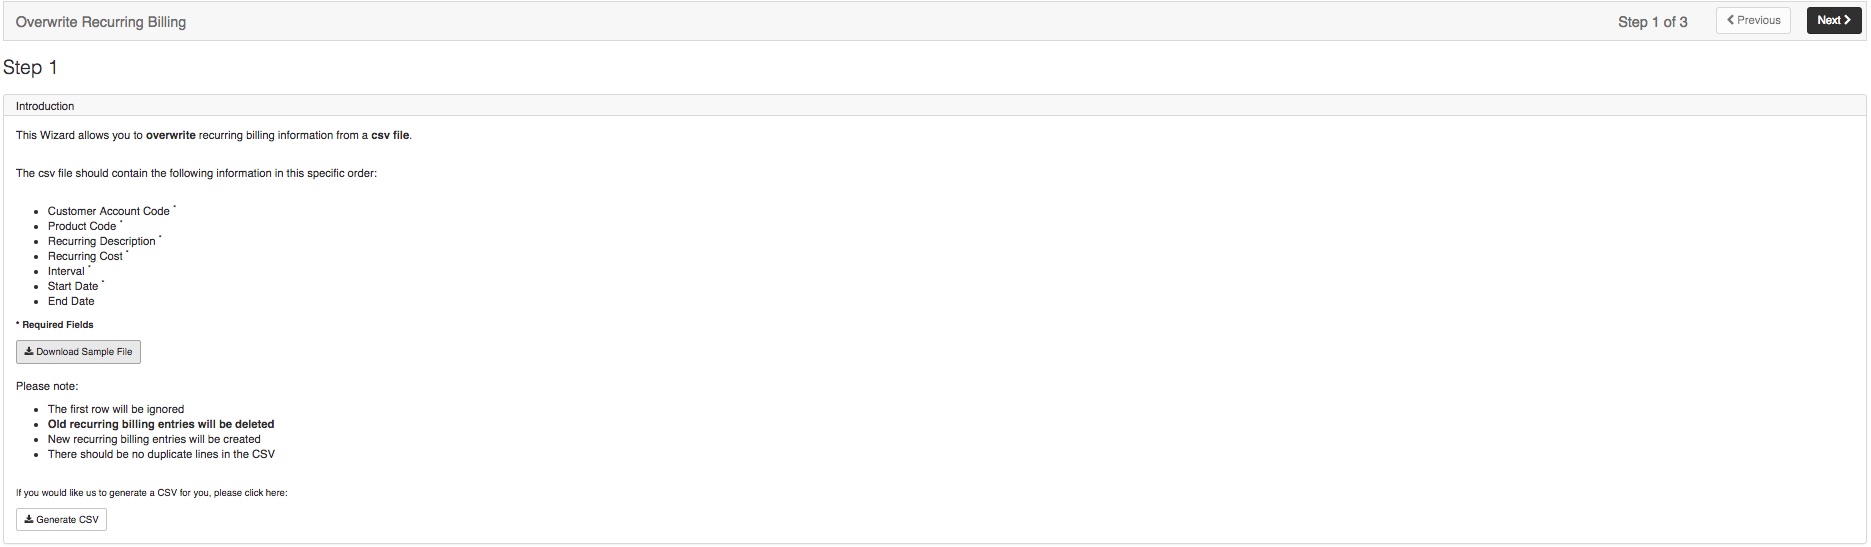
Step 1: Introduction
In your introduction, you will be able to see the following information:
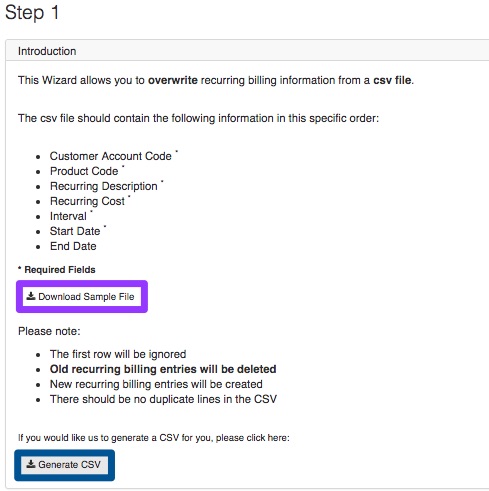
You will have one of two options when you are overwriting recurring billing entries:
| Purple: | This will allow you to create your own import template. |
| Blue: | This button will allow you to extract a list of specific non-data recurring. |
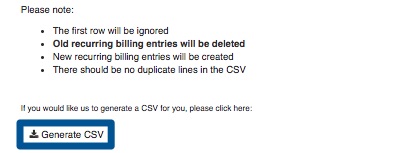
Please note:
- The first row will be ignored.
- Old recurring billing entries will be deleted.
- New recurring billing entries will be created.
- There should be no duplicate lines in the CSV document.
1.1. Creating your own templates:
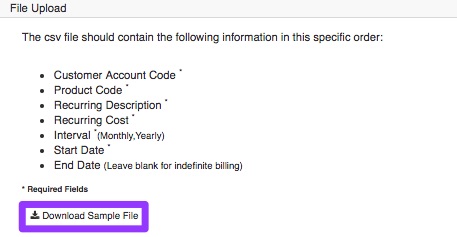
To populate the import template with your own information, click on the “Download Sample File” button to download the import template.
After the template has downloaded, click the downloaded document to open it.
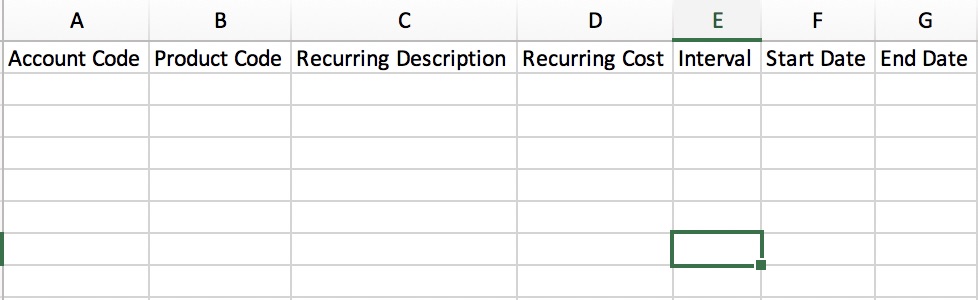
After populating your document, save it as in CSV format and then continue to step 2 of the process.
1.2. Overwriting only specific items
You will also have the option to export and override only specific non-data recurring billing items. To do this, you will need to click on the “Generate CSV” button.
After clicking on the “Generate CSV” button, you will be redirected to the following screen:
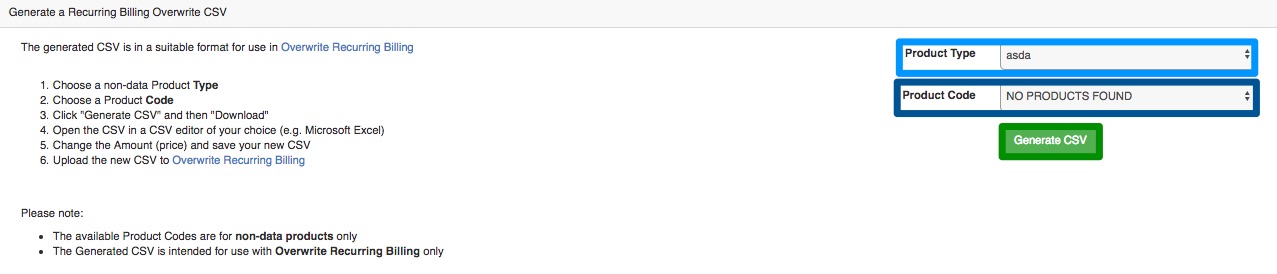
Choose the relevant “Product Type” and then the specific “Product Code” that you would like to overwrite. After choosing the relevant product type and code, click on the “Generate CSV” button. If there are no products for the specific product type, then the product code section will display “NO PRODUCTS FOUND” as in the screenshot above.
Once the CSV file has generated, then you will be able to download the CSV document.
When you open this CSV, all the relevant information will already be populated with a list of the relevant customer codes and other information. You will now just be able to change the relevant section. Remember to save your document as a CSV document and then you can continue to step 2 of this process.
*Please Note: End Date
If there should be no end date linked to the product, please ensure that the field is empty. If there should be an end date, please ensure that the correct end date has been entered.
Remember to double check that there are no duplicate entries in your document.
Step 2: File upload and validation
After you have built your import template or made your changes, you need to upload your document and validate the file. To do this, go to the import tool and click on the “Next” button.

On the next screen, you will need to “Upload CSV Filename” and then click on the “Validate File” button.
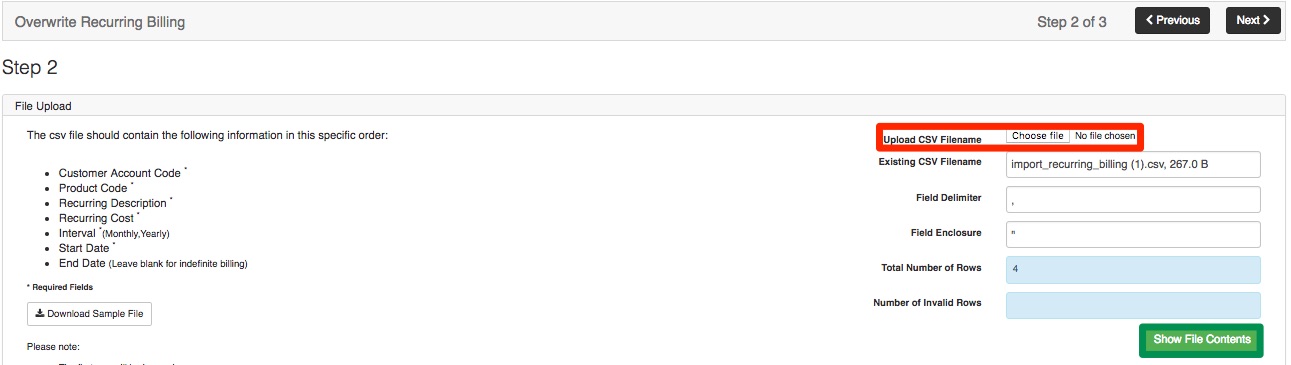
At the bottom of the screen, you will now see whether all lines are validated or not. If the lines are not validated, they will be displayed in red. Fix the unvalidated lines first before continuing to the next step. If the lines are validated, they will be displayed in green (as seen below) and you can continue to step 3.

Step 3: Overwrite
To continue to the next step, click on the “Next>” button found in the top right-hand corner.

On the following screen, you will either be able to delete the selected recurring billing items from customer profiles or you will be able to delete the selected recurring billing items and overwrite it with new ones.

3.1. Deleting recurring billing entries
To only DELETE recurring billing items, please click on the “Delete Imported Rows” button. You will now see the following pop-up screen:
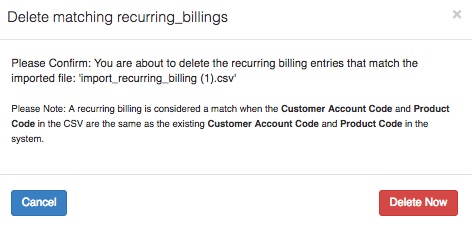
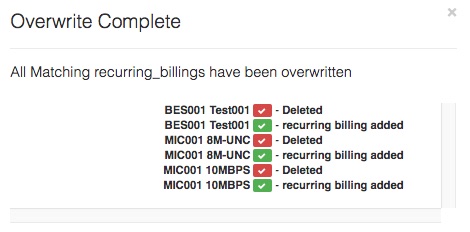
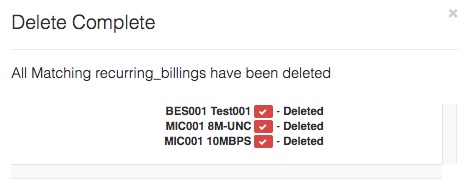
Click on the “Delete Now” button to continue. Please note that this will not overwrite old entries with new information, but simply delete the recurring billing items. Once all items have been deleted and overwritten, you will see the following pop-up screen.
3.2. Overwriting recurring billing entries
To DELETE and OVERWRITE recurring billing entries, please click on the “Delete Imported Rows and Overwrite” button. You will now see the following pop-up screen:
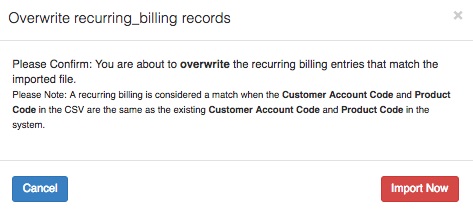
Click on the “Import Now” button to continue. Please note that this will delete the recurring billing entries as well as replace them with new ones. Once all items have been deleted and overwritten, you will see the following pop-up screen. You will be able to see all the items that have been deleted and overridden.