Helpdesk Ticket Guide
| When a ticket is created, all the admins linked to the department of the ticket, are notified, by email, that a ticket has been created and must be attended to. An admin must then go to the ‘Helpdesk Ticket list’, view the ticket and then assign the ticket to him/herself, or another relevant party to deal with the ticket. After the ticket has been assigned to the admin, the ticket needs to be updated and check that all the relevant information is correct.
The admin can communicate with the client using the notes or alternatively call the client. Attachments can also be submitted. (However, note that users cannot submit and see attachments at this stage.) When a ticket has been resolved the ticket details must be updated and the ticket must be closed (closed meaning that no further attention is required). Once the ticket is closed the user will be notified. However, the ticket will still be visible on the Helpdesk ticket list but it will be grayed out. |
1. How are tickets created?
| Tickets can be created in the following different ways:
· When the customer sends an email to the department (e.g. accounts/support/sales etc.) · When a ticket is manually created by a staff member. · When a customer logs a ticket from their online profile. · Through the CRM API connection (if it is set up). |
2. Where do I find the tickets?
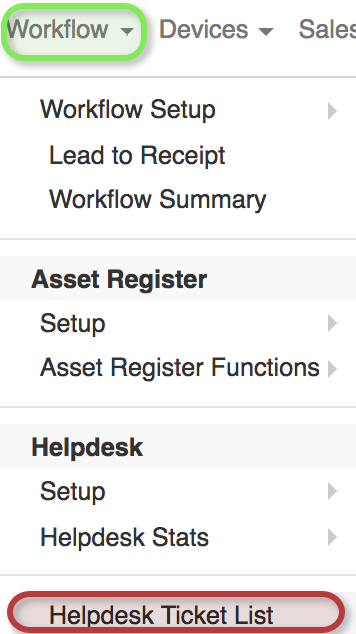
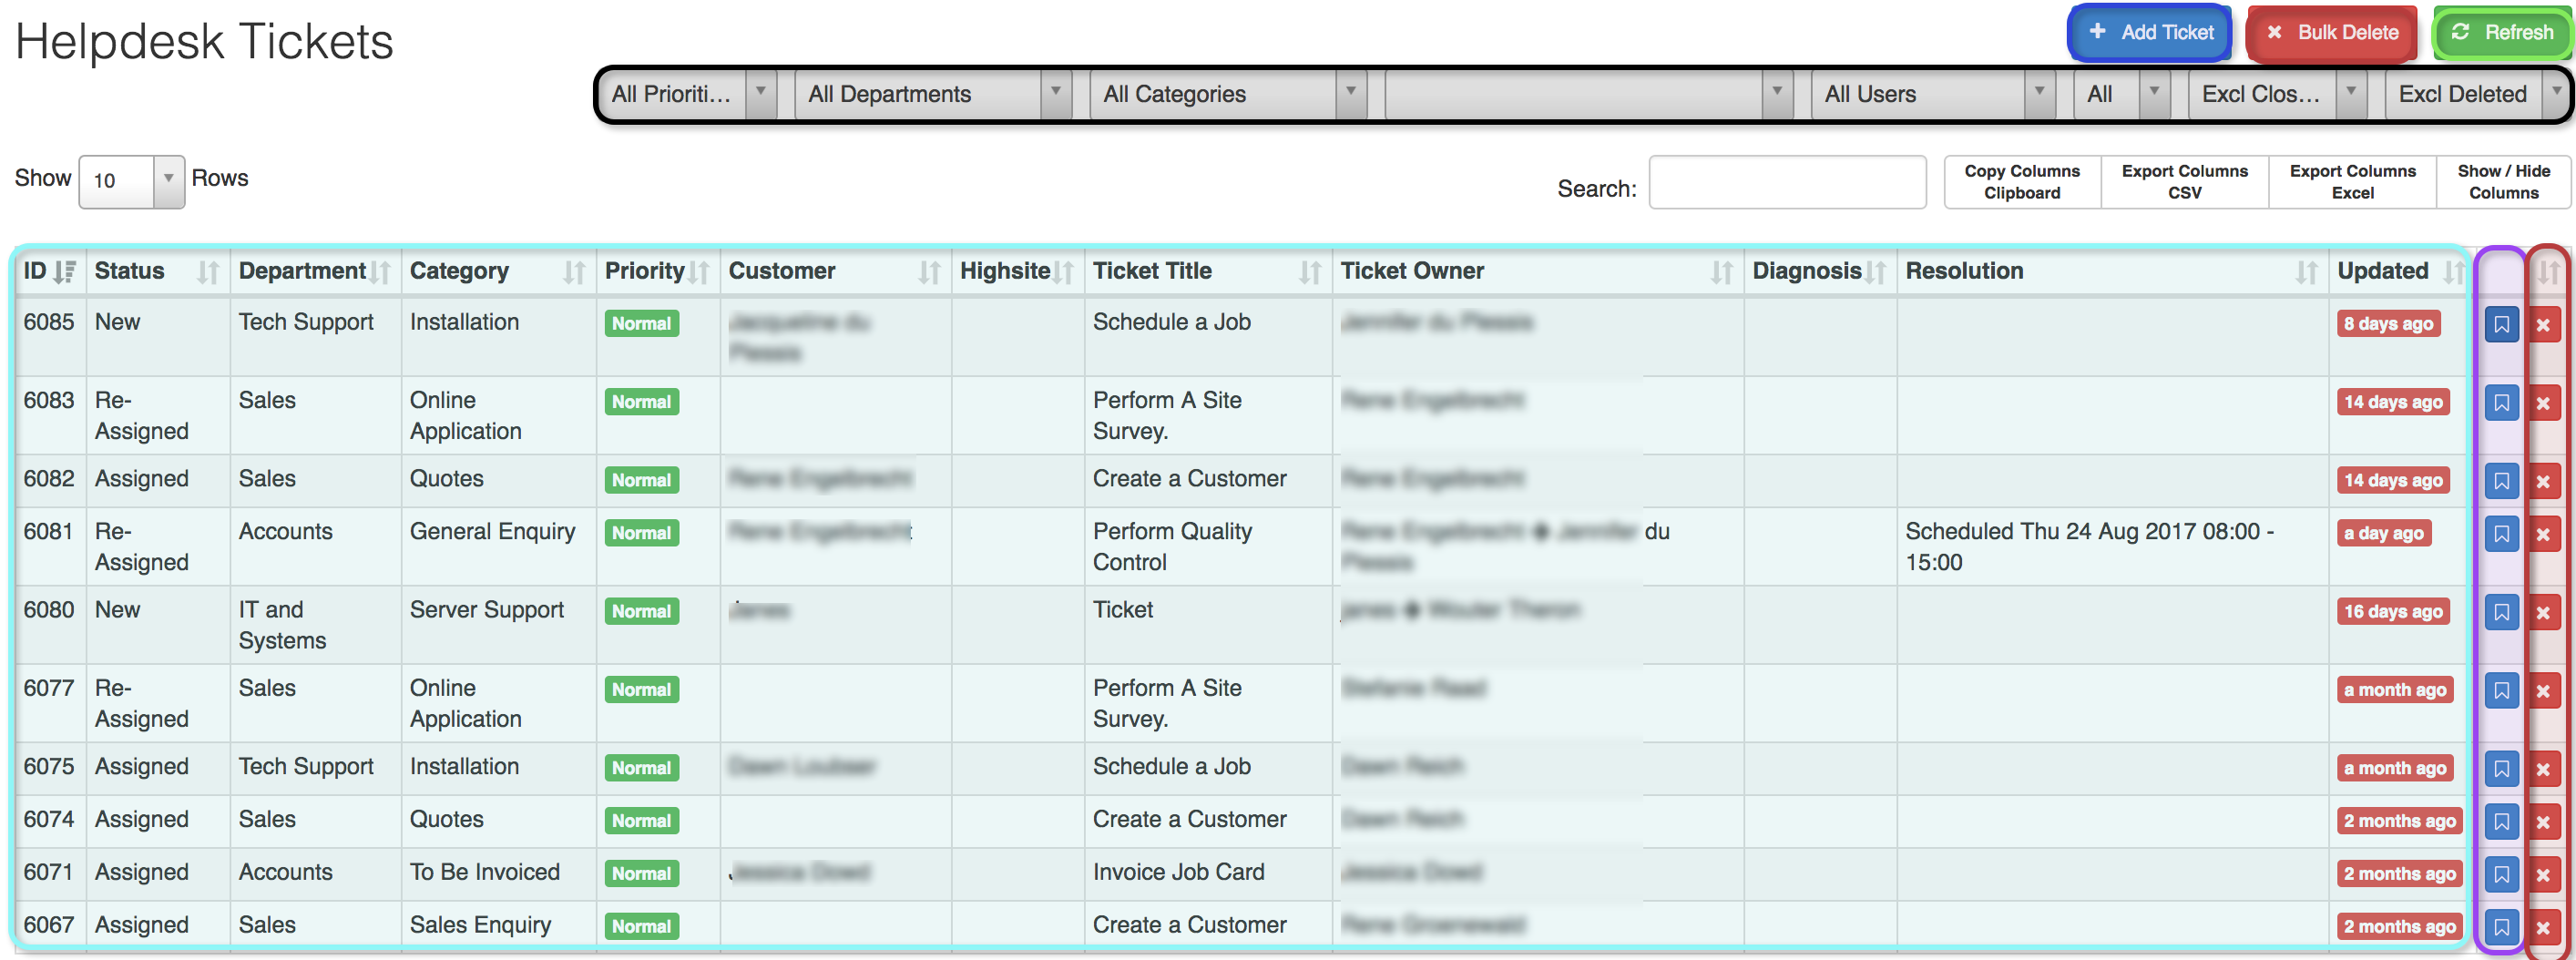
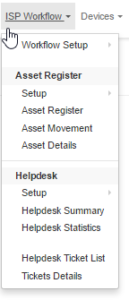
| · Click on Workflow –> Helpdesk Ticket list
This page gives you a: – quick summary of all tickets. – The ability to add or delete tickets – The ability to view and update tickets – The ability to filter tickets according to priority, departments, categories, customer and system users.
|
3. Editing and updating tickets:
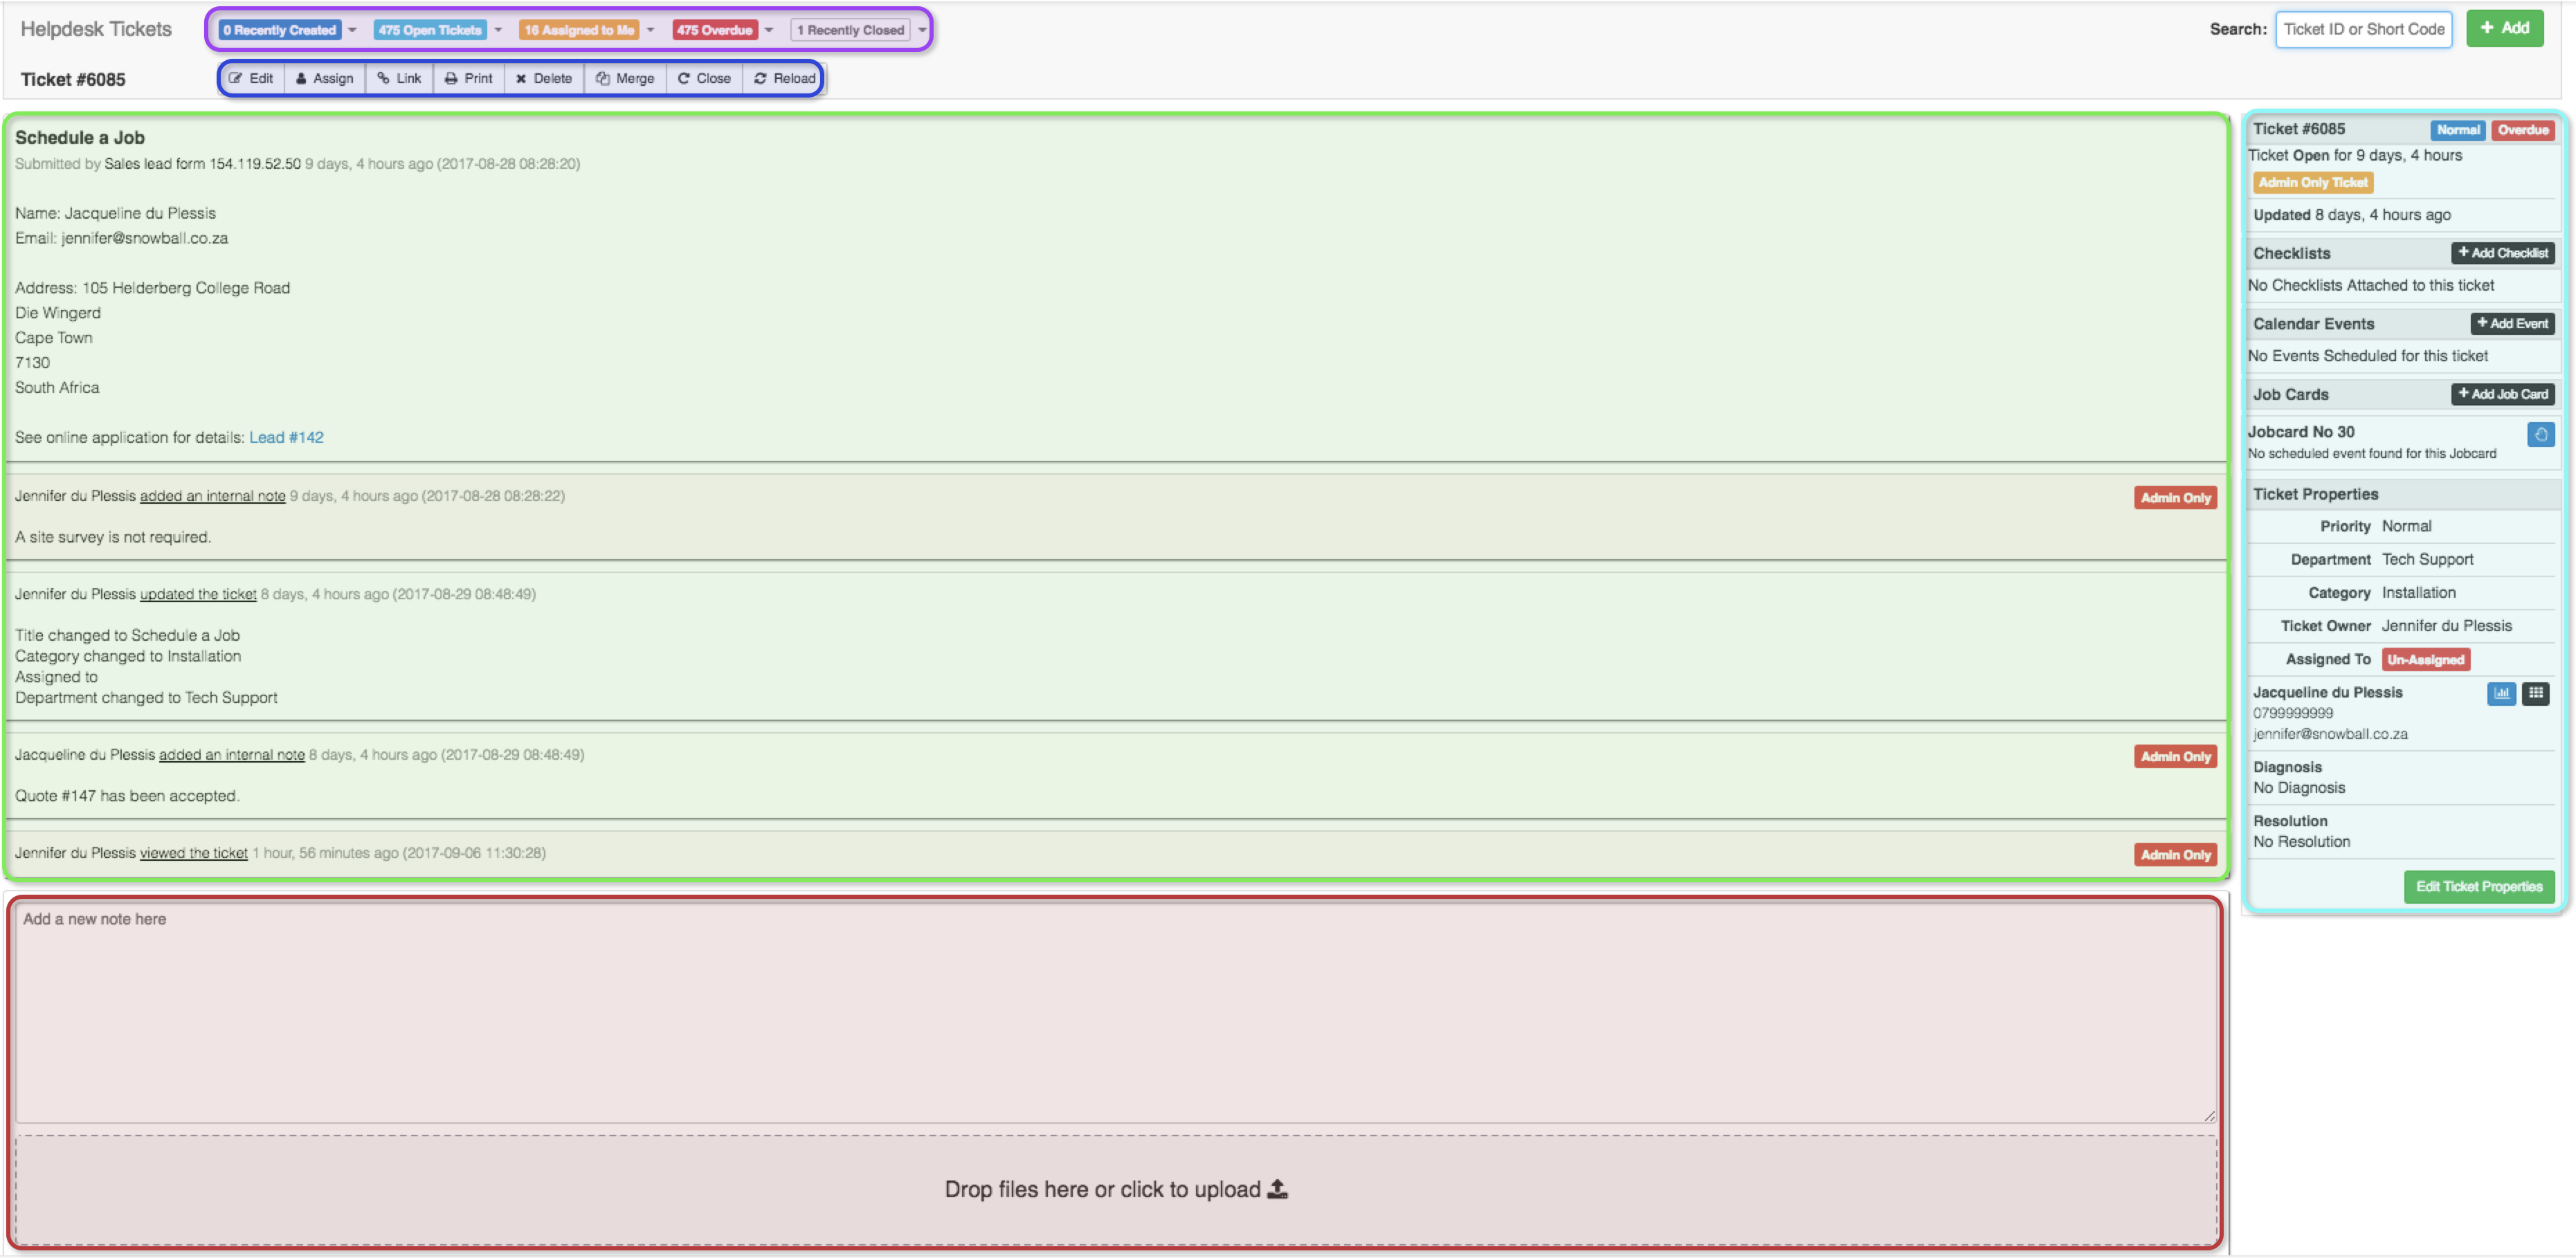
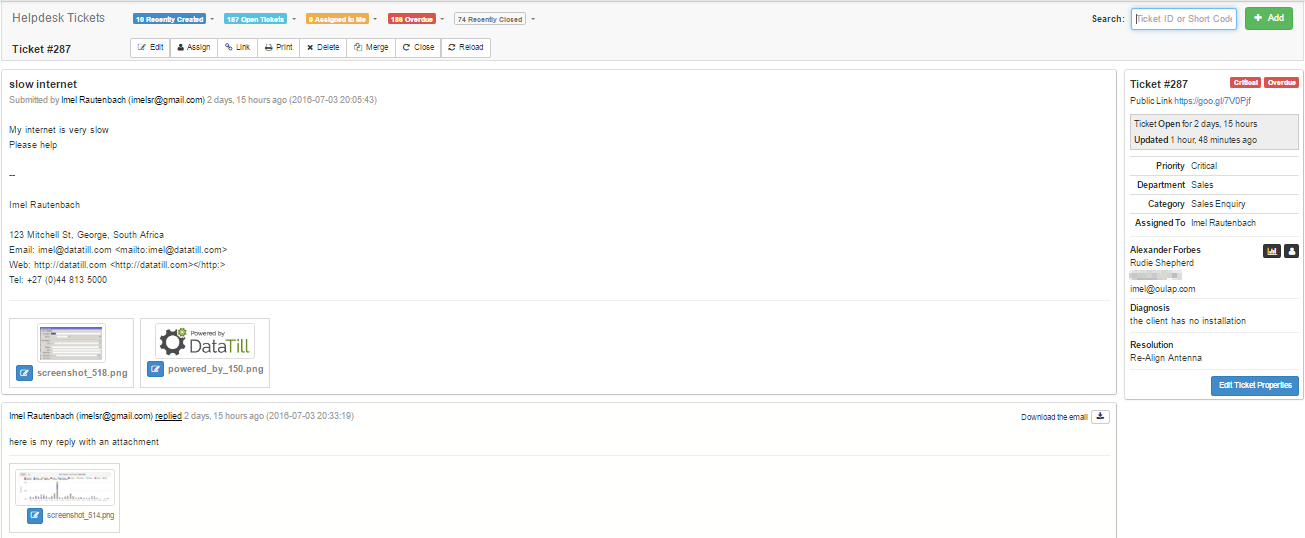
3.1 . Viewing the ticket
By viewing the helpdesk tickets you:
– Can easily access different lists of other tickets
– You can also “assign“, “link“, “print“, “delete“, “close” and “reload” the ticket.
– Will see a “conversation view of all the notes that have been posted about the ticket.
– You are able to add notes, attachments and other files to the ticket.
– View and edit ticket properties as well as see any calendar events, job cards and checklists assigned to the ticket.
3.2. Ticket management features:
- Edit – Diagnosis and Resolution are edited here.
- Assign – Tickets must be assigned to the admin dealing with the ticket.
- Print – This function will allow you to print the ticket.
- Link – Tickets of the same problem can be linked, but the tickets are still separate, so when the problem is solved all of the tickets still need to be updated and closed.
- Delete – The ticket can only be deleted if the ticket is open. Even though the ticket can be deleted, it will not completely disappear from the system and can still be searched.
- Close – to signify that the problem has been resolved or no further action is required.
- Merge – This function will be used for customers who have sent multiple tickets relating to the same problem. All tickets will be merged and you will only have one ticket.
- Every time information is updated in a ticket the client is sent an email and SMS notifying him/her that changes have been made.
- Notes (Notes are used to communicate with the user, e.g. request additional information about the query, alternatively the client can just be called.)
- Attachments can be added to tickets (pictures are previewed)(Note that clients cannot view attachments
- New tickets can be created by using the “+Add” button
- A full history is kept of any changes made to the ticket, including who made the changes.
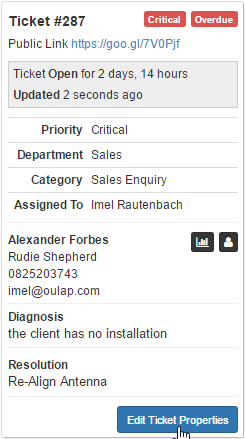
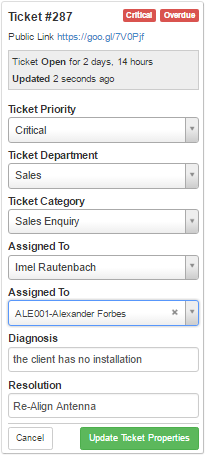
To the right, you will see ticket properties. Here all the basic information like the priority, department, category and who the ticket was assigned to is given. Then the diagnosis and resolution are also given. You can also click ‘Edit Ticket Properties’ to make changes such as Ticket Priority, Ticket Department, Ticket Category, Assigned To, Diagnosis and Resolution. Click ‘Update Ticket Properties’ to let the changes take effect.
Guide on how to use Tickets.
|
1. How the client creates a Ticket
| The client creates a ticket by logging into their client account on your HeroTill site and clicks on the “Helpdesk Tickets” button and then clicks on the “+ Submit a new Ticket” button. |
2. How to view all the Tickets
| ISP Workflow->Helpdesk->Helpdesk Ticket List |
3. How to create a ticket
|
4. How view a ticket details
|
|
5. How to edit the ticket
|
6. How to assign a ticket
|
7. How to link a ticket
|
8. How to delete a ticket
|
9. How to duplicate a ticket
|
10. How to close a ticket
|
11. How to reopen a ticket
|
12. How to add Notes to a ticket
|
13. How to add Attachments to a ticket
|
14. How to change the diagnose of a ticket
|
15. How to change the resolution of a ticket
|
16. How to change the ticket information
|
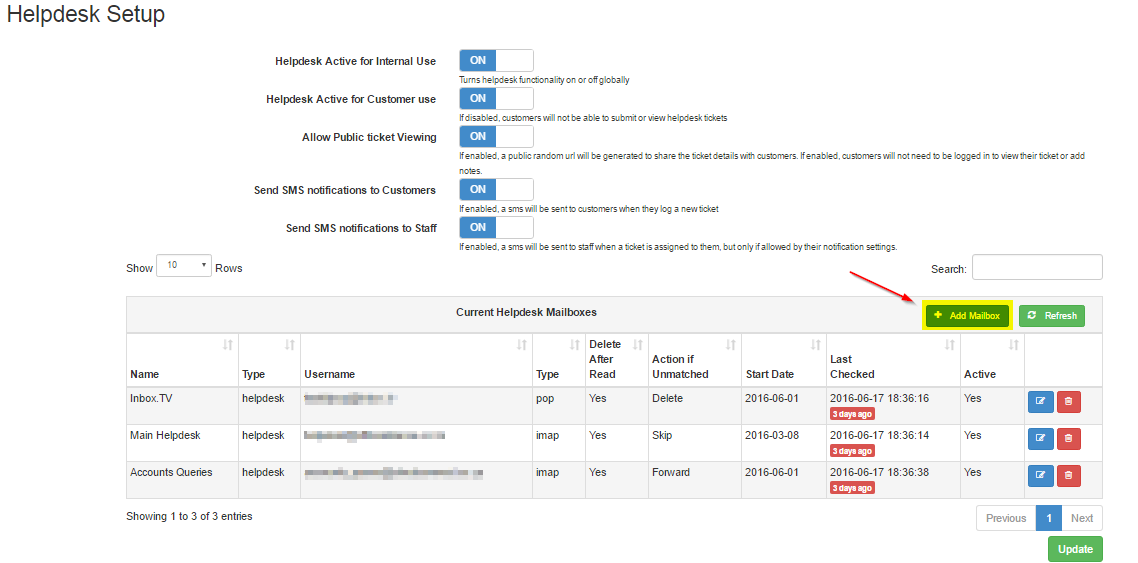
17. Helpdesk Mailbox Setup This is where you can manage what email addresses will receive help desk ticket notifications.
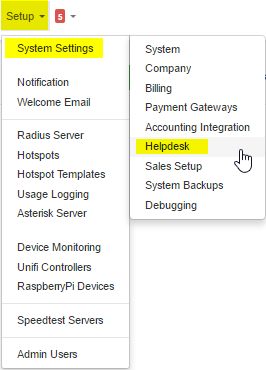
- Start out by going to “Setup -> System Settings -> Helpdesk
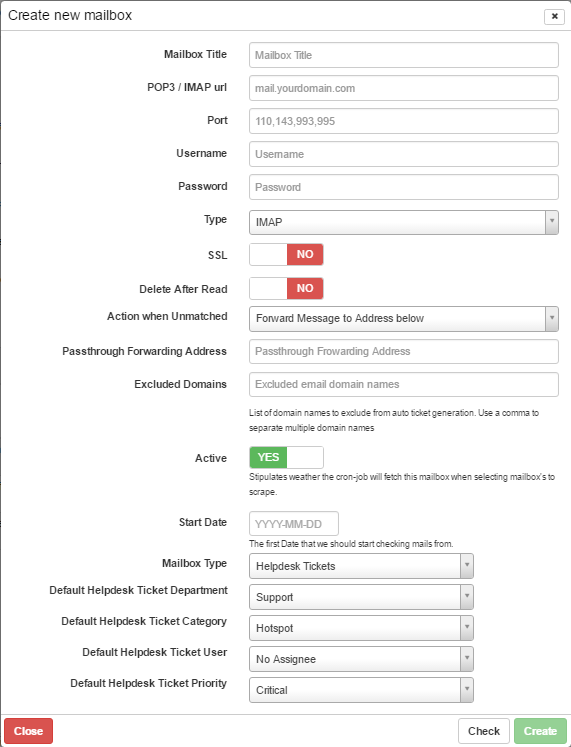
- Then click on add mailbox.
- Type in all information needed for the email login. Also assign the correct Mailbox Type, Default Helpdesk Ticket Department, Default Helpdesk Ticket Category, Default Helpdesk Ticket User, Default Helpdesk Ticket Priority.