
Helpdesk Setup Guide
Webinar: Mailbox Rules and Scraping
Webinar: Helpdesk current and upcoming functionality
Webinar: Introduction to HeroTill for new users
The purpose of this guide is to help you with your helpdesk setup. You will need to start off by creating your departments, ticket categories etc. before configuring your helpdesk notifications and mailboxes.
1. Enable Helpdesk Module
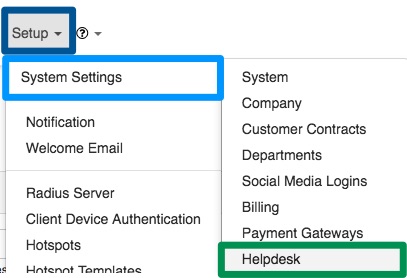
Before you can start with the helpdesk setup, you will first need to enable the helpdesk module in your HeroTill. To do this, go to “Setup” – “System Settings” then click on the “Helpdesk” option.
After the page has loaded, switch the toggle button to “Yes” to enable the helpdesk module.

1.1. Helpdesk Settings
After enabling the helpdesk, you will see a list of other settings that you need to configure as well.
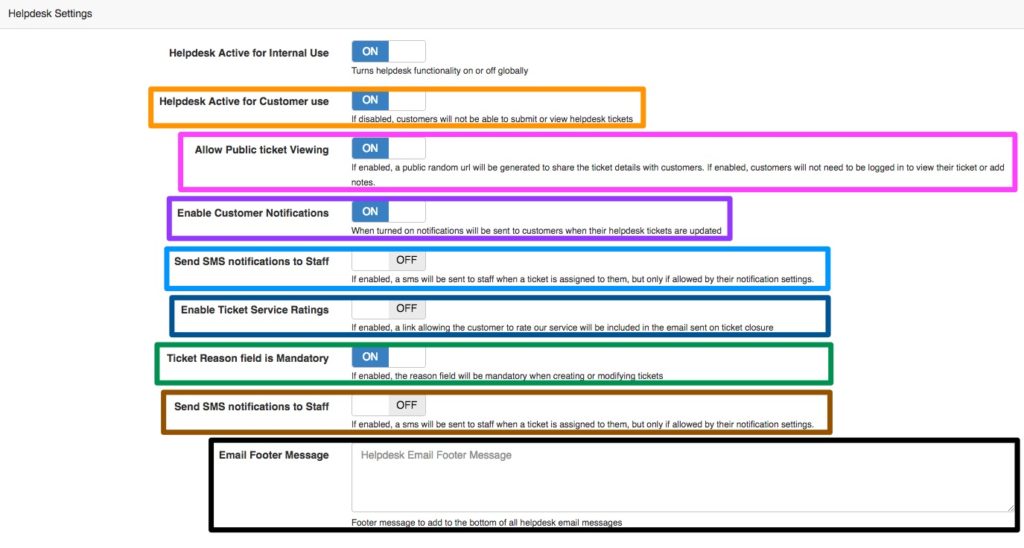
| Orange: | If enabled, customers will be able to submit or view their helpdesk tickets from their portal. If disbaled, the customers will not ba able to submit or view their helpdesk tickets from their customer portal. |
| Pink: | If enabled, a public random URL will be generated and can be sent to customers. This means that the customer will not need to be logged into |
| Purple: | If you would like customers to receive notifications when their tickets are updated, you can do that by enabling this button. |
| Light Blue: | If this button is enabled, staff can receive an SMS notification when a ticket is assigned to them. This will however only work if:
|
| Dark Blue: | If this button is enabled, customers will receive a link in which they can rate the service received. This link will be sent to the customer once the ticket is closed. |
| Green: | If this section is enabled, a reason will need to be added to all newly created tickets as well as already existing tickets that are updated or re-assigned. |
| Brown: | If this button is enabled, staff can receive an SMS notification when a ticket is assigned to them. This will however only work if:
|
| Black: | In this section, you can add a footer message that will then be added at the bottom of each helpdesk email message. |
1.2. Helpdesk PBX Settings
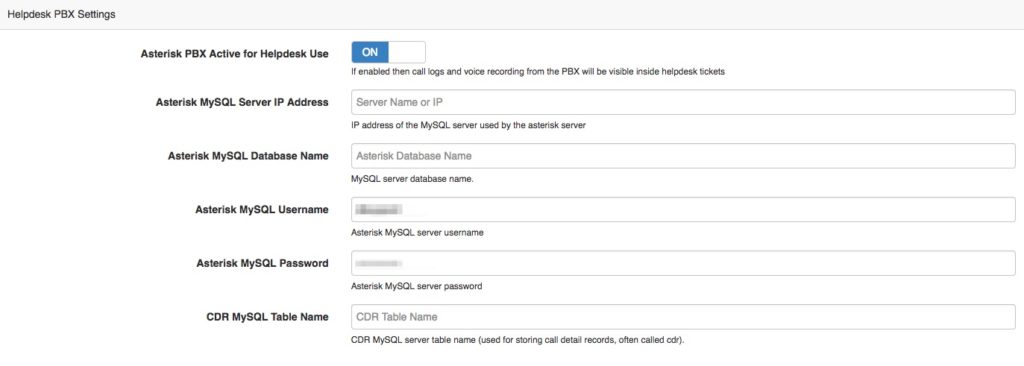
In this section, you can enable your PBX to create tickets when the customer phones in. This will then also keep track of calls that get transferred to other departments. To do this, ensure that you start by enabling the module first.
1.3. Helpdesk Escalation
The last section in the helpdesk setup will allow you to decide whether you would like to make use of the helpdesk escalation function. This function will allow tickets to be escalated according to different priorities, escalation rules and escalation periods. This escalation function can be enabled or disabled at any time. Should this function only be enabled after you have already been using the helpdesk module, then the escalation function will only be applicable on all new incoming tickets to ensure that you do not get an influx of suddenly escalated emails.
The helpdesk escalations are especially useful in cases where there are signed service level agreements in place or to ensure that your VIP customer get attended to quicker.
To enable the helpdesk escalation function, switch the toggle button to “Yes“.

Remember to click on the “Update” button found at the bottom of the page to save any changes that have been made.
If you have already set up and used the helpdesk module, continue setting up the following sections for your escalation module.
- Ticket Priorities (Section 5)
- Priority Rules (Section 6)
- Escalation Rules (Section 7)
- Escalation Periods (Section 8)
If you are setting up your helpdesk module for the first time, continue to set up your helpdesk as per the outline of this guide.
2. Create Helpdesk Departments
Your helpdesk department refers to all department within your company that will be using tickets. Please note that each department has its own ticket categories, which will be created in section 3. Some suggested departments to have is:
- Accounts,
- Field staff
- Helpdesk
- HighSite
- Management
- Operations
- Sales
- Stock
* Please note that the above are just examples and you will need to set up your departments according to your ISP structure.
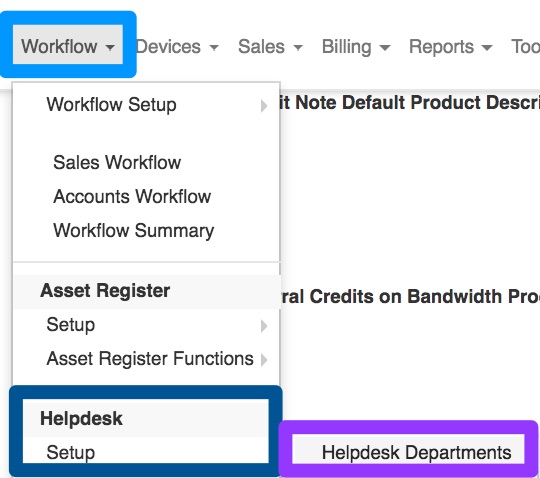
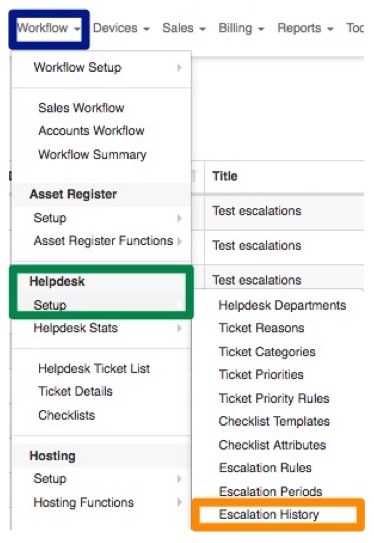
To set up your helpdesk department, go to “Workflow” – “Helpdesk Setup” and then click on the “Helpdesk Departments” option.
You will now see the following screen:
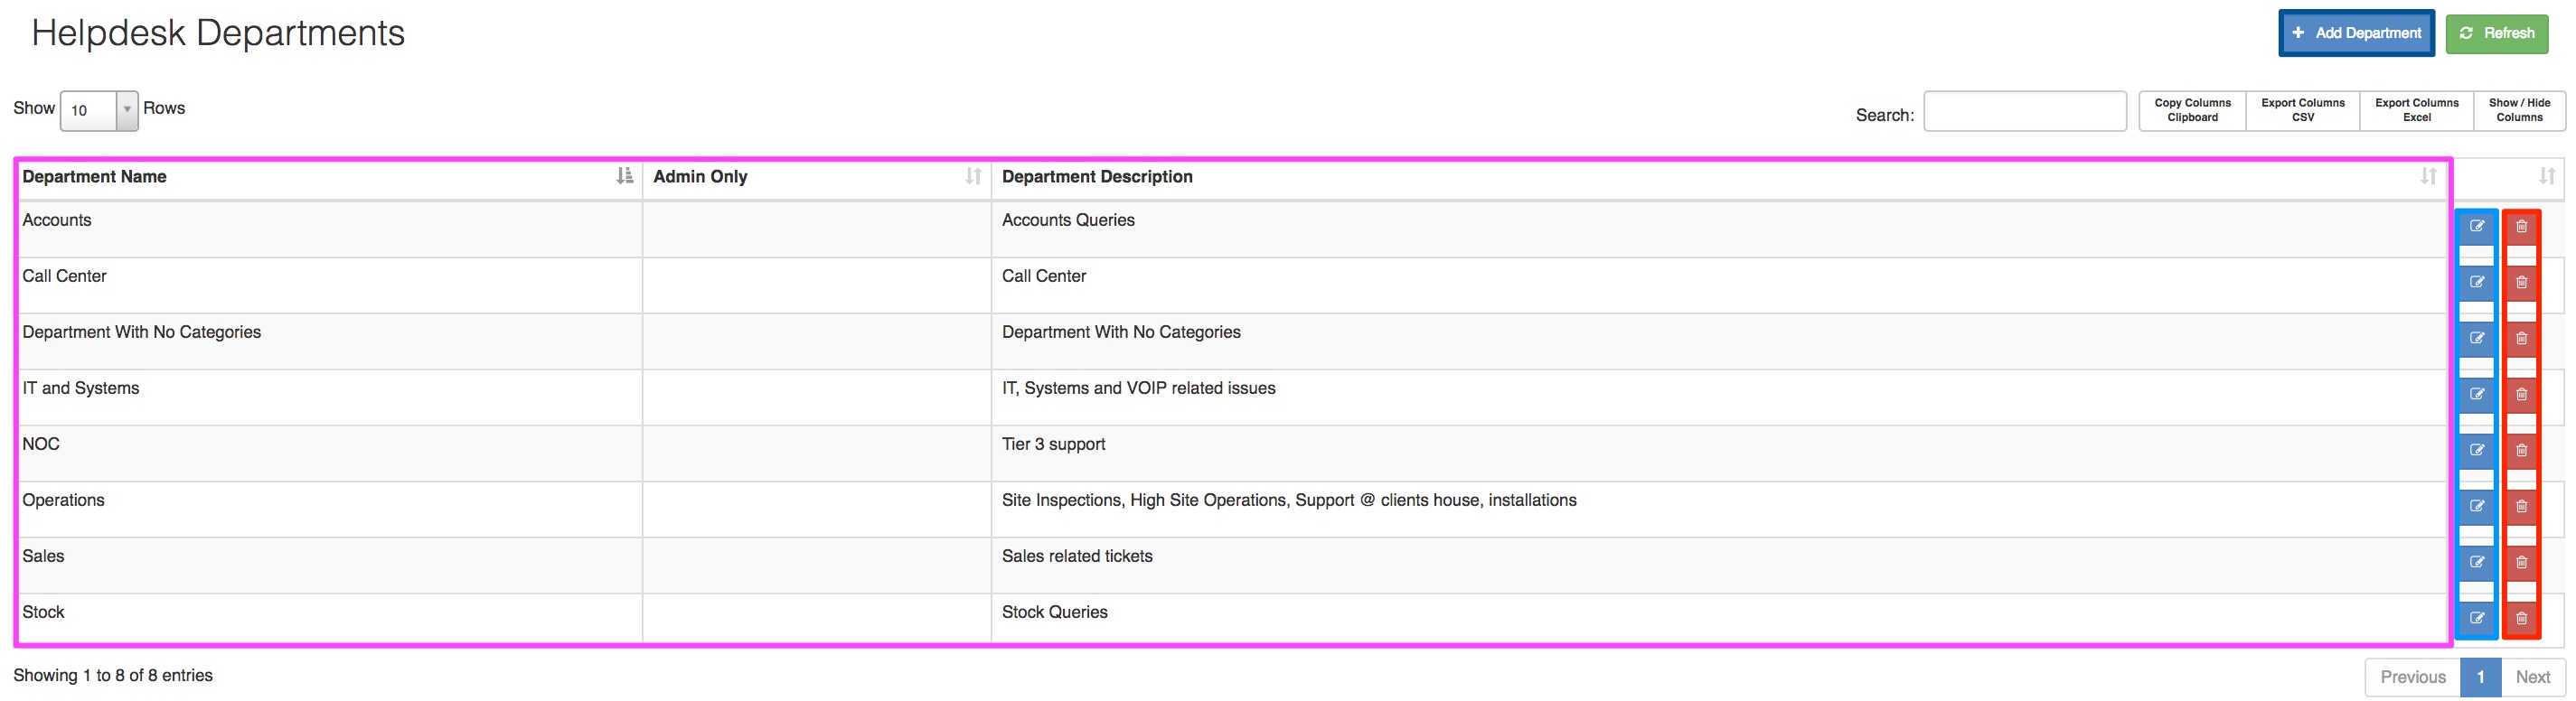
On this screen, you will be able to see a list of all departments, edit existing department, delete departments or “Add Departments“.
2.1. Adding New Departments
To add a new department, click on the “Add Department” button. On the pop-up screen, you will need to give the department a name and a short description to mention what this department is about.
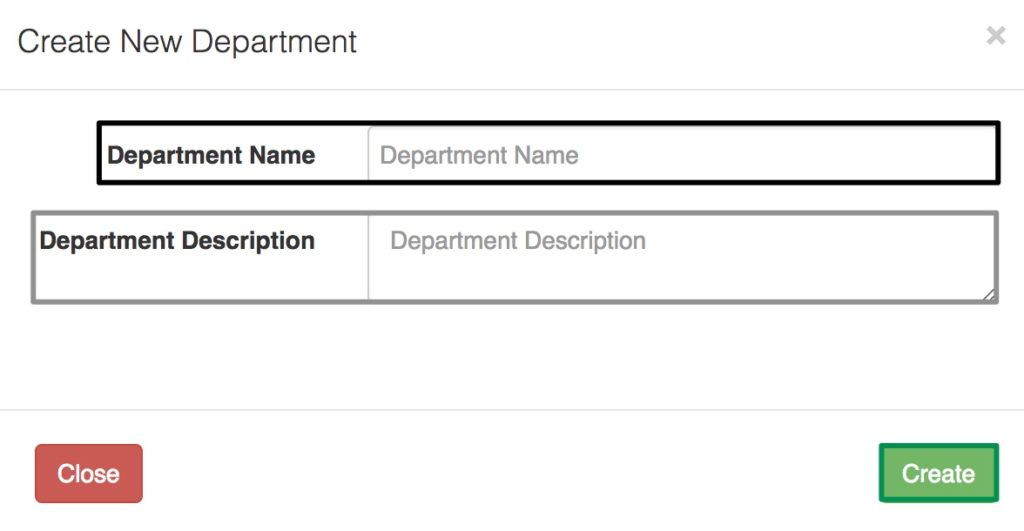
After adding all the details, click on the “Create” button.
2.2. Editing Departments
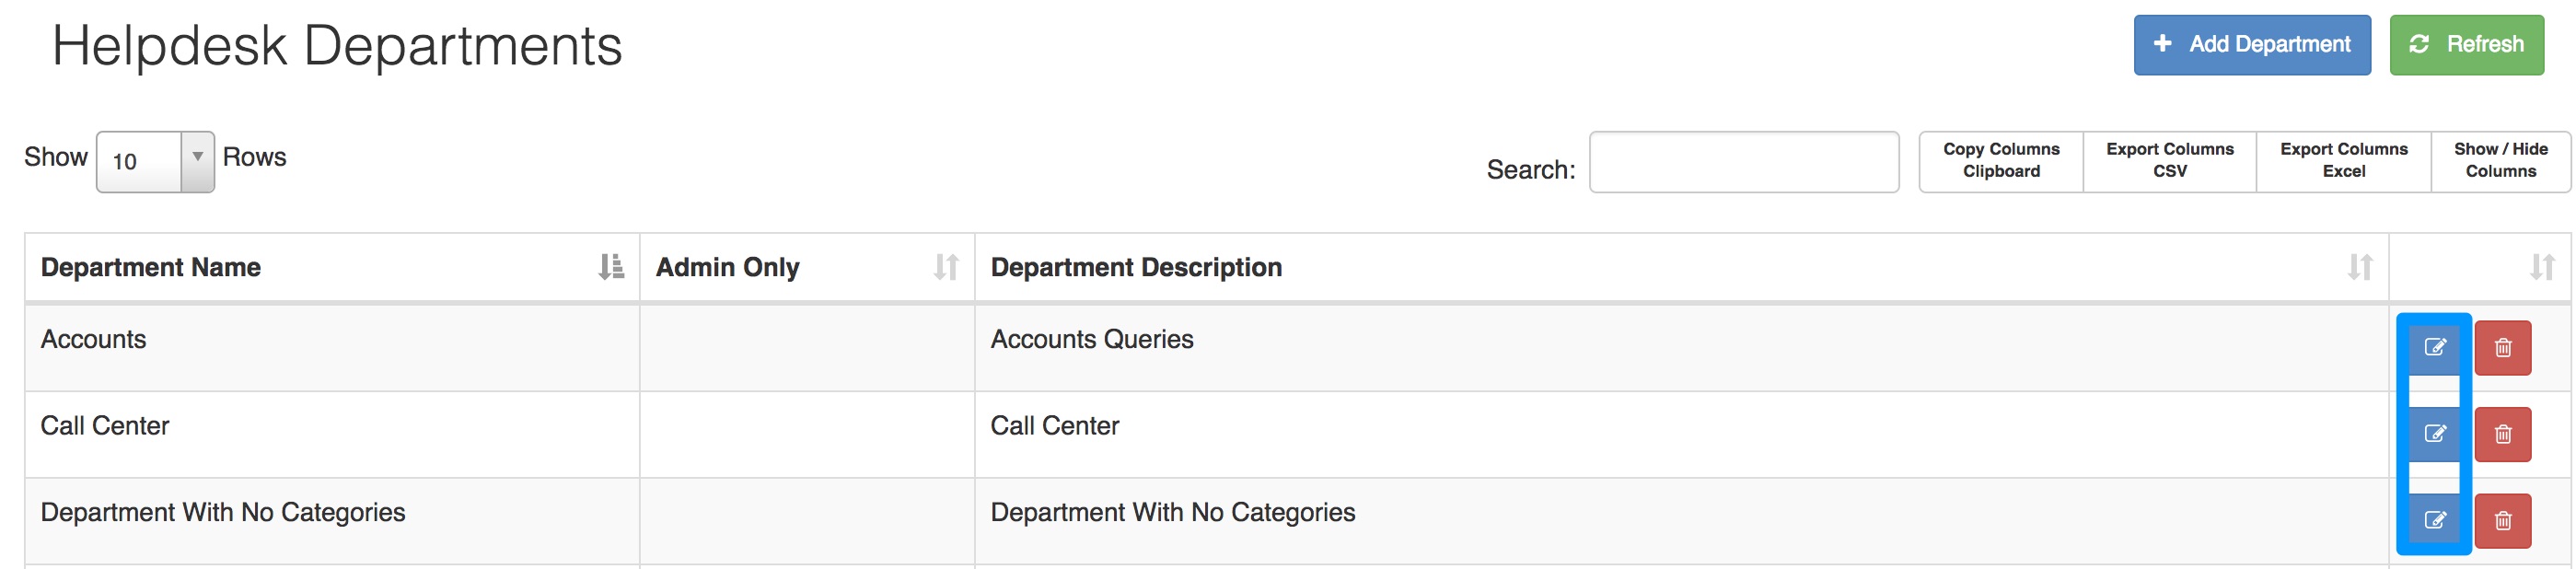
To edit a department, click on the edit button found on the right-hand side of the department.
After clicking on the edit button, you will now see the following screen:
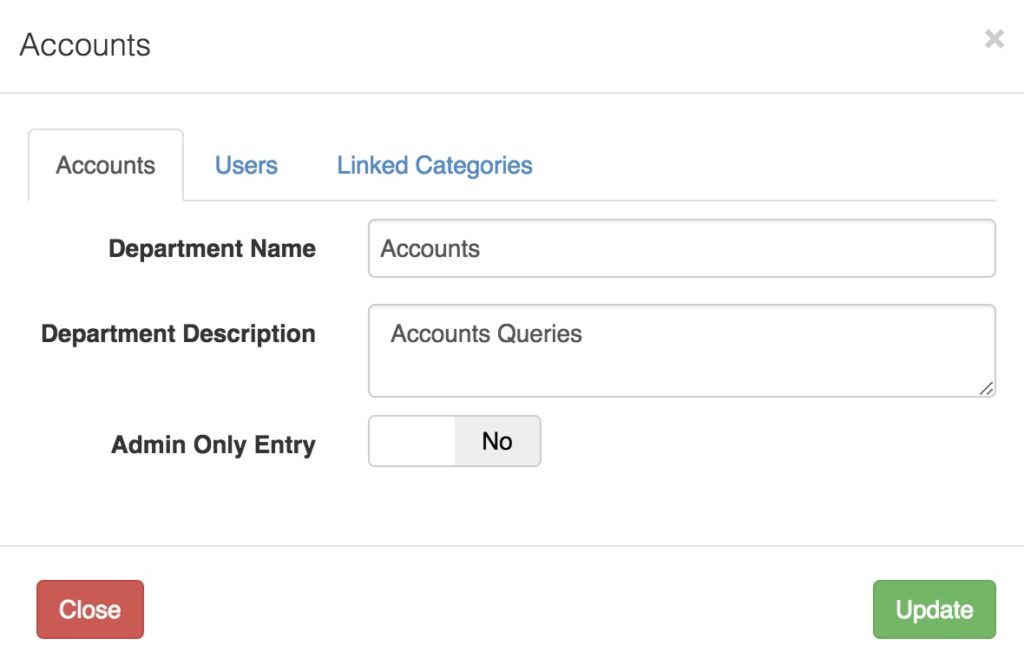
2.2.1. First Tab
Your first tab will automatically be named after your department name. On this tab, you can:
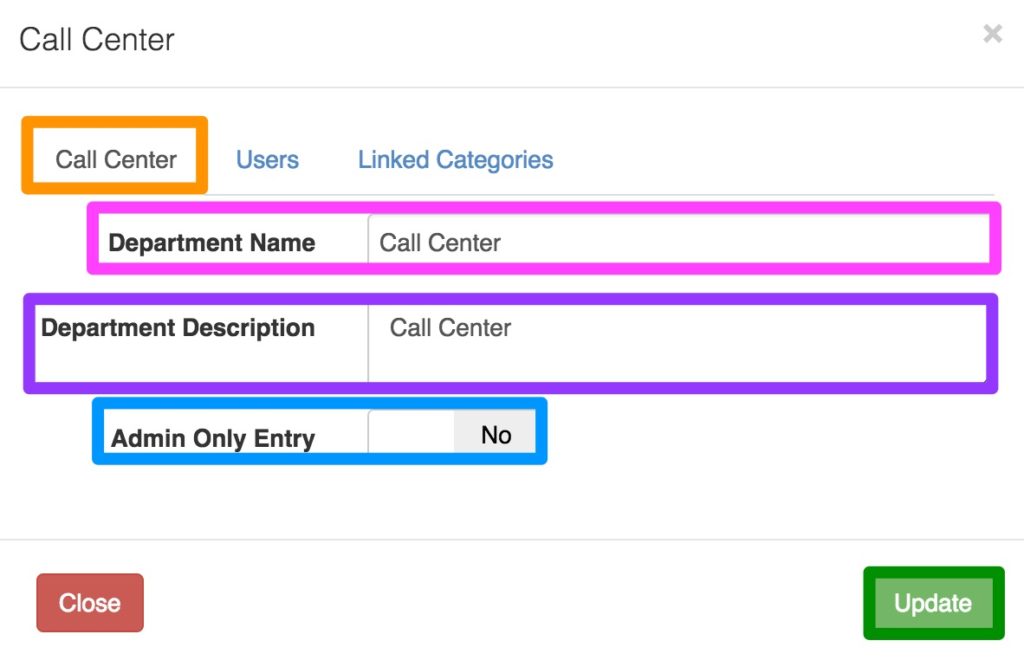
| Pink: | In this section, you can change the department name. |
| Purple: | Here, you can change the department description. |
| Blue: | The admin only button will determine whether customers can see this department when logging tickets from their customer portal.
If the toggle button is switched to no, customers will be able to choose this department when creating helpdesk tickets from their customer portal. If the toggle button is switched to yes, the customer will not be able to choose this department when creating helpdesk tickets from their customer portal. |
2.2.2. User
This users tab will allow you to link specific employees to each department.
Things to note before linking customers to departments:
- Before linking an employee to a department, you need to load all your employees as admin users (please refer to HeroTill Initial Setup for more information).
- Admin users need to be assigned to their corresponding departments to ensure that tickets can be assigned to them and subsequently dealt with.
- In other words, if a ticket cannot be assigned to specific admin users, there is a chance that the user isn’t linked to the relevant department.
To add users to a department, select their name from the drop-down menu and then click on the blue add button. If the user needs to be marked as a supervisor, you can do this by changing the toggle button next to their name to yes. If you need to delete a specific user from a department, you can do this by clicking on the delete button found on the right-hand side of the user’s name.
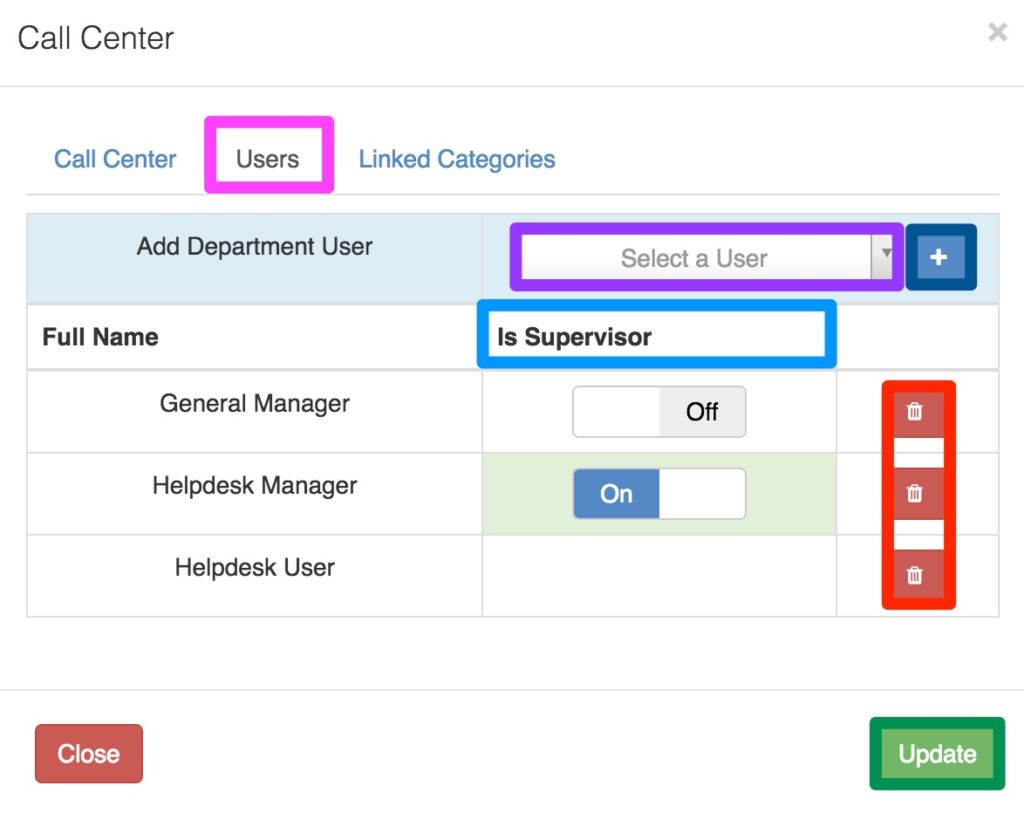
After making any changes, remember to click on the “Update” button.
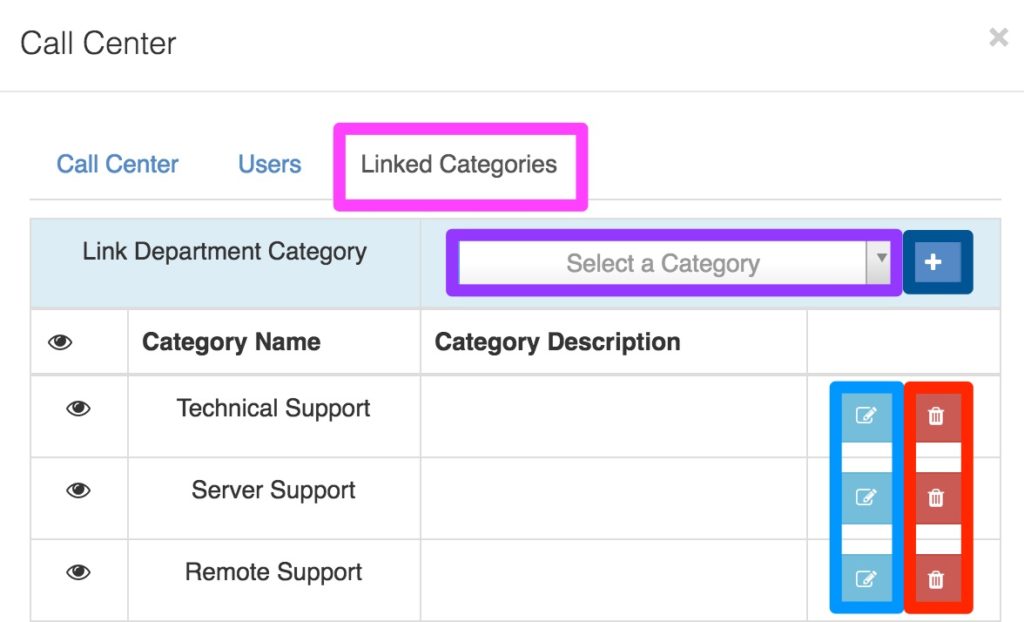
2.2.3. Linked Categories
This linked categories tab will allow you to link specific categories to each department.
Things to note before linking a category to a department:
- Categories need to be created in advance (please refer to section 3 for more information).
To link a category to a department, select the category from the drop-down menu and then click on the blue add button. If you quickly need to edit the category, you can do this by clicking on the edit button. If you need to delete a specific category from a department, you can do this by clicking on the delete button.
3. Create Ticket Reasons
The purpose of ticket reasons is to ensure that we can report on what the reason for the ticket was i.e. you will then be able to view how many tickets were created due speed issues, miscommunication, offline highsites or forgotten passwords. Tickets reasons will be for internal use only and the customer will not be able to view this. Please note that unlike ticket categories, ticket reasons are not department specific.
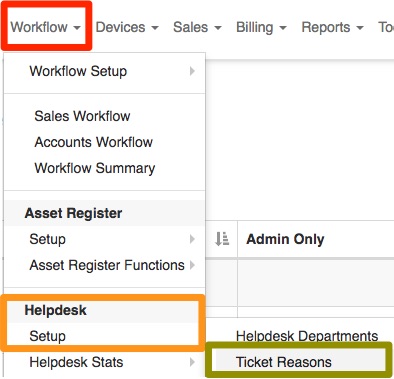
To find a list of all your ticket reasons, go to “Workflow” – “Helpdesk Setup” and then click on the “Ticket Reasons” option.
On the following screen, you will see a list of all your current ticket reasons. You will also be able to add, edit and delete ticket reasons.

3.1. Adding Reasons
To add reasons, click on the “Add Helpdesk Ticket Reasons” button and complete details on the screen. You will need to:
- assign a group to the reason i.e. enquiry, sales or other
- and give each reason a title.
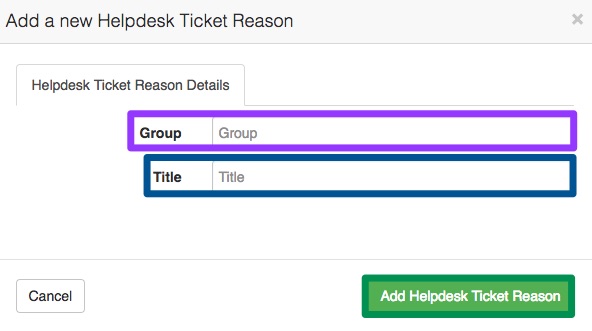
After adding the relevant details, click on the “Add Helpdesk Ticket Reason” button.
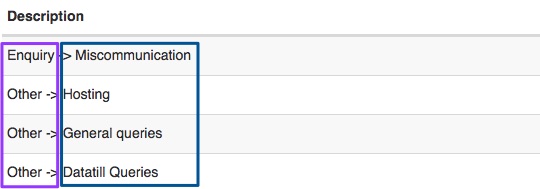
In your reason list, you will now be able to see that all reasons are listed by the group first and then the title.
4. Create Ticket categories
Helpdesk categories are there to give a broad overview of what the problem may be i.e. account query or connectivity issues. Unlike reasons, the categories can be seen and chosen by customers when they submit tickets from their customer portal. Categories are also department specific and should be linked to departments once created (for more information please view section 2.2.3)
Important things to know about categories:
- You can not have 2 categories with the same name.
- It is not advised to use the sub-category function on ticket categories as this feature is still under development.
- Once a ticket has been assigned to a ticket category, that specific category can no longer be deleted.
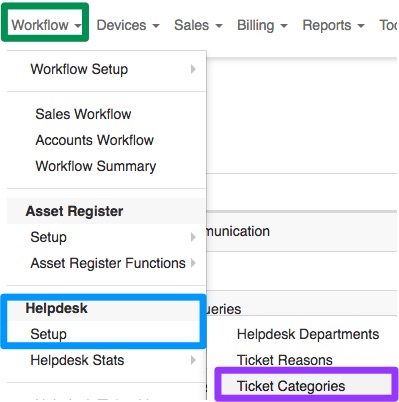
To find a list of all your helpdesk categories, go to “Workflow” – “Helpdesk Setup” and then click on the “Ticket Categories” option.
You will now see a list of all your ticket categories as well as add, edit and delete categories.

4.1. Adding Ticket Categories
To add a new category, click on the “Add Category” button.
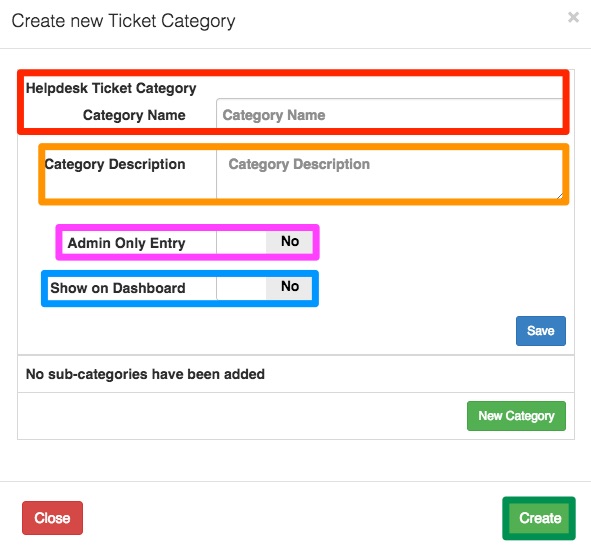
| Red: | In this section, give your category a name. |
| Orange: | Here, you need to add a short description about your category. |
| Pink: | If this is enabled, customers will not be able to choose this category when submitting tickets from their portal. In other words, then the category will be for internal use only. |
| Blue: | Is this switch is enabled, you will be able to view statistics for this category on your helpdesk dashboard. |
After adding all details, click on the “Create” button.
5. Set Helpdesk Ticket Priorities.
Your ticket priorities work in close relation with your ticket rules. Your escalation module comes with 5 pre-populated priorities and overdue times:
- Low (24 hours)
- Normal (12 hours)
- High (2 hours)
- Critical (30 minutes).
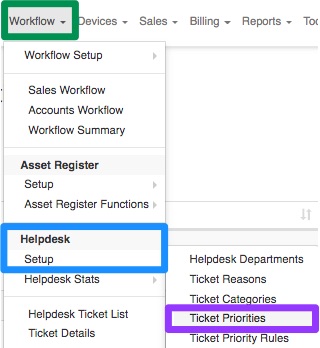
You can add and manage these ticket priorities as you need to. To find the ticket priorities, go to “Workflow” – “Helpdesk Setup” and then click on the “Ticket Priorities” option.
You will now see a list of all your ticket priorities:

| Pink: | Here you can view the priority order. Priorities at the top of the list are seen as more important than priorities at the bottom of the list. |
| Red: | Here you can see the priority type. The ISP can create and manage these priorities as per their needs. |
| Orange: | In this section, you can see the time linked to each ticket priority. For example, a ticket can be low priority for 24 hours before it will be marked as overdue. |
5.1. Adding Ticket Priorities
To add a new ticket priority, click on the “Add Priority” button.

You will now see the following pop-up screen:
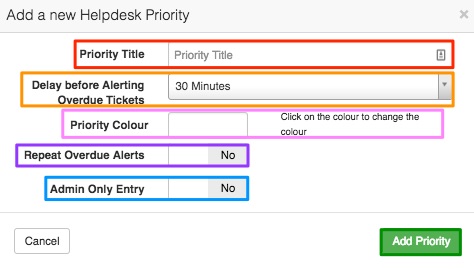
| Red: | Enter your priority title here. |
| Orange: | In this section, you need to choose the amount of time that a ticket can be linked to the specific priority before escalated to the next priority. |
| Pink: | Here you can choose a colour to link to your category. |
| Purple: | If you would like to have repeat overdue alerts for this priority, click on yes to enable it. |
| Blue: | If enabled, the customer will not be able to see what the ticket priority is. If disabled, the customer will be able to view the ticket priority. |
After completing all the fields above, click on the “Add Priority” button.
5.2. Editing Ticket Priorities
To edit a specific ticket priority, click on the “Edit” button.

On the pop-up screen, you will be able to amend the same details as to when you add a new ticket priority.
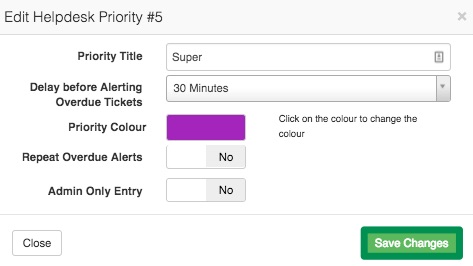
After making any changes, click on the “Save Changes” button.
5.3. Deleting Ticket Priorities
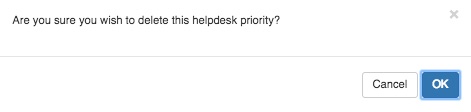
If you need to delete a ticket priority, click on the “Delete” button found on the right-hand side of the priority.

Click on the “OK” button to confirm that you want to delete the priority.
5.4. Moving priorities up and down on your list
Remember that the higher the priority is in the list, the more important it ranks. The lower the priority is on the list, the less important it ranks. Your helpdesk ticket list will then be sorted to show you your highest ranked priority tickets first. To move priorities up and down in your list, use the arrows found on the right-hand side of the priority.

6. Helpdesk Priority Rules
With the new escalation module, you can also create priority rules. This means that when tickets are created, they are automatically linked to a certain priority. For example, you can add a rule to ensure that when VIP customers create a ticket, that the ticket is automatically linked to the highest priority.
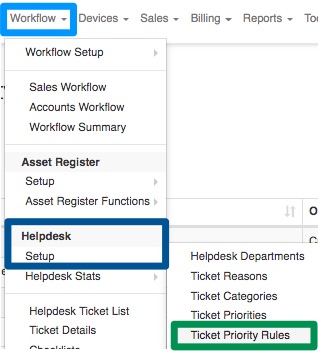
To find your ticket priority rules, go to “Workflow” – “Helpdesk Setup” and then click on the “Ticket Priority Rules” option.
You will now see the following screen:

| Pink: | Here you can see the rule name. |
| Red: | In this section, you can see to which aspect of HeroTill the rule applies. |
| Orange: | This will show you which priority is linked to the rule. |
6.1. Adding Priority rules
To add a rule, click on the “Add Priority Rule” button.

You will now need to complete the following settings:
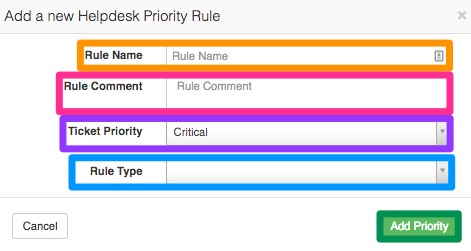
| Orange: | Add your rule name here. |
| Pink: | In this section, add any additional comments. |
| Purple: | Here you will need to choose the relevant ticket priority. |
| Blue: | In this section, you can choose one of 6 rule types.
Admin User This will determine the priority when one of your employees (admin users) creates tickets.
Customer This will determine the priority when a customer creates a ticket.
VIP Customer This will determine the priority when a VIP customer created a ticket.
Customer Group You can link ticket priorities to certain customer groups i.e. resellers.
Customer Category You can link ticket priorities to certain customer categories i.e. virtual resellers.
Default In the case that there are no applicable rules, this rule will be used to determine the default priority for the ticket. |
Click on the “Add Priority” button after completing the details.
6.2. Editing Priority rules
To edit priority rules, click on the “Edit” button found on the right-hand side.

On the following screen, you will be able to edit the same fields as when adding a new rule.
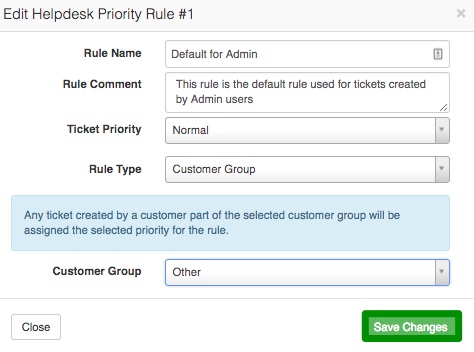
Remember to click on the “Save Changes” button after making any changes.
6.3. Deleting Priority rules
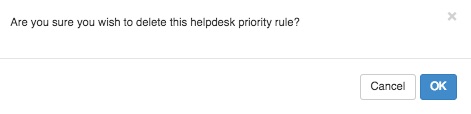
To delete a priority rule, click on the “Delete” button found on the right-hand side of the rule.

On the pop-up screen, click on the “OK” button to confirm that you would like the rule to be deleted.
6.4. What happens when multiple rules are applicable?
In the case that multiple rules are applicable to the ticket, then the rule with the highest priority rank will be applied to the ticket. For more information on how to determine the priority rank, please refer to section 2.3.4.
7. Helpdesk Escalation Rules
Setting up escalation rules will allow the system to automatically escalate tickets. Escalation rules will be applicable to all tickets that are not placed on hold and tickets that are not deleted. All rules will be set up per department. Rules can also be set up in such a way that tickets of all priorities or only ticket with high priorities can be escalated. This is especially useful for customers who have signed service level agreements with your company.
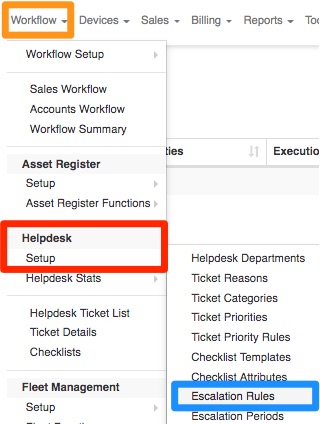
To set up an escalation rule, go to “Workflow” – “Helpdesk Setup” and then click on the “Escalation Rules” option.
Once the screen is finished loading, you will be able to see a list of all your escalation rules. You will also be able to see information such as which department and department category the rule is linked to as well as other escalation details.

7.1. Adding Escalation Rules
To add an escalation rule, click on the “Add Rule” button.

You will now see the following screen:
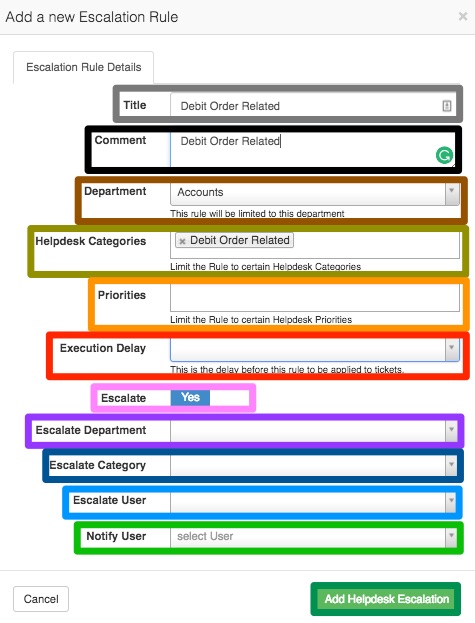
| Grey: | Give your rule a name. |
| Black: | In this section, you can add more information aa to why the escalation is needed. |
| Brown: | Here you need to choose to which department this rule is applicable. |
| Gold: | If the rule is applicable to only certain helpdesk categories, you can choose the category(ies) here. If this rule is relevant to all tickets in the chosen department, leave the field blank. |
| Orange: | If the rule is applicable to only certain ticket priorities, you can choose those priorities in this section. If the rule is relevant to all the priorities, then you can leave this field blank. For example, if you only want ticket with critical priority to be escalated, then choose the critical priority here. |
| Red: | This refers to the amount of time that a ticket can be left unattended before it will escalate. This can be from the ticket’s creation date, since it was last updated or since it was last escalated. |
| Pink: | If this toggle switch is enabled, you will be able to escalate tickets to certain departments, category and user. You will also be able to notify an additional user such as the manager about the escalation.
If the toggle button is switched to no, then you will only be able to notify an admin user that no one has yet attended to the ticket. |
| Purple: | In this section, you need to choose the department to which you would like the ticket to be escalated to. |
| Dark Blue: | Here, you will need to choose the relevant category that you would like to escalate the ticket to. |
| Light Blue: | This section will allow you to escalate the ticket to a specific admin user in the department selected. In other words, the ticket will be re-assigned to this user. |
| Light Green: | In addition to the above, you can also choose an admin user that needs to be notified of the ticket escalation. You can choose an admin user in section whether or not the escalation toggle switch is enabled or disabled. |
After completing all the details above, click on the “Add Helpdesk Escalation” button. Once you see your escalation rule on your screen, you will need to enable the escalation rule for your helpdesk.
7.2. Enabling Escalation Rules
To enable you escalation rule, click on the “Enable” button found on the right-hand side of the rule.

After clicking on the enable button, you will see the following pop-up screen:
Click on the “OK” button to successfully enable the rule.
7.3. Disabling Escalation Rules
To enable your escalation rule, click on the “Disable” button found on the right-hand side of the rule.

After clicking on the enable button, you will see the following pop-up screen:
Click on the “OK” button to successfully enable the rule.
7.4. Editing Escalation Rules
To edit an escalation rule, click on the “Edit” button.

You will now see the same screen as when adding a new rule. If you have made any changes to the rule, remember to click on the “Update” button.
7.5. Prioritising Escalation Rules
After you have created your escalation rules, you will also be able to prioritise your escalation rules from important to less important. All your rules will be grouped by department. Within each department, you will then need to determine the rule rank or priority. The re-ordering is only necessary when rules have a similar setup on what a ticket should be matched on.
To do this, go to the right-hand side of the rules. In this section, you will find arrows which will allow you to move the rule up and down. Remember, the higher up in the list, the more important the rule.

7.5.1. What if I can’t move a rule?
You will not be able to move rules up when:
- It is already at the top of the list for a specific department.
- It is the only rule for a specific department.
You will not be able to move rules down when:
- It is already at the bottom of the rules list in a specific department.
- It is the only rule for a specific department.

8. Helpdesk Escalation Periods
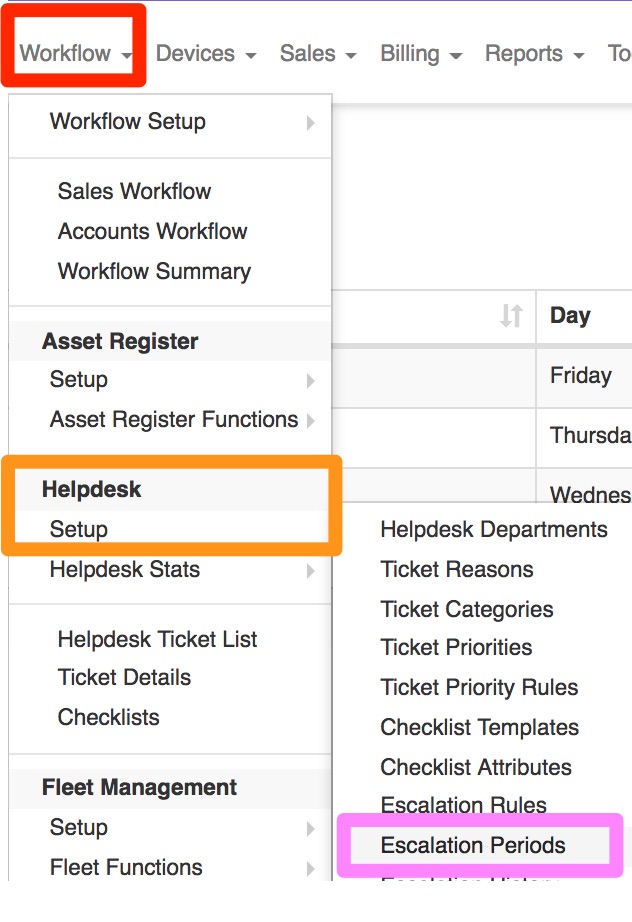
Once you enable the escalation module, you will be able to determine certain periods during which tickets can be escalated. These escalation periods are global to all departments in your company. To find the escalation periods, go to “Workflow” – “Helpdesk Setup” and then click on the “Escalation Periods” option.
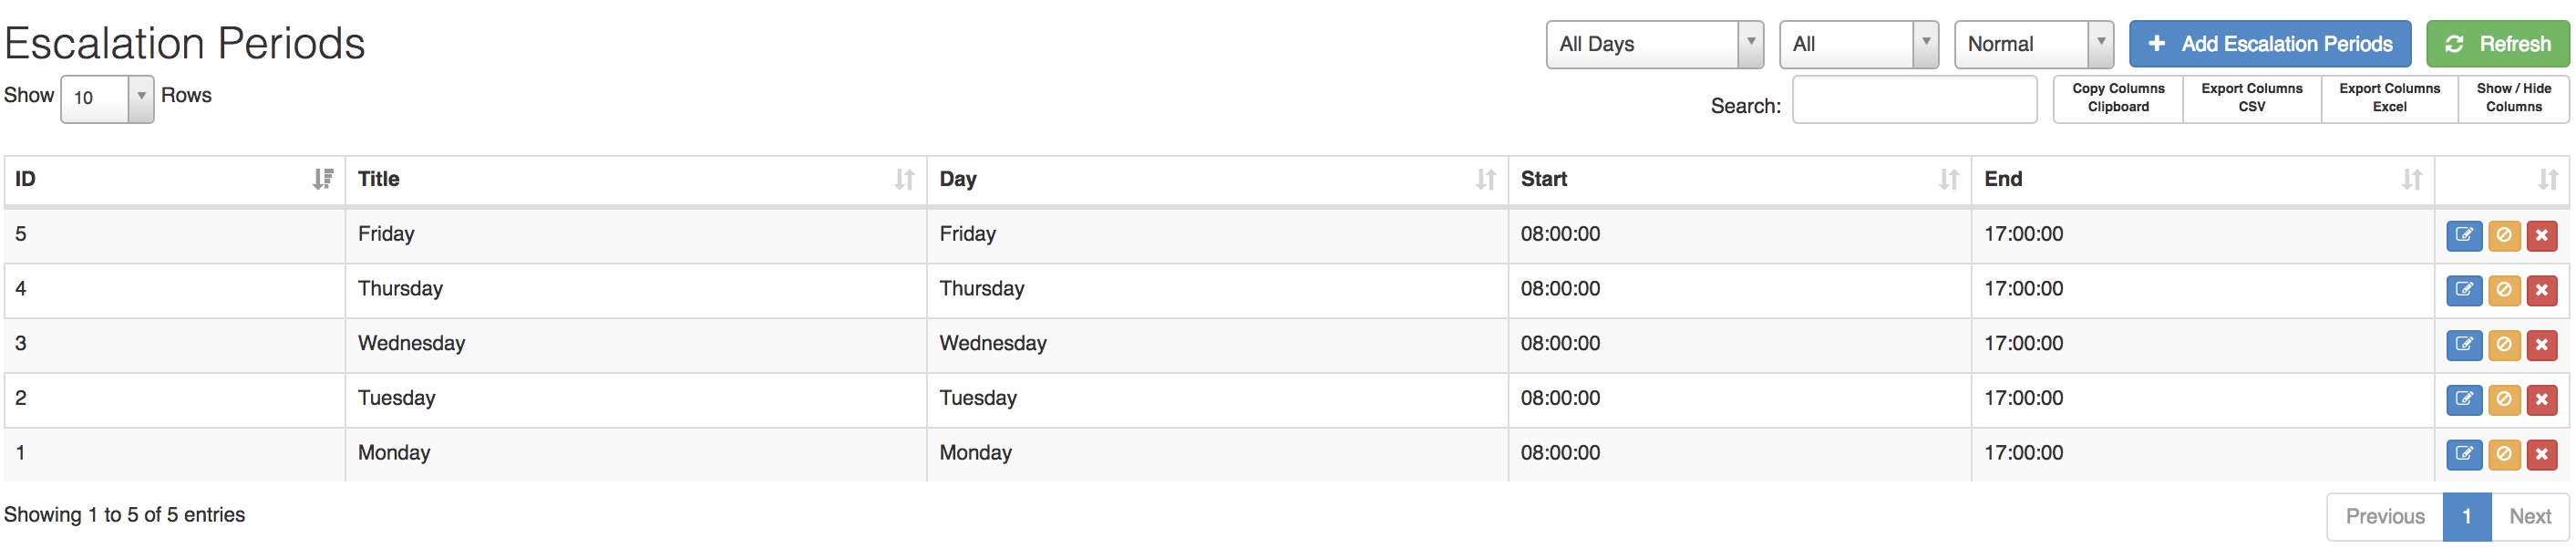
On the following screen, you will see a list of all current escalation periods. When you enable the escalation module, the system automatically creates five pre-populated escalation periods. These five periods will allow escalation to only take place between Monday to Friday from 08h00 to 17h00.
8.1. Adding Escalation Periods
To add escalation rules, click on the “Add Escalation Rules” button found on the right-hand side.

You will now see the following screen:
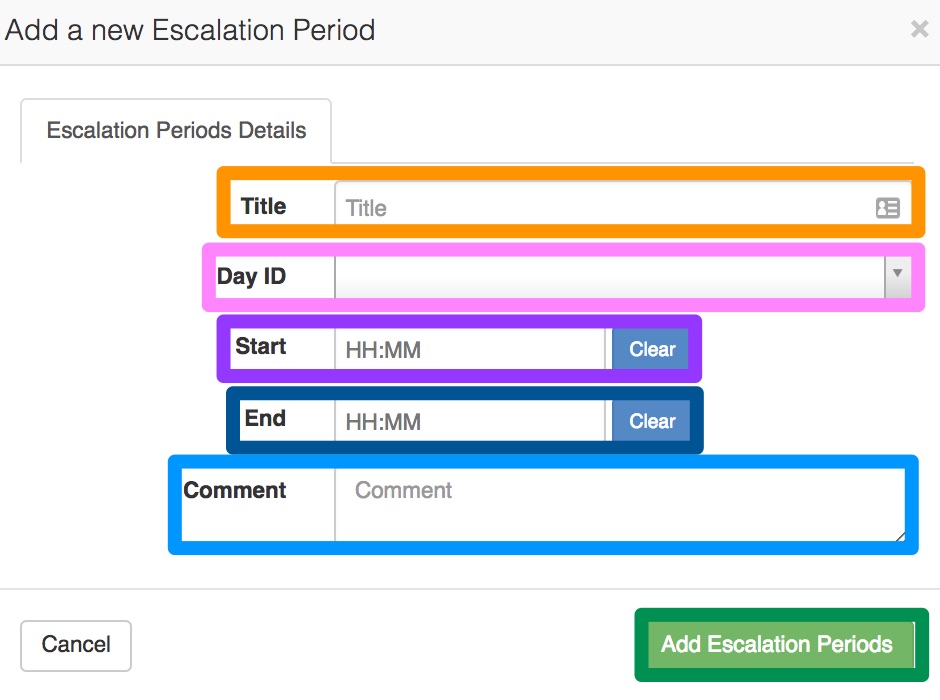
| Orange: | Here you need to add a name for the rule. |
| Pink: | Select the day of the week for which rule is applicable. |
| Purple: | In this section, you can enter from which time of the day the escalation rule should be active. |
| Dark Blue: | In this section, you need to add the end time. This means after that specified time, tickets will not be escalated until the following day. |
| Light Blue: | Here you can add any additional comments. |
After completing all the necessary details, click on the “Add Escalation Periods” button.
8.2. Editing Escalation Periods
To edit the existing escalation rule, click on the “Edit” button found on the right-hand side of the screen.

8.2.1. Editing the Period
After clicking on the “Edit” button, you will see the same screen as you would see when creating a new rule. Change the details as needed and then click on the “Update” button.
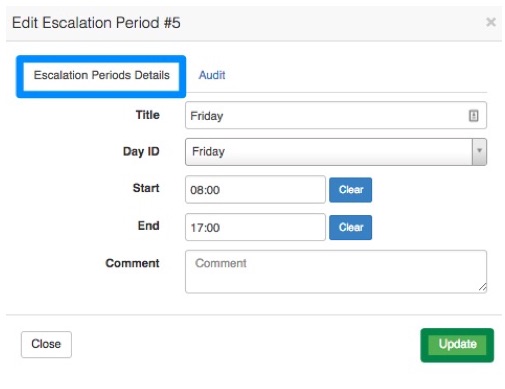
8.2.2. Audit Trial
Additionally, you can now also view the audit trial for each escalation period. To do this, click on the “Audit” tab.
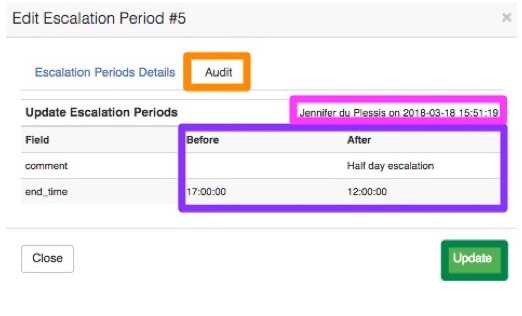
You will now be able to see who made changes and what changes were made. Remember to click on the “Update” button after making any changes.
8.3. Disabling Escalation Periods
8.3.1. Disabling the Periods
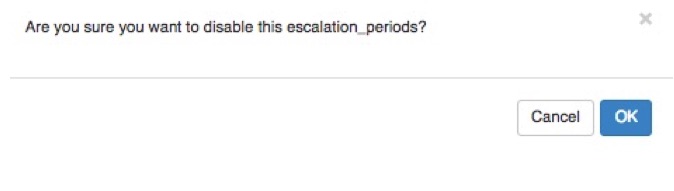
Disabling an escalation rule means that this rule will no longer be active. To disable a specific escalation rule, click on the “Disable” button.

After clicking the “Disable” button, you will see the following pop-up screen. Click on the “OK” button.
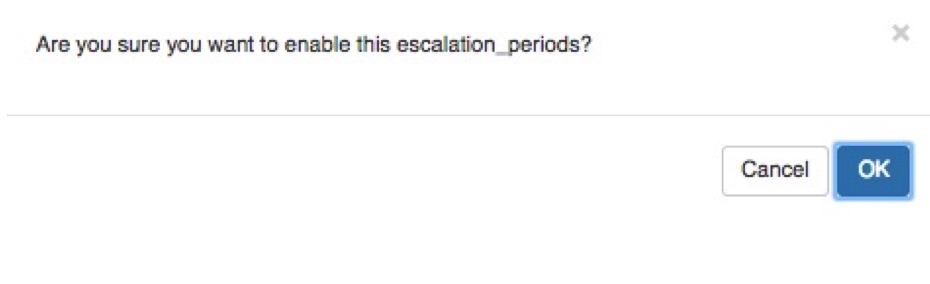
8.3.2. Enabling the Periods
To make a rule active again, click on the orange tick mark.

On the pop-up screen, click on the “OK” button.
8.4. Deleting Escalation Periods
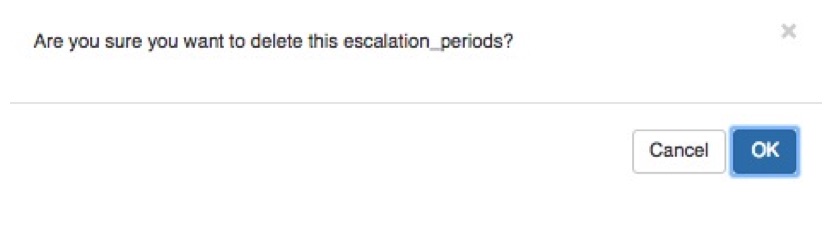
To delete an escalation rule, click on the delete button found next to the rule.

After clicking the “Delete” button, you will see the following pop-up screen. Click on the “OK” button.
9. Escalation History
To view a list of all tickets that have been escalated, go to “Workflow” – “Helpdesk Setup” and then click on the “Escalation History” option.
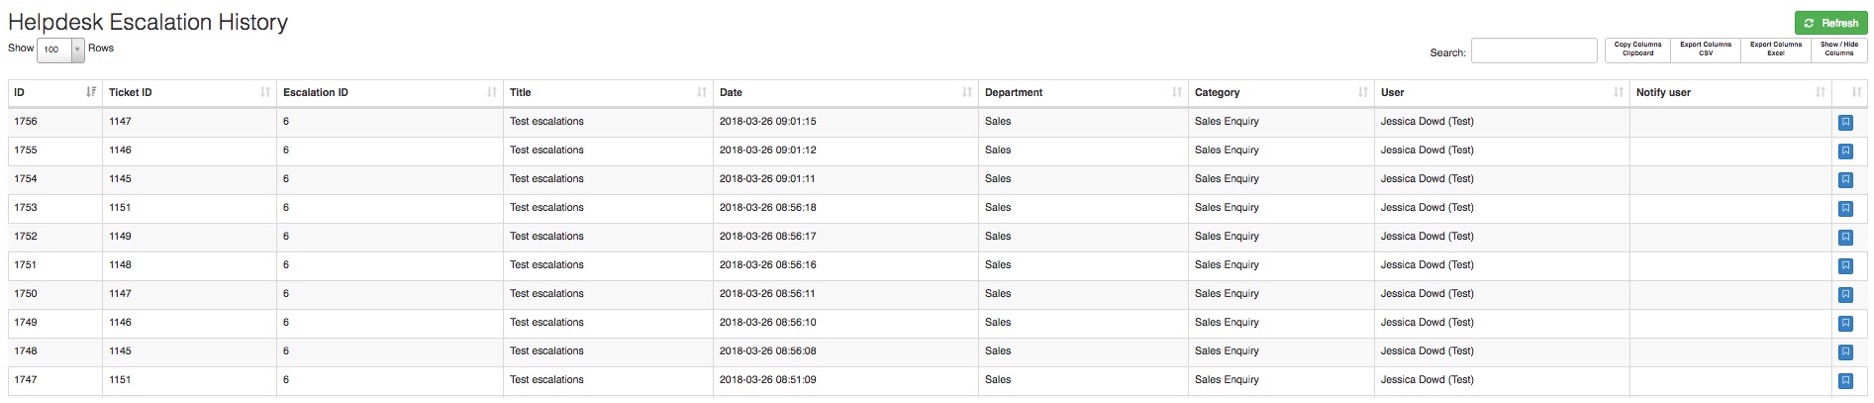
On the following screen, you will see a list of all escalations that have taken place.
10. Mailboxes
Next, you will need to set up your mailboxes. For more information on how to set up your helpdesk mailboxes, please refer to the Mailbox Scraping manual.
11. Helpdesk Notification Setup
This setting will allow you to inform your customers if any changes have been made to their tickets. This will also send a notification to the customer once they have created a new ticket. This email will contain more information about the ticket that they have created and will allow them to quickly access the ticket.
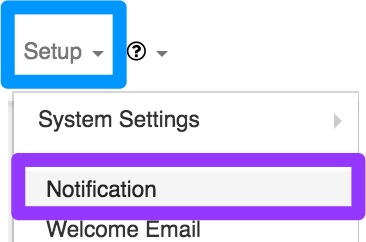
To find this setting, go to “Setup” and then click on the “Notification” option.
Under your Notifications settings, ensure that you have enabled the “Notifications Enabled” toggle switch.
