2. Sales Leads:
2.1. New Sales Leads:
2.1.1. Leads via the Customer Edit Screen.
This process is used for customers who already has or had services with us and has the need to upgrade, add another service or move their current installation to a new site. To submit a lead from the customer’s profile, go to the customer edit screen and look for the “Create Sales Lead” button.

When you click on the “Create Sales Lead” button, a pop-up screen will appear where you can enter the customer request and submit the lead successfully. Please be thorough when describing the customer’s needs. When all the information has been added to the “Lead Message”, click on the “Submit Sales Lead” button.
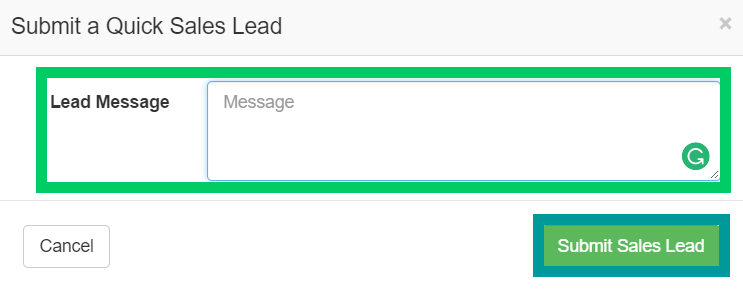
When the lead has been submitted, a new lead will be generated. This lead can be found under the new sales leads. This lead will not be automatically assigned to a sales agent.
2.1.2. Leads via the Sales Lead page
To add a sales lead, go to the sales lead screen and then click on the “Add” button on the right-hand side of your screen.
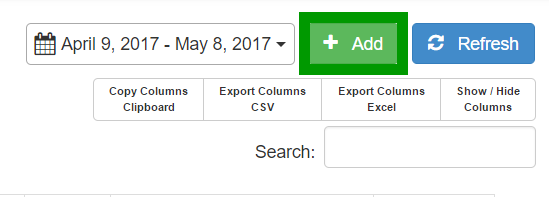
On the pop-up screen, you can now start filling in customer’s details. When you have completed the form, click on the submit button at the bottom of the screen.
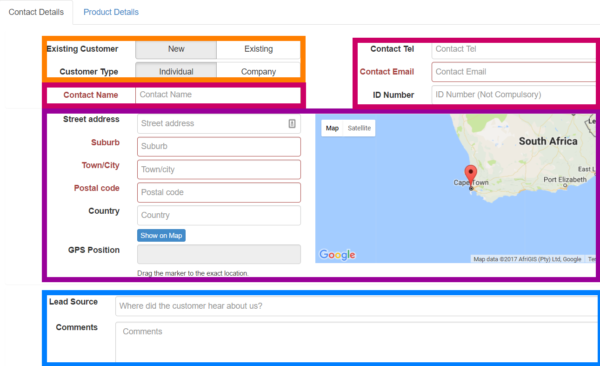
| Orange: | First, you choose whether this is a New Customer or an Existing Customer. Once you have clicked on the relevant button, you can choose whether the customer type is an individual customer or a customer with a company. |
| Pink: | In this section, you van fill in the customer’s contact details. The contact name and email address are compulsory fields and you will not be able to submit the sales lead without these completed fields. |
| Purple: | In this section, you can insert the customer’s address details. Once you have filled in the address fields, click on the “Show on Map” button and the marker on the map will move to the address. |
| Blue: | Lead Source:
Here you can choose where the customer heard from us. This is usually only applicable to new customers but is not a compulsory field. Comments: These comments are usually summary notes on what the customer’s needs are. This will appear on the ticket as an “admin note and the customer won’t be able to see it. |
If a new lead is manually submitted by the sales agent, then it will automatically be assigned to their name and move to active status.
2.1.3. New Leads: Submitted via email or online applications.
Other ways in which leads can be submitted is from the customers. The customer can either send an email with his or her request to the sales department, or they can go to our website and submit a contact form. Both of these ways will create a sales lead which can be seen under the “New” subheading of sales leads. These leads will not automatically be assigned to sales agents.
2.2. Active Sales Leads:
When the sales lead has reached this stage, there are only two things left to do:
- Close the sales lead if the customer is no longer interested
- Determine whether a site survey is required.
2.2.1. Submitting leads for Site Surveys:
First, you need to confirm whether a site survey is required. When you’ve confirmed this, you can take the active sales lead to the next phase of the workflow.
In the Active Leads section, look for the relevant lead and click on the “Site Survey” button. The following screen should now appear:
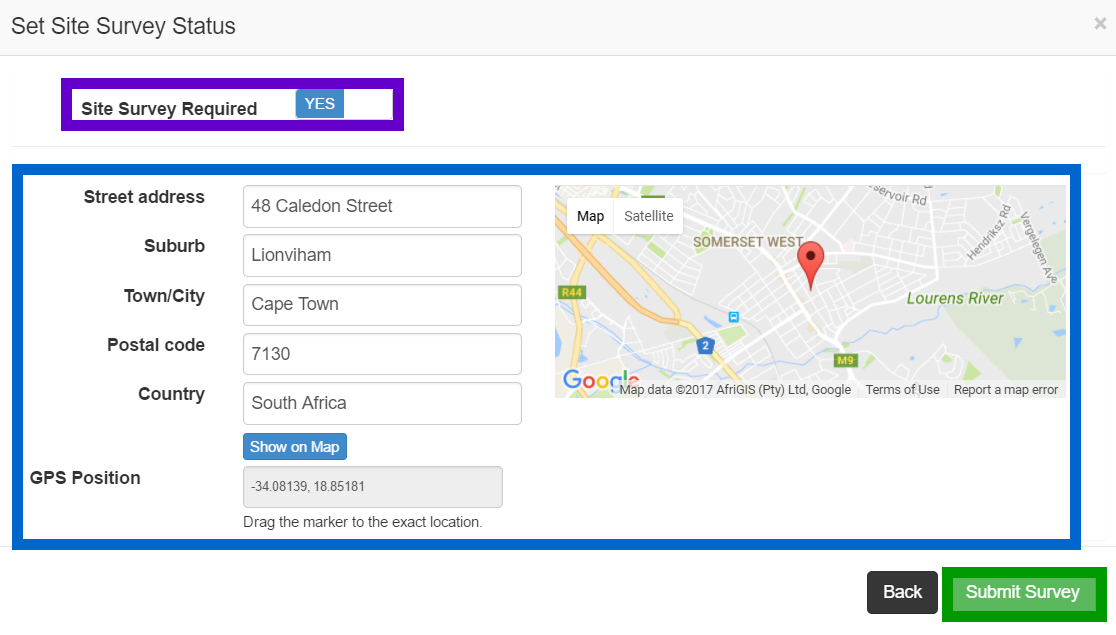
| Purple: | Choose whether a site survey is required or not. |
| Blue: | If yes, check that the address details are correct and accurate. |
| Green: | Click on the Submit Survey button to ensure that the lead goes into the next phase of the workflow. |
2.2.2. What happens after submitting the site survey?
If a site survey was a requirement, the lead will move to the Site Survey phase of the workflow. The field coordination team will then schedule a time, date and a team to complete the site survey.
If a site survey was not a requirement, the lead will move to the Quotes phase of the workflow. This means that the sales agent who is in charge of this lead can now send the customer a quotation.
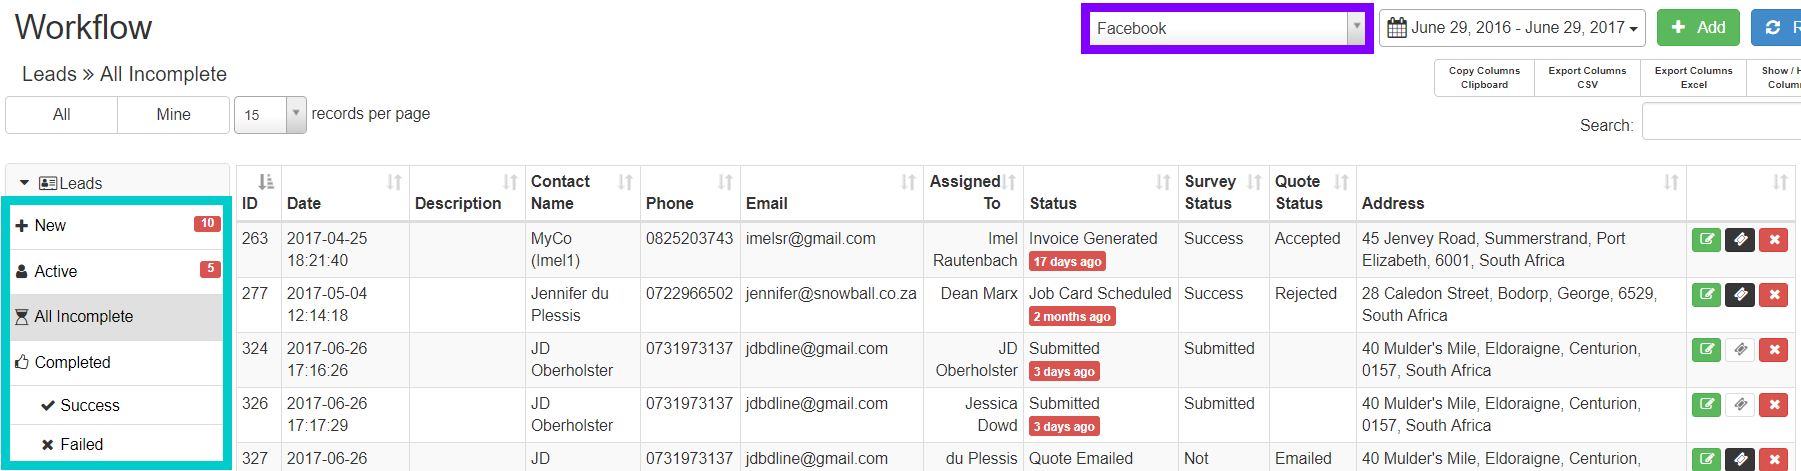
2.3. Lead Sources
If you want to view all leads that came in via a certain source, then you can use the filter function at the top of the leads screen. To be able to filter the leads according to their source, you need to be sure that you have clicked on one of the leads subheadings. Only after you have clicked on one of these subheadings, will you be able to see the filter function.