
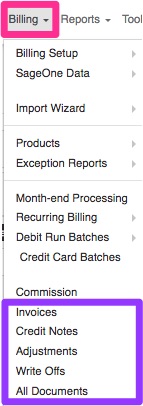
1. Where to find your billing documents
This guide will give you more information on how to push billing documents to SageOne. Billing documents refer to:
- Invoices
- Credit Notes
- Write-offs
- Adjustments
You will be able to find these documents by going to “Billing” and then clicking on the relevant option.
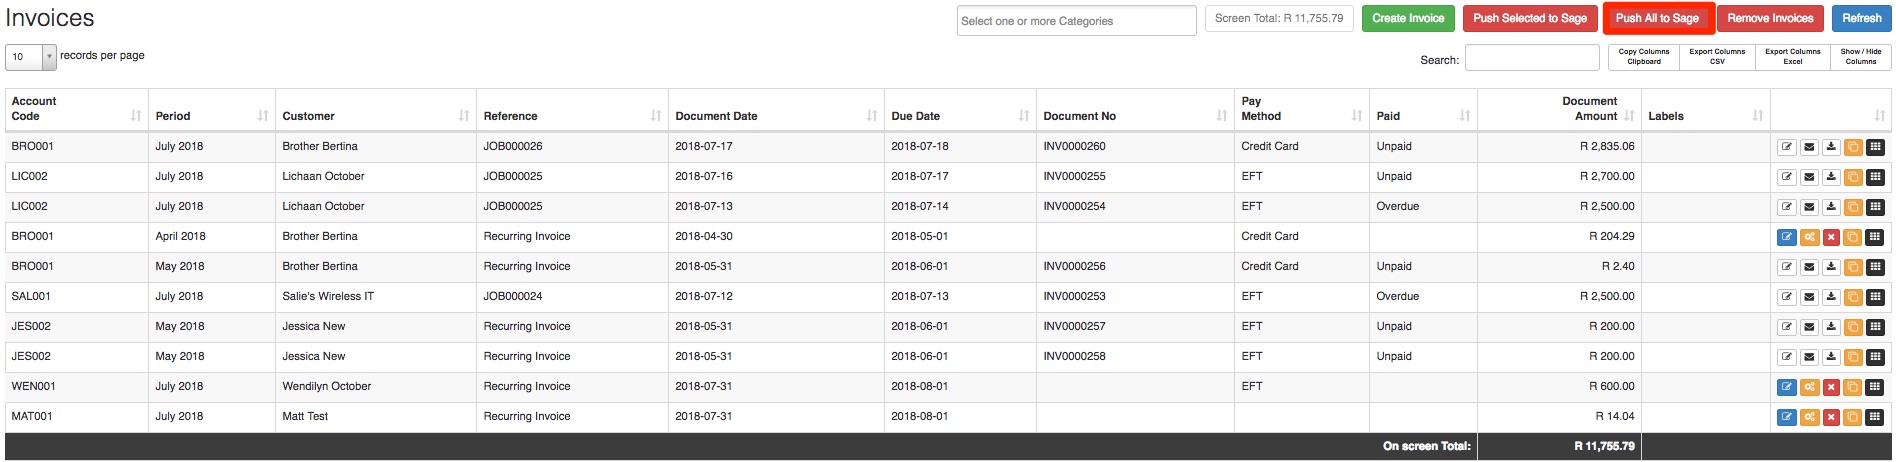
On the following screen, you will be able to see a screen similar to the one below:
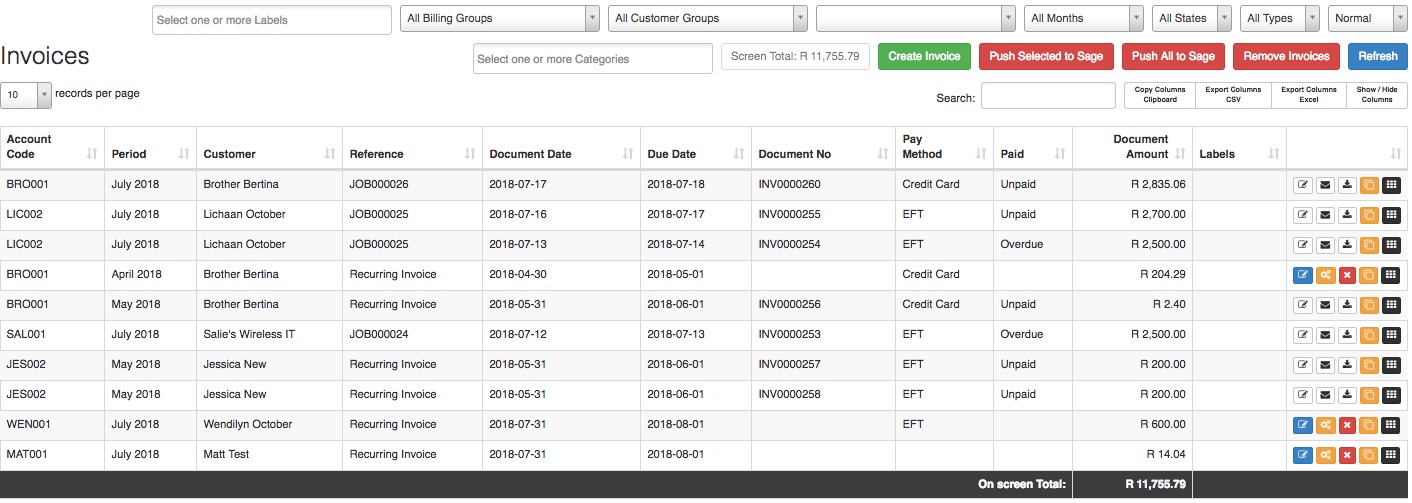
On the right-hand side of the screen, you will be able to see all the action buttons.
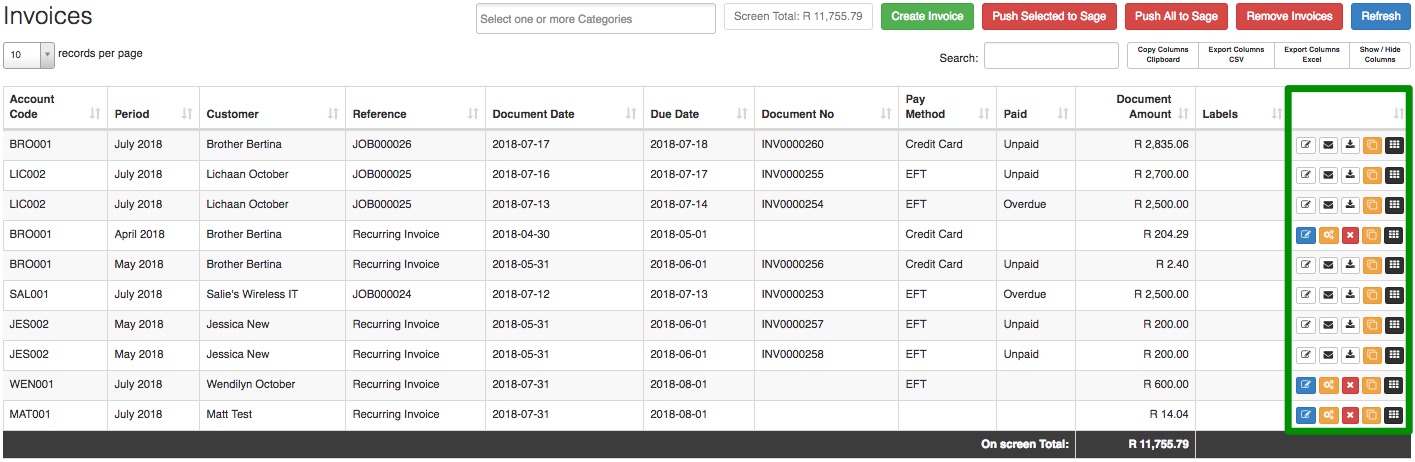
In the case that these buttons are greyed out, it means that this document has already been pushed to SageOne and can no longer be edited or amended. You will, however, be able to view, send, download or duplicate the invoice. You will also be able to go to the customer’s profile by clicking on the black button.

If the buttons on the right-hand side of the screen are colourful, this means that the document is still in draft mode and that you will still be able to edit, amend or delete it. After you have finished amending your document, it will need to be pushed to SageOne.

2. Pushing documents to SageOne
Billing documents can be pushed in one of two ways:
- Pushing single billing documents
- Pushing batches or multiple billing documents
You will need certain HeroTill permissions to be able to push billing documents to SageOne. If you are unable to see the Generate SageOne Invoice button, or the Push All to Sage or the Push Selected to Sage buttons, please inquire with your systems administrator about your permissions.

2.1. Pushing Single billing documents to SageOne
You will be able to push single billing documents to SageOne by clicking on the Generate SageOne Invoice found on the right-hand side of the screen. This method will mostly be used in the case of installation and other manually created invoices.

After clicking on the Generate SageOne Invoice button, you will see the following pop-up screen. Click on the “Generate” button to push the invoice to SageOne.
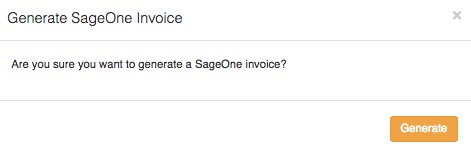
Once you click on the Generate button, the invoices will be emailed to the customer and will no longer be in draft status.
2.2. Pushing multiple billing documents to SageOne
If there are a few billing documents that need to be pushed, you can click on either the “Push All to Sage” button or on the “Push Selected to Sage” button. This method will mostly be used when doing your monthly billing run.
Please note that some billing documents screens might not have the Push Selected to Sage button.
2.2.1. Push Selected to Sage
When clicking on the “Push Selected to Sage” button, you will be able to push all draft invoices that you can currently view on the screen. In other words, this will not take into account any draft invoices that may be on i.e. on the 2nd or 3rd screens.
To view more lines on your screen, you can change the “Records per page” section.

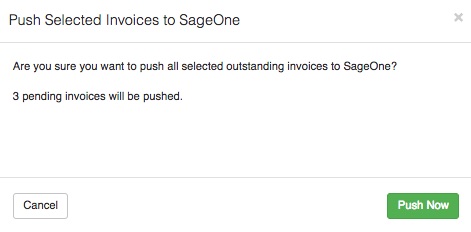
After clicking on the “Push Selected to Sage” button, you will see a pop-up screen similar to the one below. Click on the “Push Now” button to push the billing documents to SageOne.
2.2.2. Push all to Sage
To push all draft invoices to SageOne, you can click on the “Push All to Sage” button.
After clicking on this button, you will have the option to either push all to sage or to just push invoices with specific payment methods. This is a useful function for in-house monitoring to ensure that customers are billed correctly.
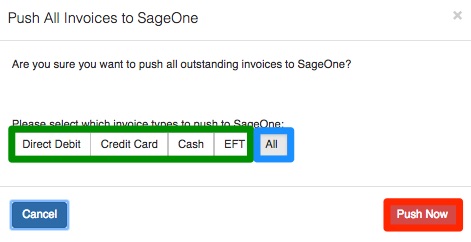
After choosing the applicable method, click on the “Push Now” button. This method will not take into account the number of draft invoices on the current screen, but rather push all draft invoices to SageOne. After clicking on the “Push Now” button, you will see the following screen.
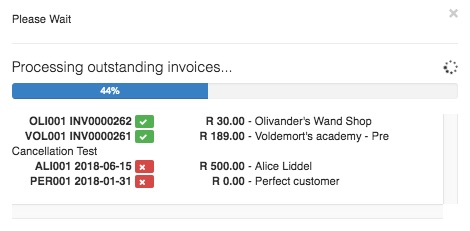
On the above screen, you will be able to view which invoices as successfully pushed as well as which invoices were unsuccessful.
2.3. What should I do if the invoice did not push to SageOne?
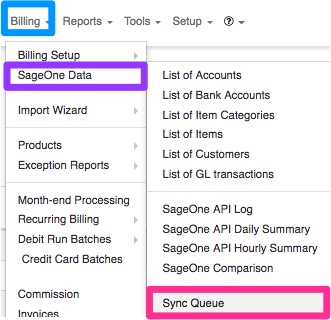
In the case that the invoices have not been successfully pushed to SageOne, you can go to the SageOne sync queue to view if there might be any syncing errors. To find the SageOne sync queue, you can go to “Billing” – “SageOne Data” and then click on the “Sync Queue” option.
From this screen, you will be able to see any syncing errors. If there are syncing errors, click on the resync button next to the line item to re-sync it.

If the line item is still in error status, please contact the HeroTill support team for further assistance.