
4. Quotes
This is the phase where the quoting starts to happen. The sales agent now has enough information to provide the customer with an accurate quote in terms of the installation and services that we will provide them with.
4.1. Edit Sales Lead: Quotes
After the site survey has been completed, the lead can now be found under the new quotes section. Find the lead that you want to work on and click on the edit lead button to add a quote. After clicking on the edit lead button, the following screen will pop up.
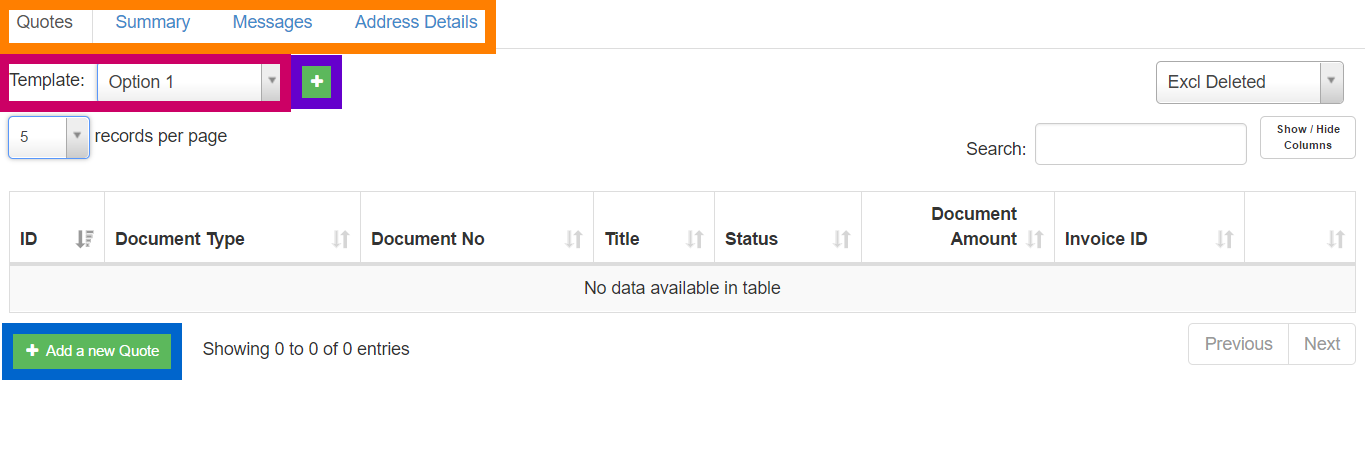
| Orange: | Here you can choose the part of the lead you want to edit or update You can also still update the customer details before you create the quote for the customer. |
| Pink: | This section allows you to choose between the different quoting templates. |
| Purple: | Once you have chosen the template that you want to use, click on the green button. The quoting template will appear and you just need to adjust it according to the customer’s needs. |
| Blue: | If you do not want to use one of the quoting templates, then click on the “Add a new Quote” button and create your own quote. |
4.1.1. Quoting templates examples:
The quoting templates have been created to save a bit of time when it comes to the quoting process. It will provide you with a framework that you just need to customise according to the customer’s needs. You are still able to add or remove lines as needed. Quoting templates can also be set up to have fixed payment methods (see sales setup manual for more information). For example:
Option 1: Home Install Template:

Option 2: Business Install Template

Option 3: Call out

*Please note that these are only examples created to display possible templates. Each WISP will create their own templates according to their specific needs.
4.2. Creating Quotes:
On the Edit Sales Lead pop-up screen (see 4.1), you need to choose whether you want to create a quote from a certain template or if you want to create a new quote from scratch. Please note that you cannot create free standing quotes. To create and send a quote to a customer, you need to complete the workflow from the beginning to the end.
4.2.1. Quoting templates and blank quotes:
4.2.1.1. Quoting templates:
To add a quoting template to the lead, select the option that you want to use and then click on the + button next to the option. You will then see a template line appear below the template option heading. Click on the edit button to modify the quote according to the needs of your customer.

When editing the quoting template, please remember to choose the correct products (in terms of the technology type) that you will be installing.
For example:
If you are installing wireless services for a customer, please ensure that all Non-data products you choose have the _wireless at the end. This is not applicable for hosting or data products. For more information on this, please refer to the “Sales Items” document.
4.2.1.2. Blank quote templates:
To add a blank quoting template, click on “Add a new Quote” button found in the bottom left-hand corner.

4.2.2. Adding and removing items from a quote:
4.2.2.1. Adding items to a quote:

| Orange: | Here you will choose the type of product you want to quote the customer for. Example:
· Jobs · Data Products · Hardware etc. |
| Red: | In this section, you will choose the actual product that you want to quote the customer for. Example:
· Call out · Fibre · High Powered Route |
| Pink: | This will appear on the customer’s invoice. You can add text to the description, but do not remove the text that will automatically appear. Example:
· Capped 4Mbs 20GB · Capped 4Mbs 20GB – example@example.com · Capped 4Mbs 20GB – Office Line If you add extra information in the description, please ensure you do not type more than 100 characters. |
| Purple: | Click on “Add another line” if you want to quote the customer for more than one product or product type. |
When you are happy with the quote, click on the “Update” or “Create Quote” button found at the bottom right-hand side of the corner.
4.2.2.2. Removing items from a quote:
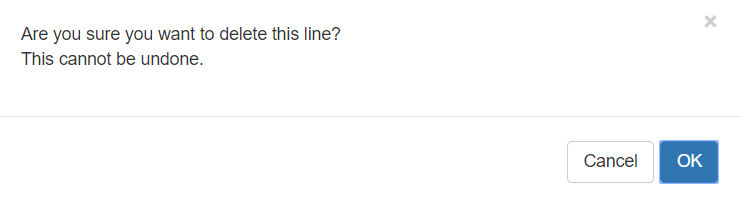
To remove a line from a quote, simply click on the x on the right-hand side of the screen.

A pop-up screen will now appear, requesting I you are sure that you want to delete this line. If you are sure, click on the “OK” button.
When you are happy with the quote, click on the “Update” or “Create Quote” button found at the bottom right-hand side of the corner.
4.2.3. Free or discounted products and services being quoted:
When creating quotes, it is important to remember that you cannot add zero rand (R0.00) items on the quote. If there are any zero rand (R0.0) items on the quote, the system will not allow you to update or create the quote. If you want to add a product or service on the quote that will be provided to the customer at no cost, then you have to adjust the discount percentage to 100% to ensure that no costs will be included.

4.2.4. Cloning Quotes:
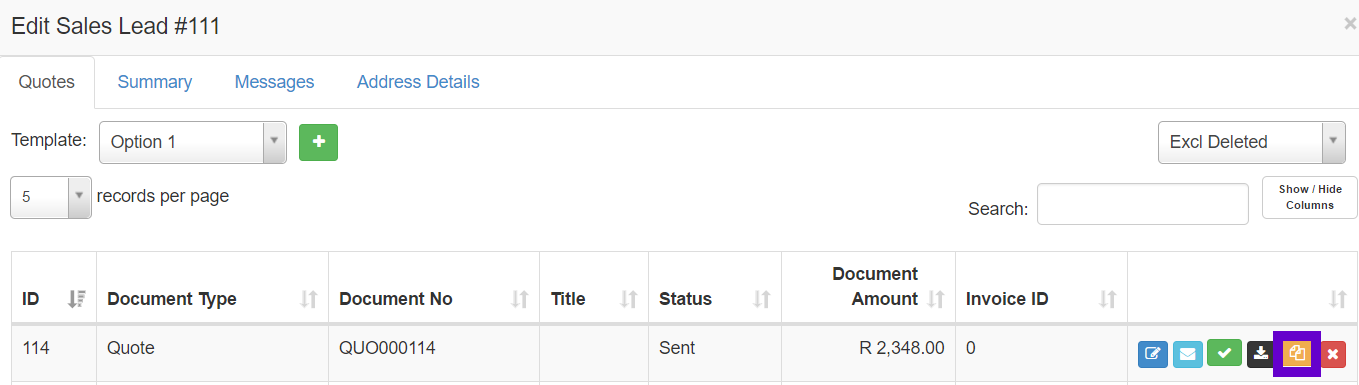
When you need to send a customer two or three quotes that are very similar, you can use the cloning quote function. Please note that you cannot clone the quote and assign it to another customer. A cloned quote will remain on the sales lead from which it has been cloned. To clone the quote, click on the cloning button.
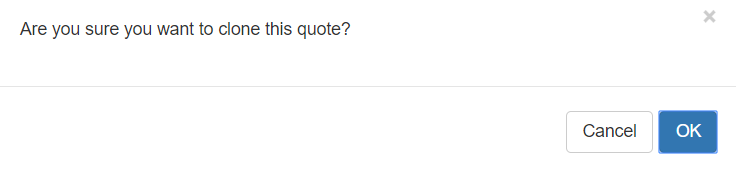
The following pop-up screen will appear. If you are sure that you want to clone the quote, click on the “OK” button. If you do not want to clone the quote, click on the “Cancel” button.
Once the quote has been cloned, click on the edit button to personalise the quotes to meet the customer’s needs.
1.2.5. Sending the quote(s) to the customer:
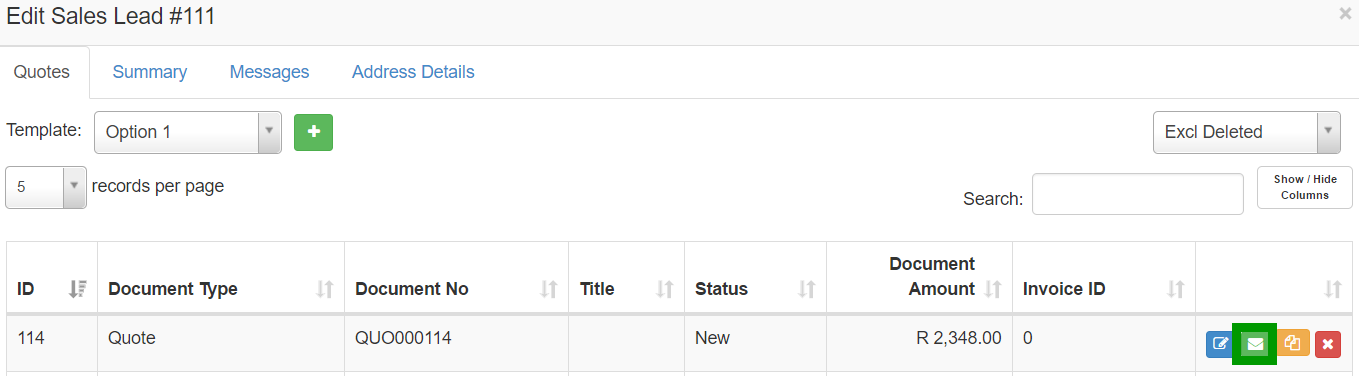
After the quote has been created or updated, the system will take you back to the sales lead screen. On the right-hand side you will find a green button with an envelope on it. Click on the envelope to send the quote to the customer. You will need to do this of every quote that you want to send to the customer.
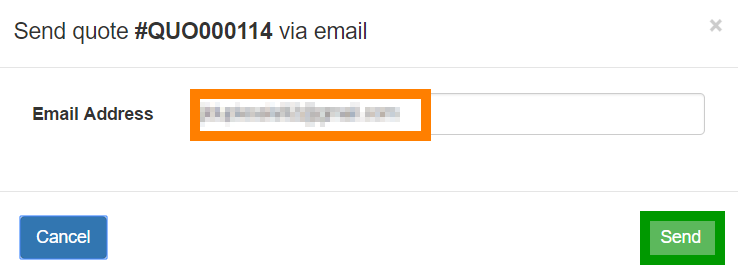
The following pop-up screen will appear (see screenshot on the next page). The customer’s email address will automatically pull through from the sales lead. You can replace this email address or add a secondary one but unfortunately cannot send the quote to two different email addresses simultaneously. Click on the send button to send the quote to the customer.
After the quote has been sent to the customer it will move from new status to active status.
1.3. Accepting and rejecting quotes:
Quotes can be accepted or rejected in two different ways:
- The customer accepts or rejects the quote by following the link in the email they receive.
- The sales agent can manually accept or reject the quote when they receive confirmation of the customer’s choice.
1.3.1. When the sales agent needs to accept or reject the quote:
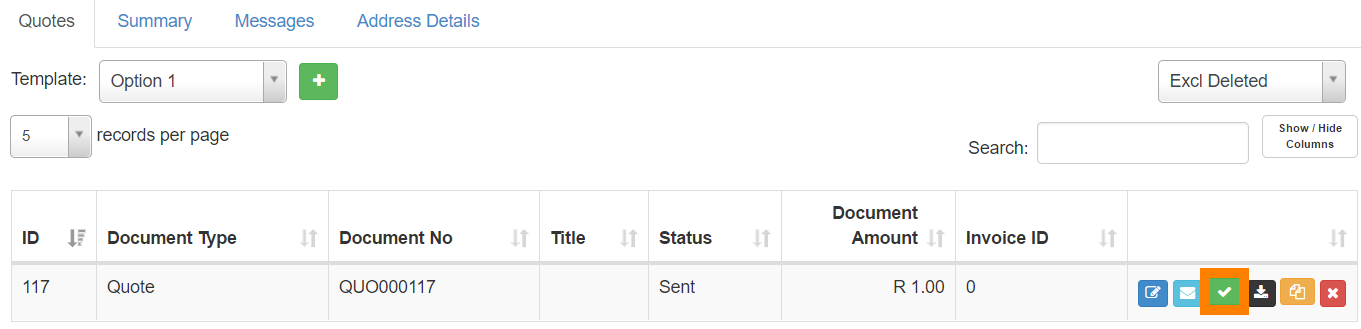
This will only happen when the sales agent has received the necessary confirmation form the customer. To accept or reject the quote, open the sales lead and click on the green tick mark found in the orange block.
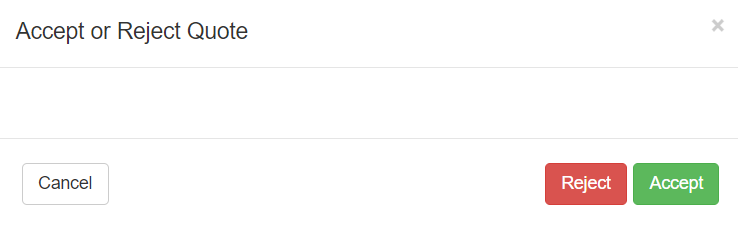
After clicking on the tick mark, a pop-up screen will appear giving you options to either accept or reject the quote. To accept the quote, click on the “Accept” button. To reject the quote, click on the “reject” button.
1.3.1.1. Accepting the quote:
To accept the quote, click on the “Accept” button. A pop-up screen will appear asking you if you are sure you want to accept the quote. If you are sure, click on the “Yes” button.

On the edit sales lead screen you will see that the quote’s status has now changed to “Accepted“.

1.3.1.2. Rejecting the quote:
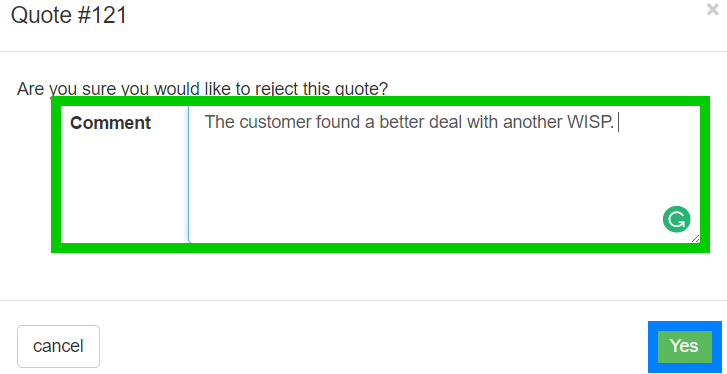
To reject the quote, click on the “Reject” button. A pop-up screen will appear in which you need to add any comments as to why the customer is rejecting the quote. Please note that you cannot fully reject the quote if you do not add a reason. After you have added the comments, click on the yes button to complete the rejecting action.
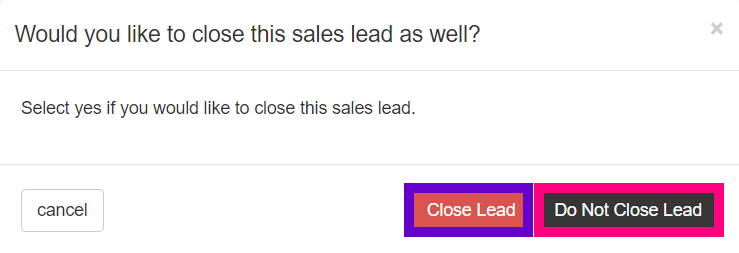
On the next pop-up screen, you need to choose whether you want to close the lead or keep it active. If there is nothing you can do to see to it that the customer’s needs are met, you can click on the “Close Lead”. If there are other ways of meeting the customer requirements or the customer perhaps want another quote, then click on “Do Not Close Lead”. The lead will stay active and you can generate more quotes or close it at a later stage.
A last pop-up screen will now appear to inform you that your action has been successful.
1.3.2. When the customer accepts or rejects the quote:
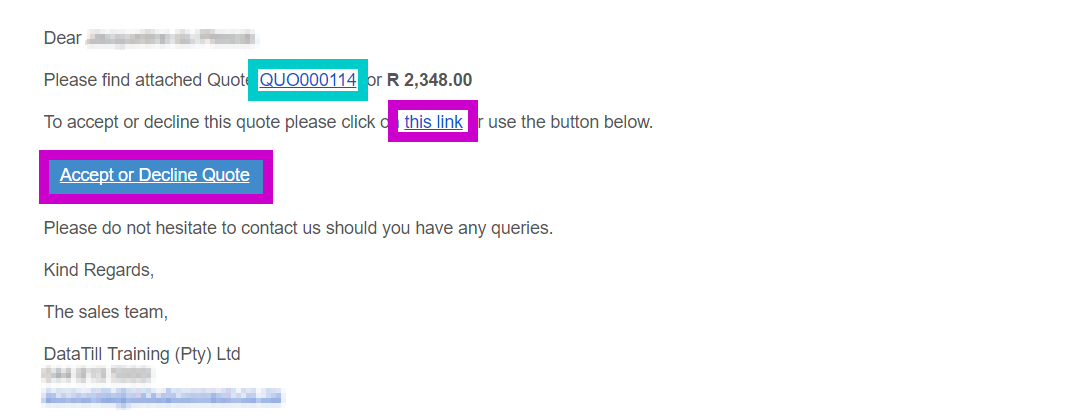
When you send the quote to the customer, they need to have the option to view the quote and then to accept or reject the quote by following the link or clicking on either the “Accept or Decline Quote” button.
After the customer has clicked on the link or the “accept or decline button”, this screen will open in their web browser.

| Pink: | Here the customer can view their details.
|
| Orange: | This section shows the detail of the quotation.
|
| Blue: | If the customer chooses to decline the quote, they will be required to provide a reason or comment as to why they are choosing to decline the quote.
They however do not need to provide any comments or reasons when accepting the quote.
|
| Red: | This is the “Decline Quote” button that the customer can click on if they are unhappy with the quote.
|
| Green: | If the customer is happy with the quote and want to proceed, they can click on the “Accept Quote and Update Details” button. |
1.3.2.1. Accepting the quote:
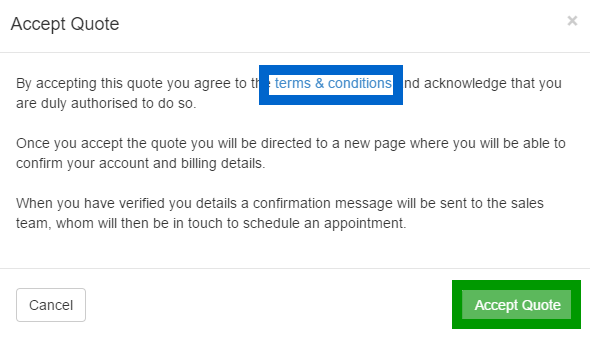
When clicking on the “Accept Quote and Update Details” button, a pop-up screen will appear. On this screen there is a link that will redirect the customer to the “terms & conditions” page as well as provide them with information of what the next step will be after accepting the quote. When the customer has read through the terms and conditions, they can click on the “Accept Quote” button. Should they choose to rather decline the quote, they can click on the “cancel” button and then choose to decline the quote.
By clicking on the accept quote button, the customer agrees to the terms and conditions. The customer will then be redirected to a screen where they are able to update their account information, payment information and address information. All fields that are compulsory will be marked in red.
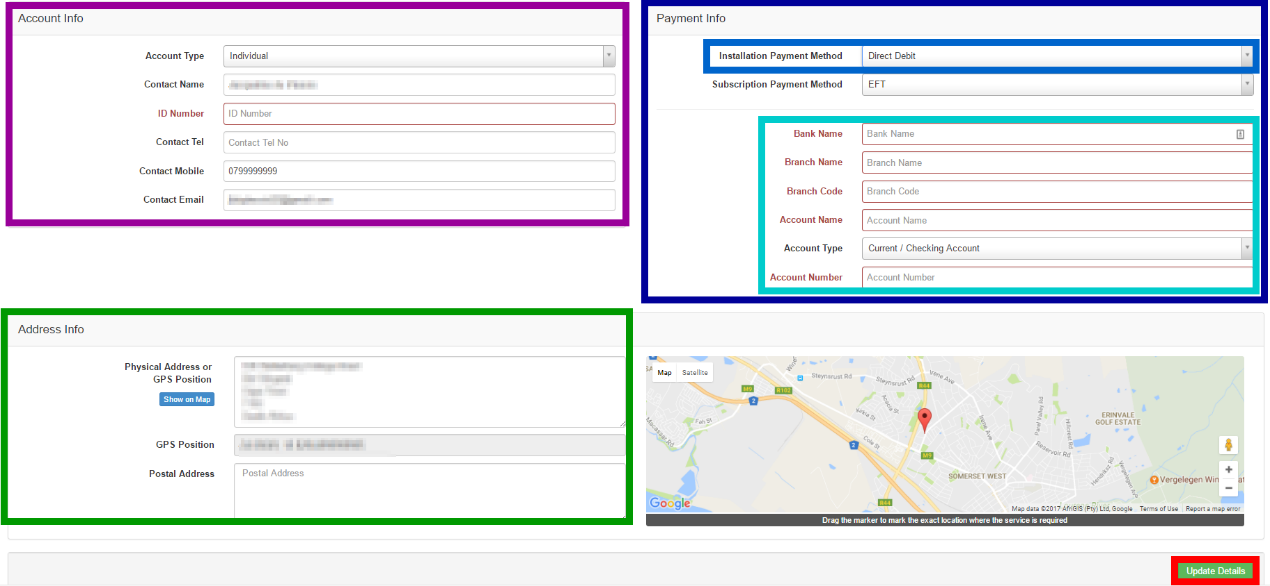
| Purple: | Here the customer can update their account details:
Individual customers: – Contact Name (compulsory field) – ID number (compulsory field) – Contact Telephone number – Contact mobile (compulsory field) – Contact email (compulsory field)
Companies: – Company name (Compulsory field) – Company Registration number (Compulsory field) – Company VAT number – Contact Name (compulsory field) – ID number (compulsory field) – Contact Telephone number – Contact mobile (compulsory field) – Contact email (compulsory field)
|
| Dark Blue: | In this section the customer can update their payment information.
They can choose how they want to pay their installation invoice as well as their monthly subscription method.
Customers will have an option between 4 different payment methods: – Direct Debit (Debit Order) – Credit Card – EFT – Cash.
|
| Light Blue: | If the customer chooses to pay via Direct Debit, they need to fill in their banking details in this section:
– Bank Name – Branch Name – Branch Code – Account Name – Account Type – Account number.
|
| Green: | In this section the customer can update their address information.
|
| Red: | When they are done updating their details, they need to click on the “Update Details” button. |
1.3.2.2. Rejecting the quote:
If the customer chooses to decline the quote, they first need to add a reason in the comment box and then click on the “Decline Quote” button.

After clicking on the decline quote button, a pop-up screen will appear asking if the customer is sure if they want to reject the quote. The customer can then choose to either reject the quote or to cancel should they not want to reject the quote.

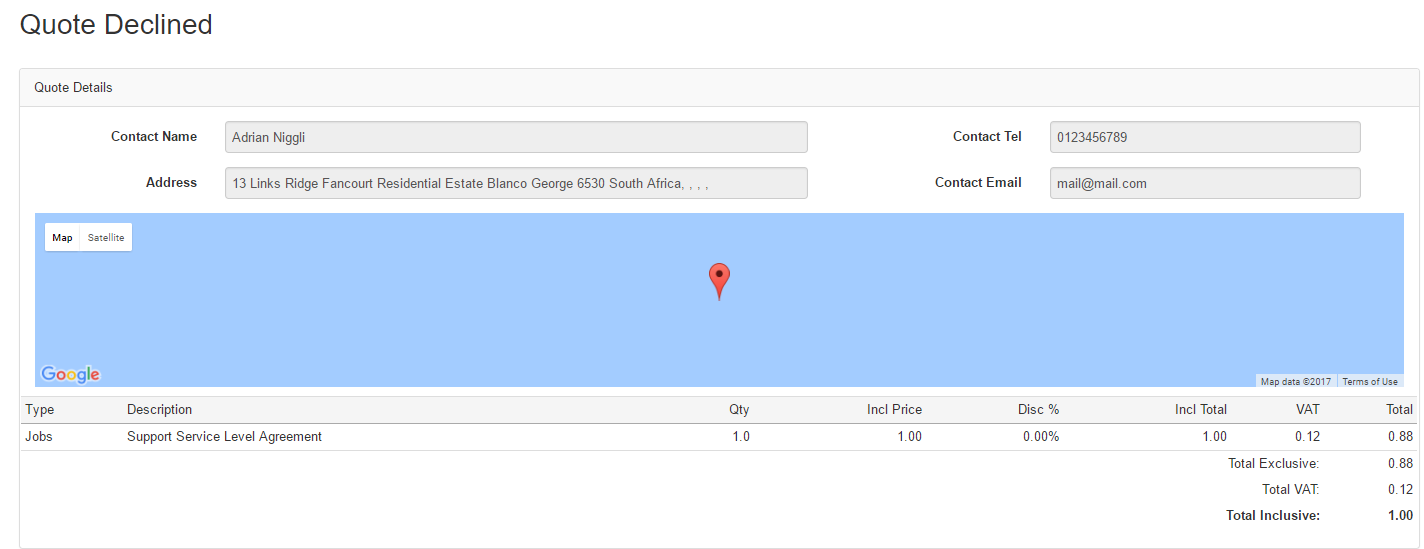
When the quote has been successfully rejected, the customer will be redirected to the following screen:
1.3.3. What happens once the quote has been accepted or rejected?
1.3.3.1. Accepted quotes: New customers
If the quote has been accepted by the customer, the sales agent will receive an email to notify them. The quote will now move from active quotes to Customers – New. The same process will also apply when the sales agent accepts the quote manually.
1.3.3.2. Accepted quotes: Existing customers
If the quote has been accepted by the existing customer, the sales agent will receive an email to notify them. The quote will now move to Job Cards and not to customers as they are already an existing customer and a new profile does not need to be created.
1.3.3.3. Rejected quotes:
If the customer has rejected the quote, the sales agent will receive an email to notify them. The lead will be closed and moved to rejected quotes. If the sales agent manually rejects the quote for the customer, they can choose to either close the lead or keep it active.
1.3.4. When quotes don’t get accepted or rejected:
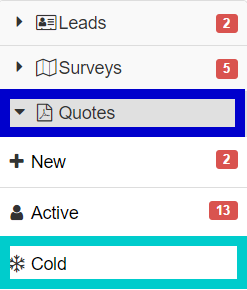
1.3.4.1. Cold quotes:
Under the quotes heading there is a sub-heading called “Cold”. All quotes that are not accepted or rejected will move here after a set time period. The specific time period can be set up in the sales settings.
When the leads are moved to the cold quote section, it will be assigned to the sales manager who needs to ensure that these leads are followed up on. The quote can then be accepted or rejected by either the sales agent or the customer and move to the next step in the workflow.