
5. Customers:
The next phase in the workflow is to create the customer’s profile on HeroTill. Go to the “Customer” phase of the work flow and then click on New”. A list of all new customers that need to be created will appear here.
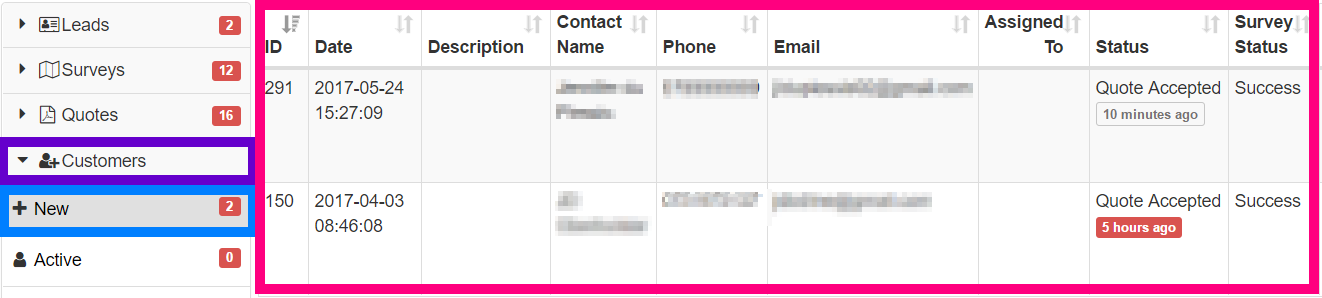
5.1. Creating the customer from the sales leads process:
To create the customer profile, click on the blue button of the relevant lead you want to work on.

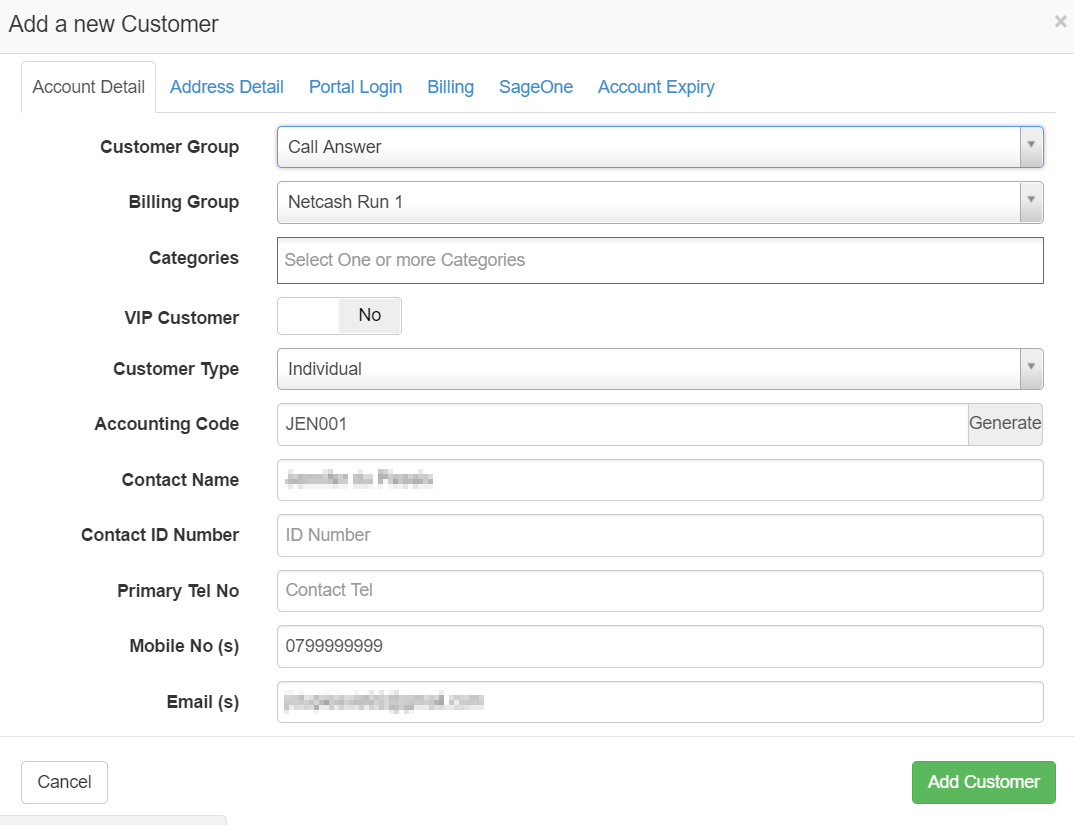
After clicking on the blue button, a pop-up screen will appear:
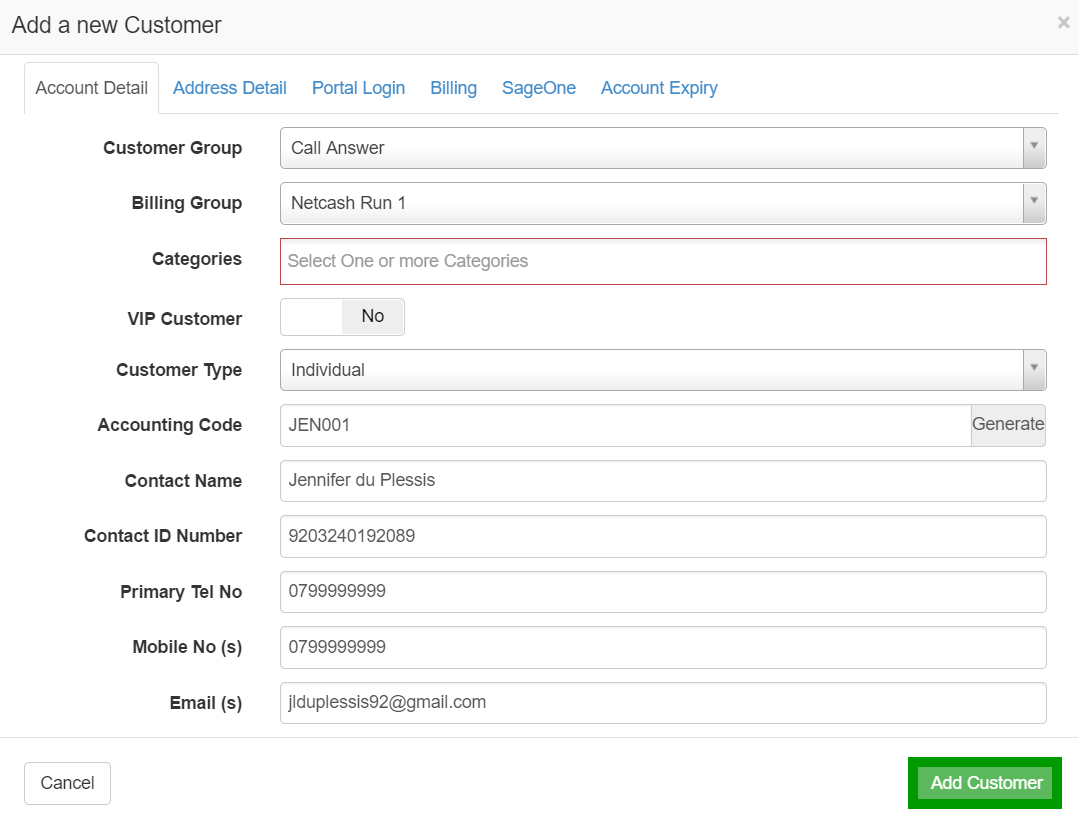
5.2. Adding the customer details:
On the above mentioned screen, you can now start filling in all customer details that are still missing. Most of the details should already be filled in and if you are lucky the customer has updated their information when accepting the quote, but it remains your responsibility to check that all the required information has been filled in. Below are some tips on what information to look for when creating their profile:
5.2.1. Customer Group & Billing Group:

| Pink: | These are groups like staff, high site owners, names of estates, resellers etc. |
| Purple: | This is to define on which day the customers would like to have their Debit Order (DO) deducted. Please note that this differs from WISP to WISP. Please ensure that you know the date(s) on which your WISP runs DO batches and that you don’t make promises to customers that you can’t keep. |
5.2.2. VIP Customers & Customer Type:

| Blue: | This is to mark the customer as an Important customer – for example
High paying customers will be marked as VIP. |
| Green: | Choose whether the new customer is an individual or a company. |
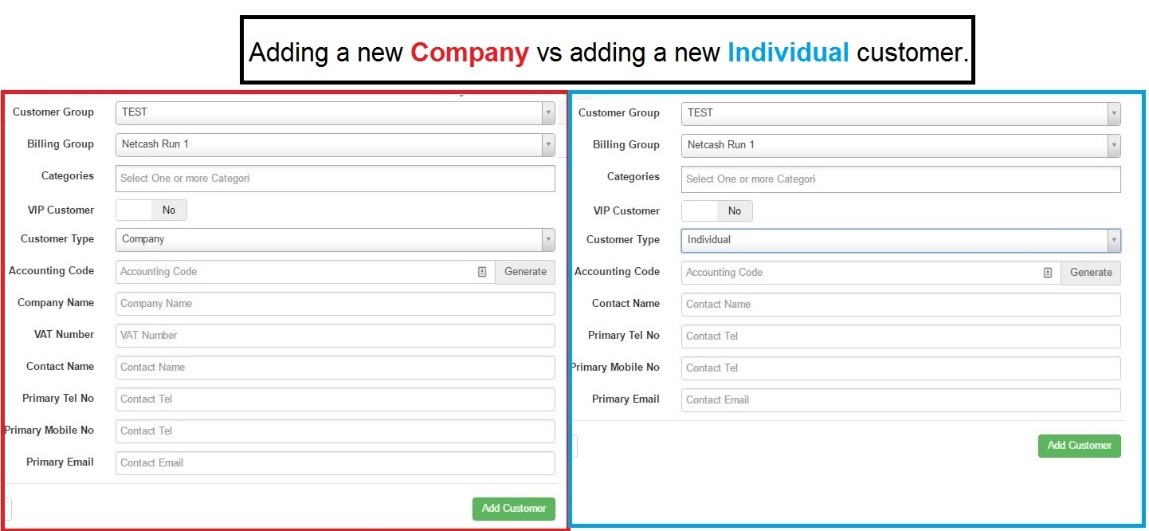
5.2.3. Company vs. Individual customer.
There are differences between adding a new customer and adding a new company to the system. Adding a company has additional fields like Company Name, VAT number and contact name whereas adding a new individual customer has none of these.
5.2.4. The customer details:
Although it is important that all detail should be filled in, there are some compulsory fields that are non-negotiable. Should one of these fields not be filled in, the system will show you which fields are compulsory by highlighting it in red. If need be, please ask the customer to provide you with any missing information.
Compulsory fields for companies: Company Name, Contact name, Contact tel., contact email and account code.
Compulsory fields for individuals: Company Name, Contact name, Contact tel., contact email and account code.

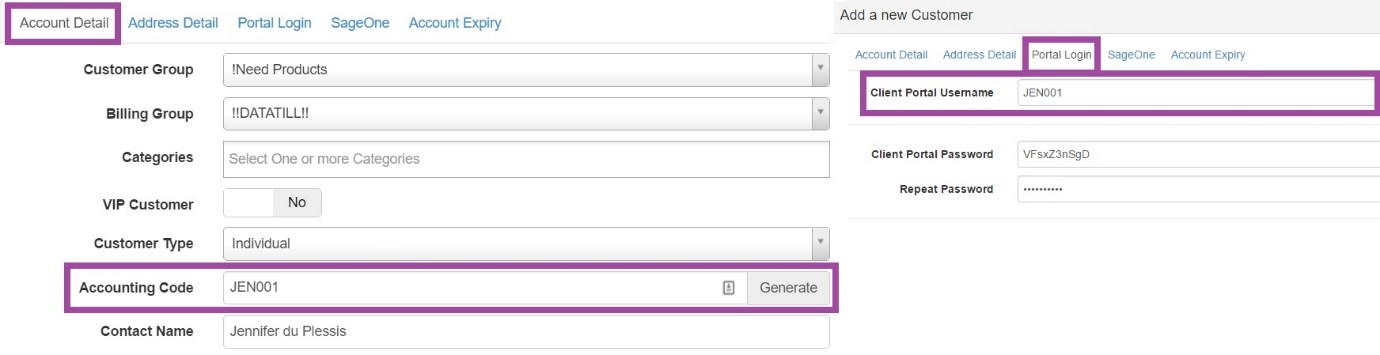
5.2.5. Accounting code:
The accounting code is also referred to as the customer code. The code should have automatically generated, but if it did not, please click on the “generate” button. Once a customer has been assigned a customer code, the code will never change – not even if the contact person or business name changes.

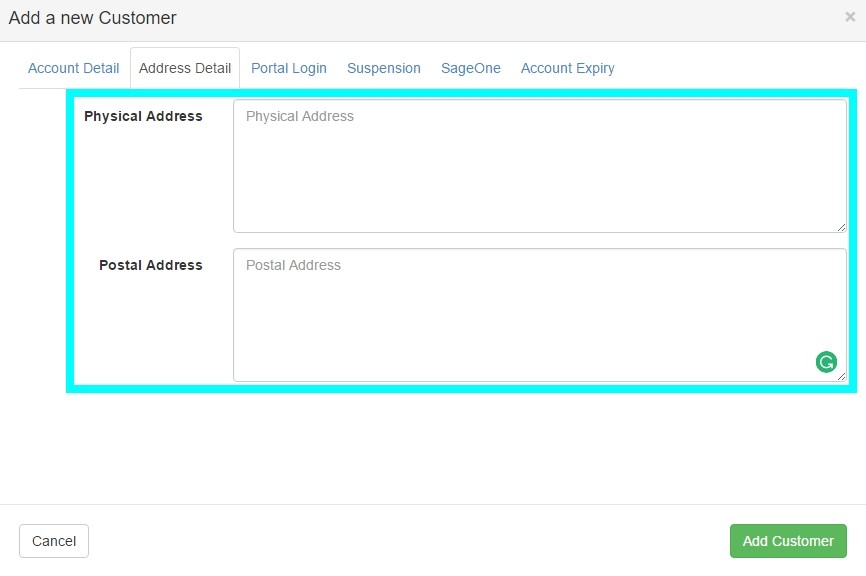
Even though this is not a compulsory field when you are adding a customer, please remember to check that the customer’s address is filled in. To view the customer’s address, click on the “Address Details” tab. Here you will be able to see the customer’s physical and postal address.

5.2.7. Portal Login:
This is related to the login details for the customer portal. This is not something you have to worry about or work on. When the accounting code is generated, the “Client Portal Username” will automatically be populated with the customer “accounting code”.
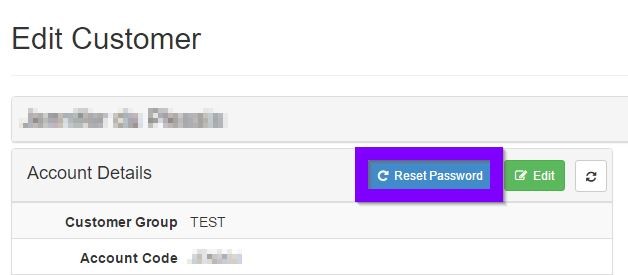
If the customer has forgotten their password, then you can send them a “Reset Password” link. To do this, go to the customer profile, look for the account detail section, and then click on the “Reset Password” button.
5.2.8. SageOne ID:
This ID is related to the syncing functions with SageOne – the online accounting system we use for reporting functions. This ID will also automatically generate a number as soon as a new customer is created. This ID is never to be tampered with as this will ensure for lots of drama, syncing issues and a broken customer profile.
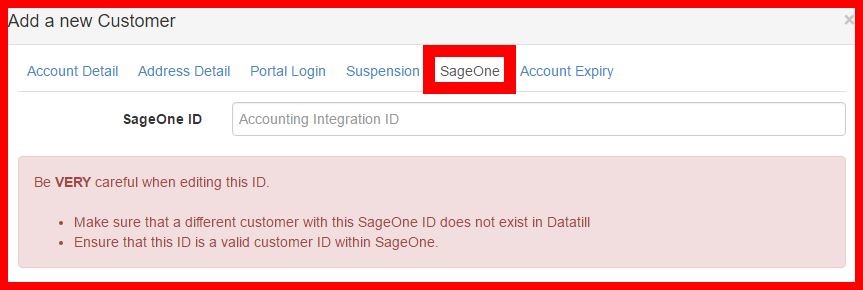
Even though it says “Be VERY careful when editing this ID”, please do not attempt to edit this without permission from the Systems Administrators.
5.2.9. Account Expiry:
This section is for the accounts department only. The accounts department will use this section for customers who need to be suspended due to non-payment as well as all customers who cancel their services with us. Remember to click the Save changes button before closing the screen.
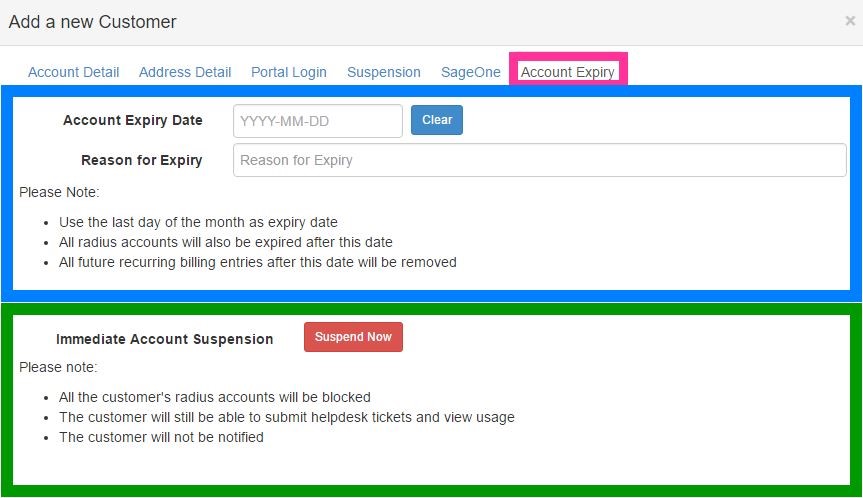
| Pink: | Here you can see where to find the “Account Expiry” tab.
|
| Blue: | This is the section you use when a customer cancel their services.
|
| Green: | The big red button is the one you use when the customer doesn’t pay and they need to be suspended. |
After all the details have been checked and added, click on the “Add Customer” button to create the customer.
5.2.10. Customer Welcome Email:
When the customer has been successfully created, a welcome email will be sent out to the customer. The email will read as follow:
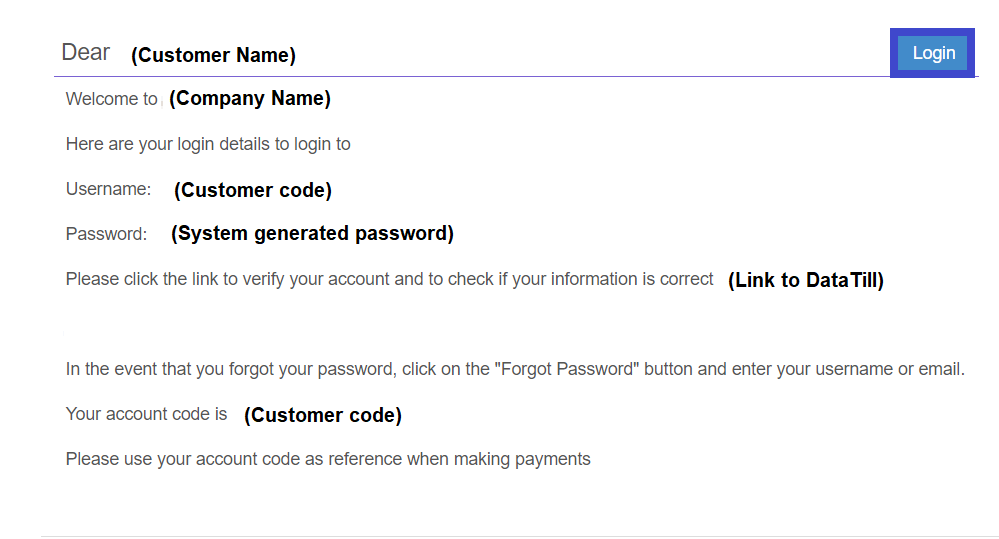
To log into their customer profile, the customer can either click on the link provided in the email or the “Login” button found at the right-hand top.
5.3. Active customer screen:
Here you will find a list of customers that still need their payment method set up as well as the product(s) and services that they will be using. The customer will only move to the next phase of the workflow once their products have been set up and their payment method added.
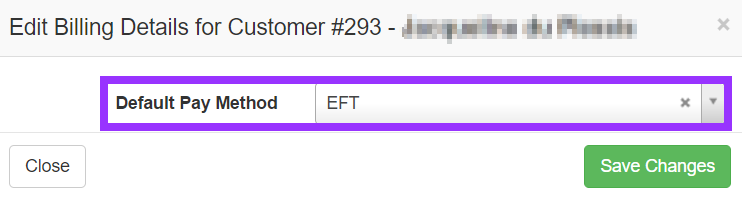
5.3.1. Adding the payment method:
Click on the blue button to add the customer’s payment method.

A pop-up screen will now appear. Click on the drop-down menu to choose the customer’s preferred payment method. The customer can choose to pay via Direct Debit (Debit Order), EFT, Credit Card or Cash. After the payment method has been selected, click on the “Save Changes” button.
5.3.2. Direct Debit:
If the customer prefers to pay via Direct Debit, please fill in all the details as required.
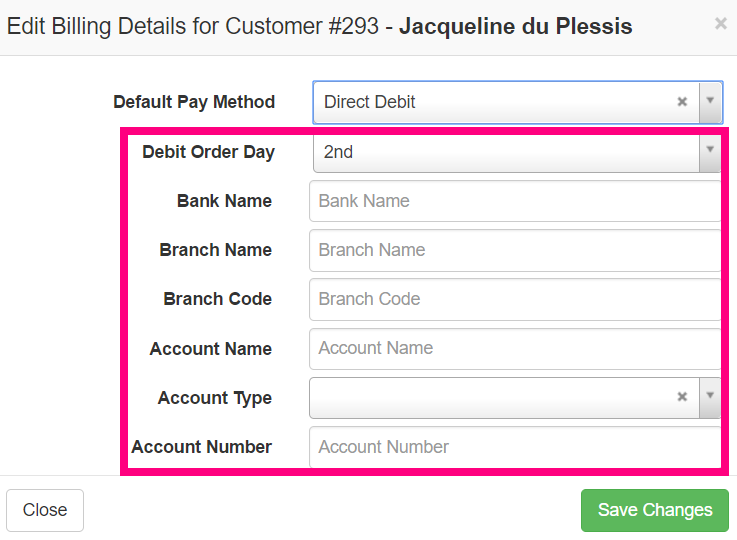
| Debit Order Day: | This is to define on which day the customer would like their Debit Order deducted. Please note that this differs from WISP to WISP. Please ensure that you know the date(s) on which your WISP runs DO batches.
|
| Bank Name: | Here you add the name of the bank which the customer uses.
|
| Branch Name: | Here you add the branch name. If you are unsure about the branch name, just copy the bank name here.
|
| Branch Code: | Remember a branch code is always 6 digits long.
|
| Account Name: | Add the name of the account holder.
|
| Account Type: | Choose what type of account the customer has.
|
| Account Number: | Add the customer’s account number here. |
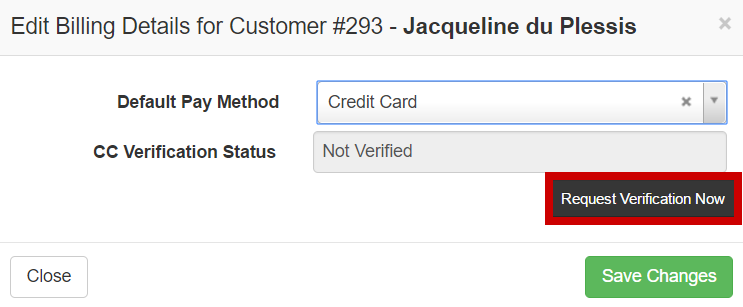
5.3.3. Credit Card customers:
Should the customer prefer to pay via Credit Card, please click on the “Request Verification New” button.
The customer will receive the following email:
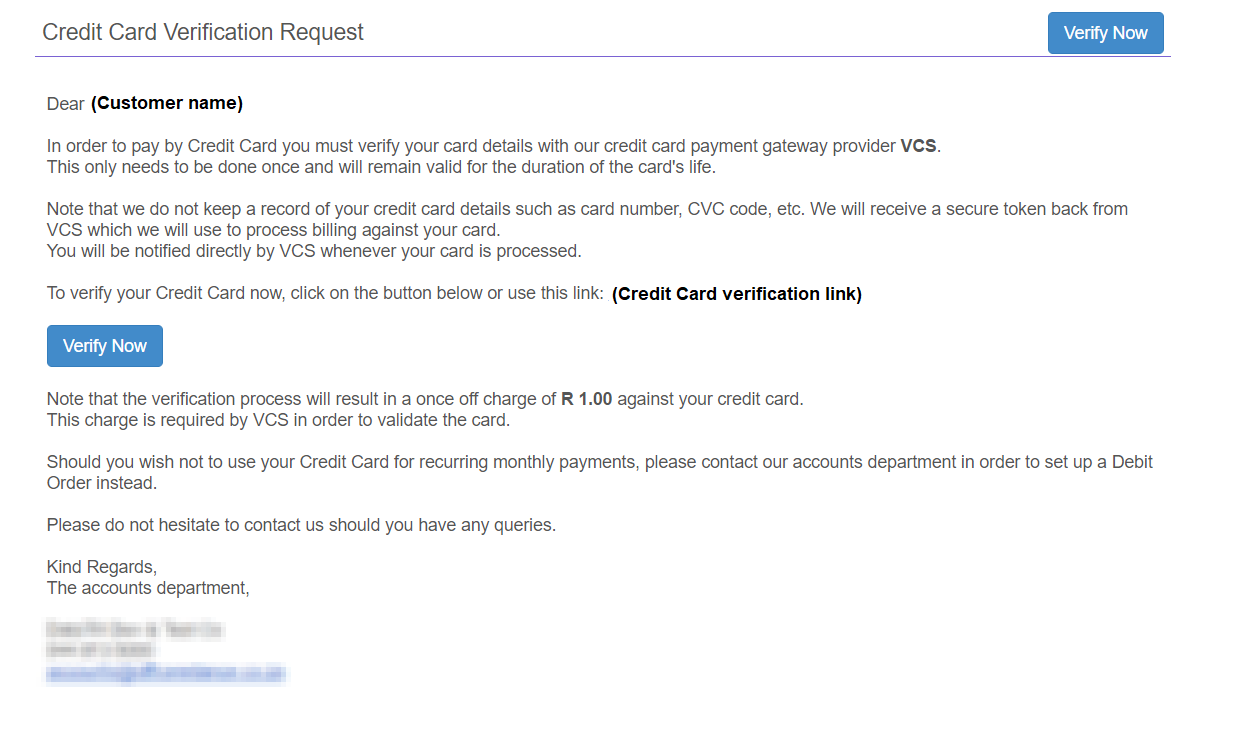
By clicking on the “Verify Now” button, the customer will be taken to a new web browser page where they can verify their credit cards.
*Please note that for credit card verification the Mozilla Firefox web browser tend to work the best.
5.4. What happens once the customer has been successfully created?
After the customer has been successfully created, their billing has been checked and their monthly recurring billing has been set up, the lead will move to the next workflow phase: Job cards – New. In this phase the scheduling of the job will take place.
5.5. Customer Updates:
This section relates to all customer who update their account information or payment method through their online portal.

| Orange: | Here you can see that we are under the customers phase of the workflow.
|
| Red: | We are currently working in the “Update” subheading.
|
| Green: | This is a list of all customers who have submitted changes to their profiles.
|
| Blue: | To Accept or Reject the changes that the customer wants, click on the view request button. |
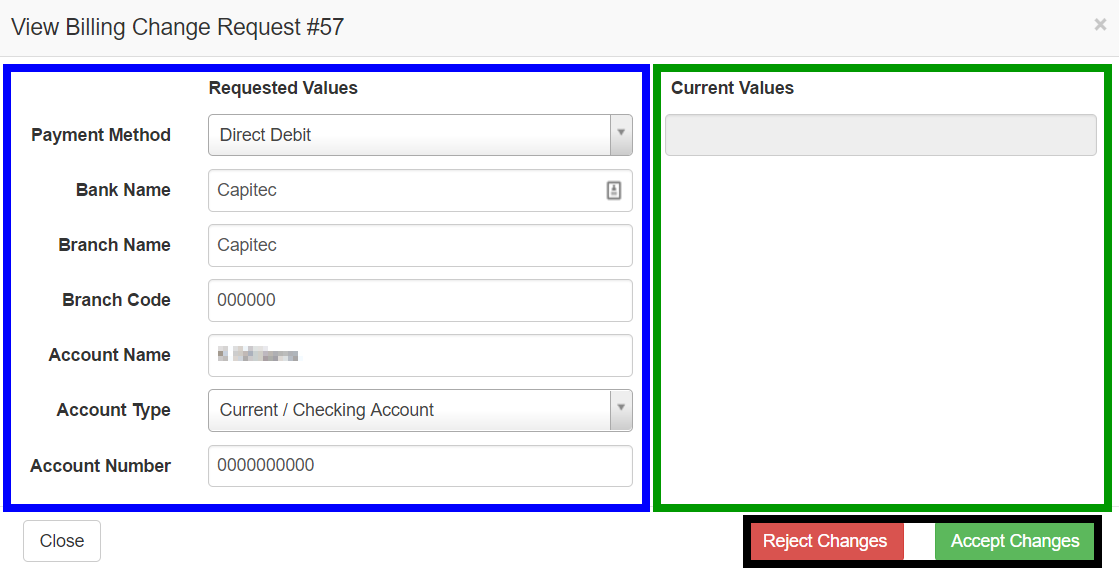
5.5.1. Payment method updates:
After clicking on the view request button, a pop-up screen will appear showing you the changes that the customer wants to make versus what the information on his profile current is. If you are happy with the changes the customer want, click on accept changes. If you do not agree with these changes, click on reject changes.
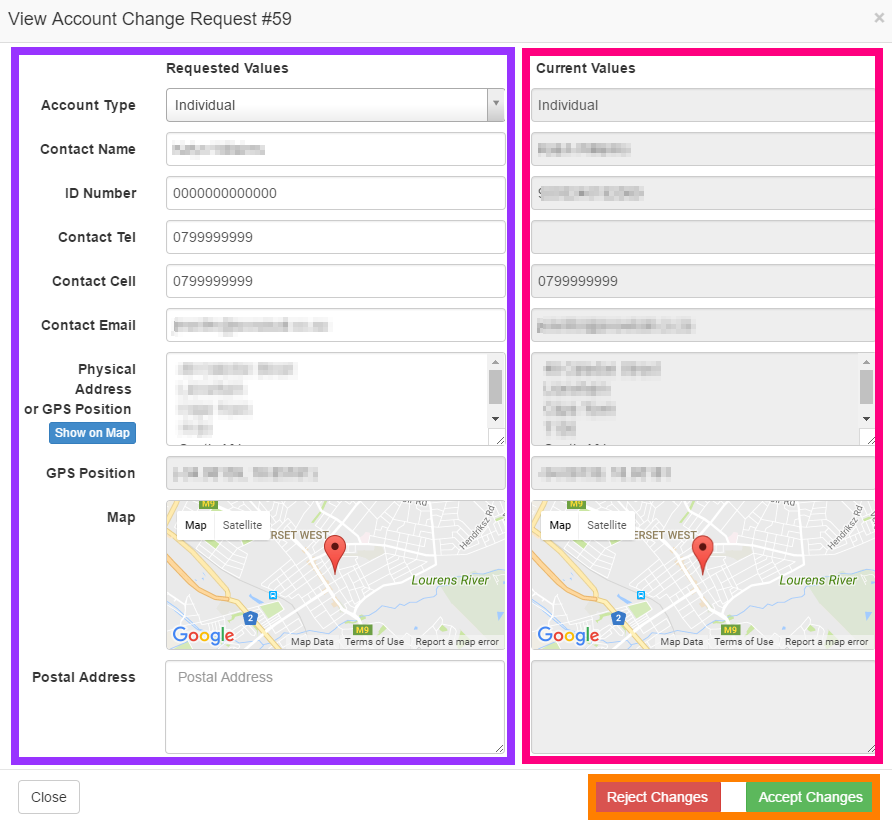
5.5.2. Account details update:
After clicking on the view request button, a pop-screen will appear showing you the changes that the customer wants as well as the information that is currently on his profile. Through the online portal the customer is also able to request that a company changes to an individual customer or that an individual customer’s profile becomes a company profile.
If you are happy with the changes the customer want, click on accept changes. If you do not agree with these changes, click on reject changes.
After you have either accepted or rejected the changes, the line item will no longer be seen here. To see all customer change requests, go to customer drop down menu and then look for the heading “Customer Requested Changes”.