
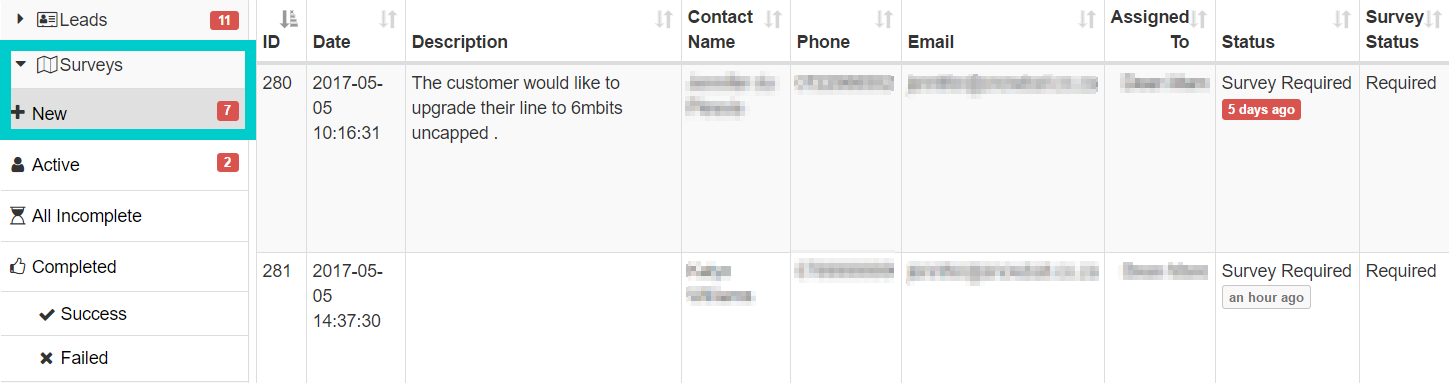
3. Surveys:
This phase of the workflow is controlled by the coordination team and the technicians who need to do the job.
3.1.New Surveys:
These are all sales leads that need site surveys done. Once the sales agent has submitted the lead for a site survey, it will be moved to “Survey” – “New”. It will automatically be assigned to a default user as set up in the sales setting. The default user will usually be the person coordinating and scheduling the field installations.
3.2. Scheduling Surveys:
To schedule Site Surveys, click on the green “Site Survey’ button found on the right-hand side of the screen. A screen will now pop-up which will allow you to schedule the event as well as update the address if need be.
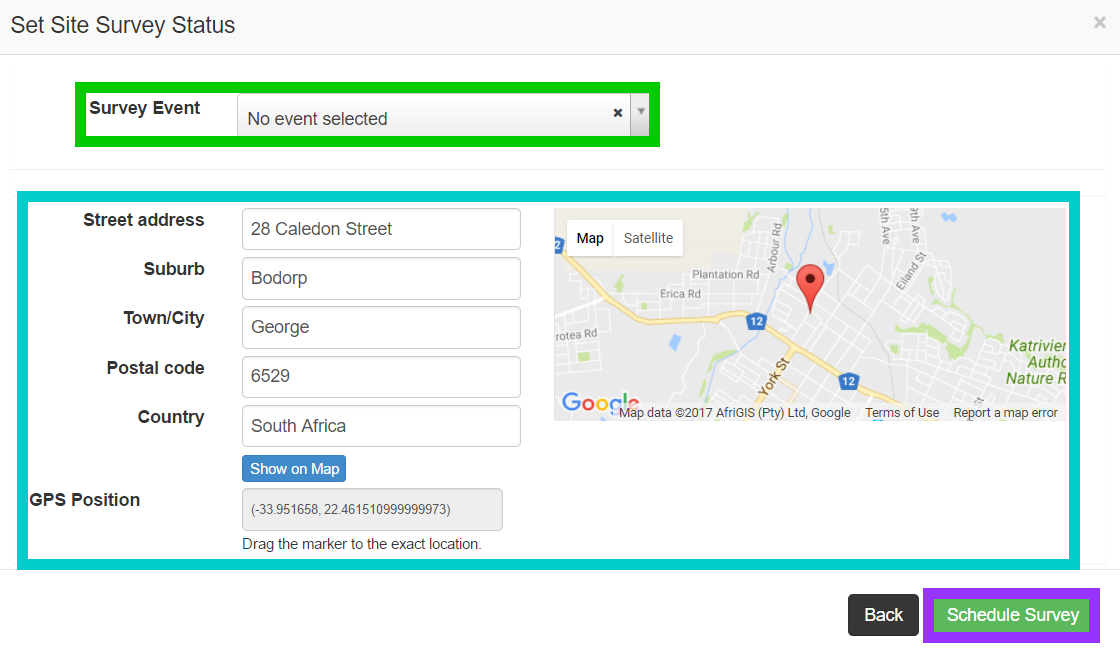
 |
Step 1:
To schedule an event, click on the drop-down menu found next to Survey Event. Once you can view the calendar, click on the day that you want to schedule the event on. |
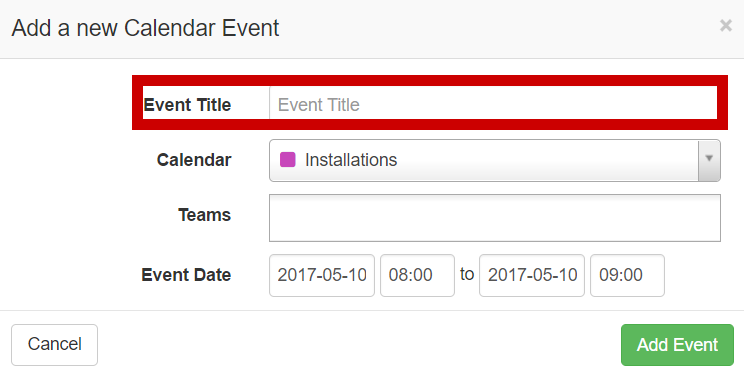 |
Step 2:
Type in the event title. Please keep this relevant to the event being scheduled for example Miss Williams – Site Survey. |
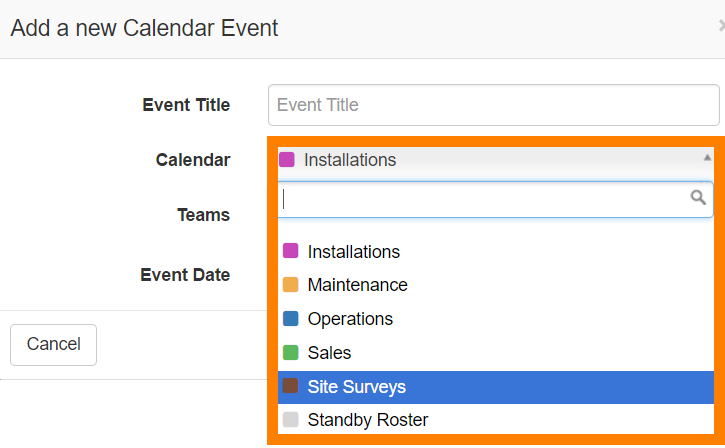 |
Step 3:
Next, is choosing on which calendar you want to schedule the event. Click on the drop-down menu and then choose the relevant calendar for example: Site Surveys. |
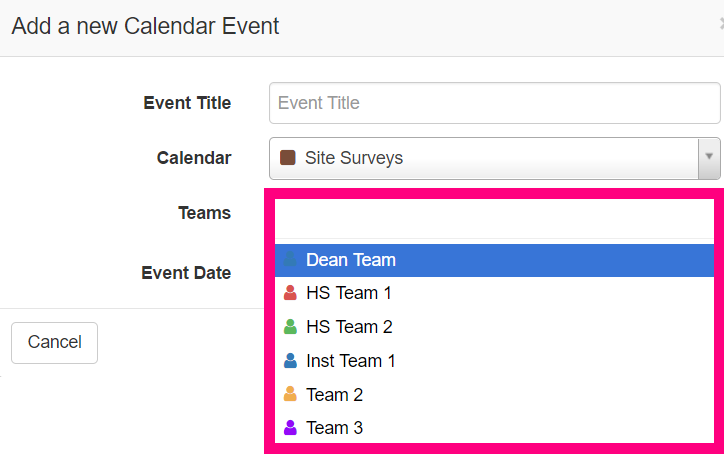 |
Step 4:
The next step requires you to allocate the even to a team. Click on the drop-down list next to Teams and select the team that you want to schedule for the event. |
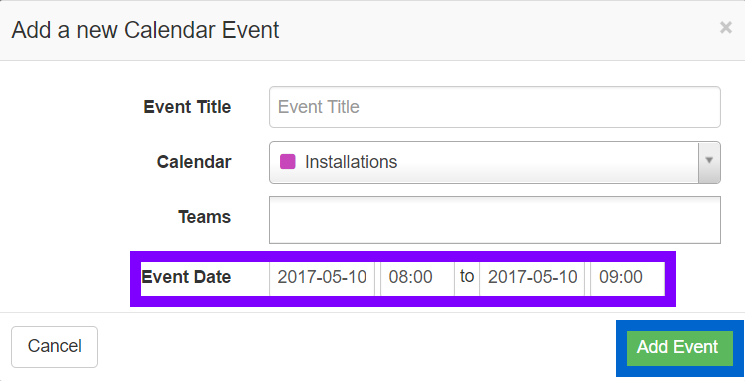 |
Step 5:
Ensure that you schedule the event on the correct date and time.
When all the required fields have been filled in, click on the “Add Event” button. |
|
|
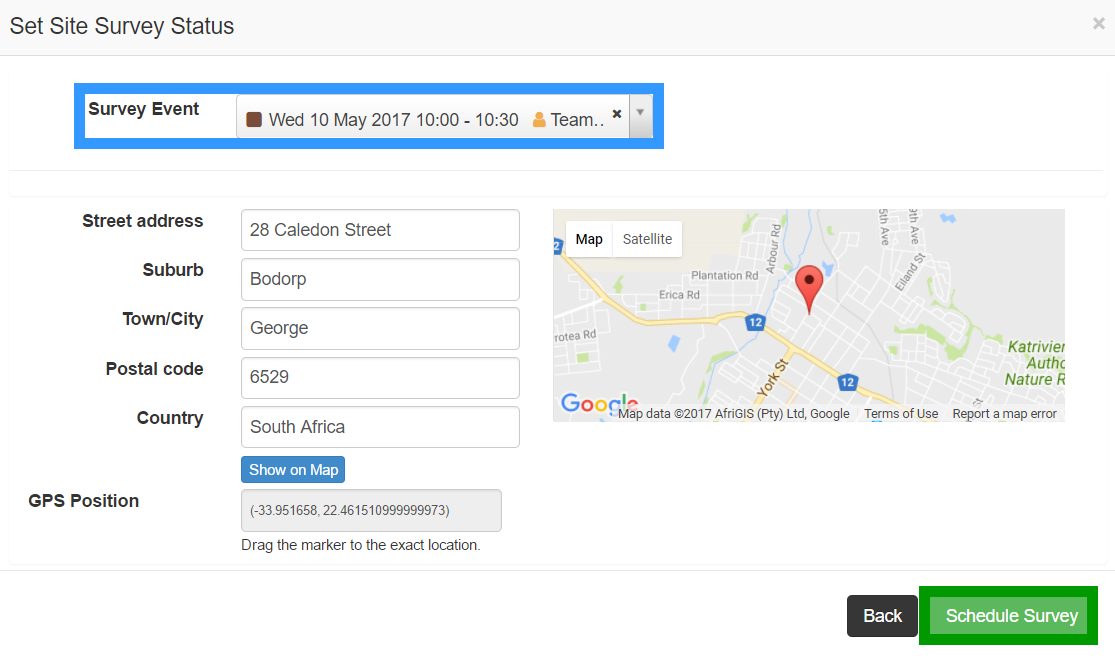
Step 6:
In the blue section, you can see the date, time and team that has been assigned to the event. If you are happy with this, click on the Schedule Survey button. |
3.3. Active Surveys:
These are the current surveys scheduled on the calendar which indicates all the site surveys to be completed by the field staff.
3.4. Completing Surveys:
To complete a site survey, click on the green Site survey button found on the right-hand side of the screen of the lead profile you are working on.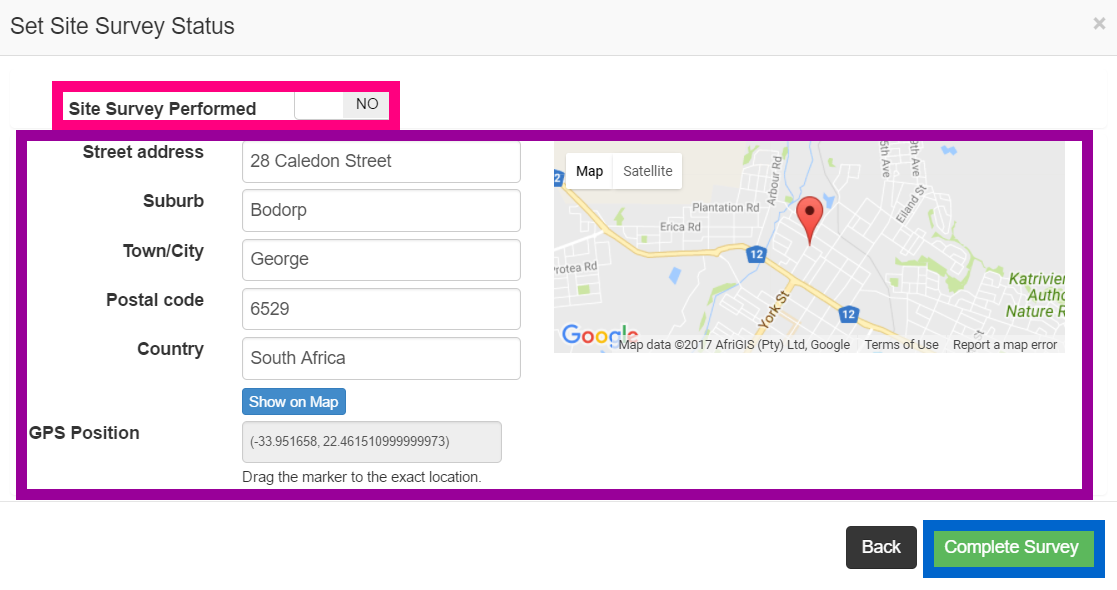
| Pink: | Choose whether the site survey has been performed or not. |
| Purple: | Check that the address on the survey is correct. |
| Blue: | Once all details have been filled in, click on the “Complete Survey” button. The survey will not move onto the next phase of the workflow if it has not been completed. |
3.4.1. Successful surveys:

| Purple: | Make sure that you choose yes in order to complete the survey. If you choose “No” and click on the “Complete Survey” button, then the lead will continue to be under “Active” leads as it has not yet been completed. |
| Dark Blue: | Choose whether it was a success or a failure. For this example:, the site survey was a success. |
| Light Blue: | The field technician should add comments here: This is a compulsory field. For example:
– The site survey was successful and I foresee no problems with the installation. – High site a bit too far, will need a stronger dish for a successful installation. – There are trees that might become an issue if they are not regularly trimmed. |
| Green: | Click on the drop-down menu and then choose the high site that the customer will be connected to. |
| Yellow: | This section is greyed out because it pulls high site related information from the system and displays it here: For example:
– High Site has reached maximum capacity. |
3.4.2. Failed Surveys:
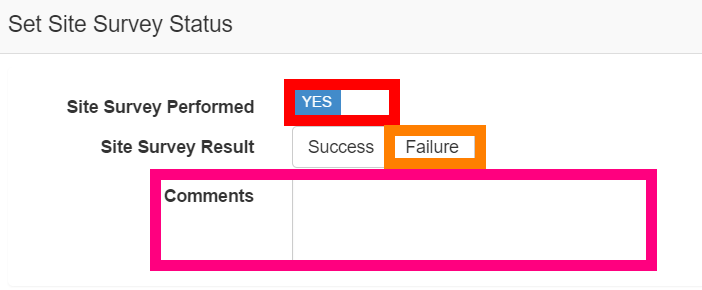
| Red: | Make sure that you choose yes in order to complete the survey. If you choose “No” and click on the “Complete Survey” button, the lead will stay “Active” as it has not yet been completed. |
| Orange: | Choose whether it was a success or a failure. |
| Pink: | The field technician should add comments here. This is a compulsory field that needs to be completed. For example:
– Electric cables are in the way. – The customer has no Line of Site. |
3.5.What happens once the survey has been completed?
3.5.1. Successful surveys:
Leads that have been marked as successful will move to the quotes phase of the workflow. The sales agent can now accurately quote the customer without any surprise costs. The lead will automatically be re-assigned to the original lead owner when it moves to the quotes phase of the workflow.
3.5.2. Failed Surveys:
In cases where the site survey was a failure, the lead will be closed. If at a later stage you need to view any of the details on this lead, you can find it under Surveys – Failed. Once the survey has been marked as a failure, you will not be able to move it back to successful surveys.