This guide explains how setup the monitoring on HeroTill, configure the Pi, we will discuss what hardware is supported, and discuss the hardware itself and how to install it.
Custom image download link
Custom image to sync to HeroTill on your Raspberry Pi: systemsfiles.com/raspberry-pi/custom-raspberrypi-3-and-lower.img
Navigating Raspberry Pi devices on your HeroTill
Raspberry Pi
Go to Devices->RaspberryPi Devices

RaspberryPi Fields
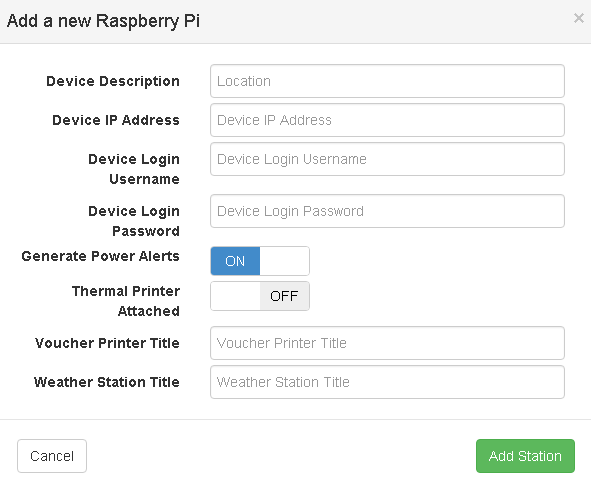
Device Description
Device Address
Device Login Username
Device Login Password
Generate Power Alerts (ON/OFF)
Thermal Printer Attached (ON/OFF)
This is used for printing hotspot vouchers
Voucher Printer Title
This is not a compulsory field.
Weather Station Title
This is not a compulsory field.
Operations
Go to Devices->RaspberryPi Devices -> Click on Edit
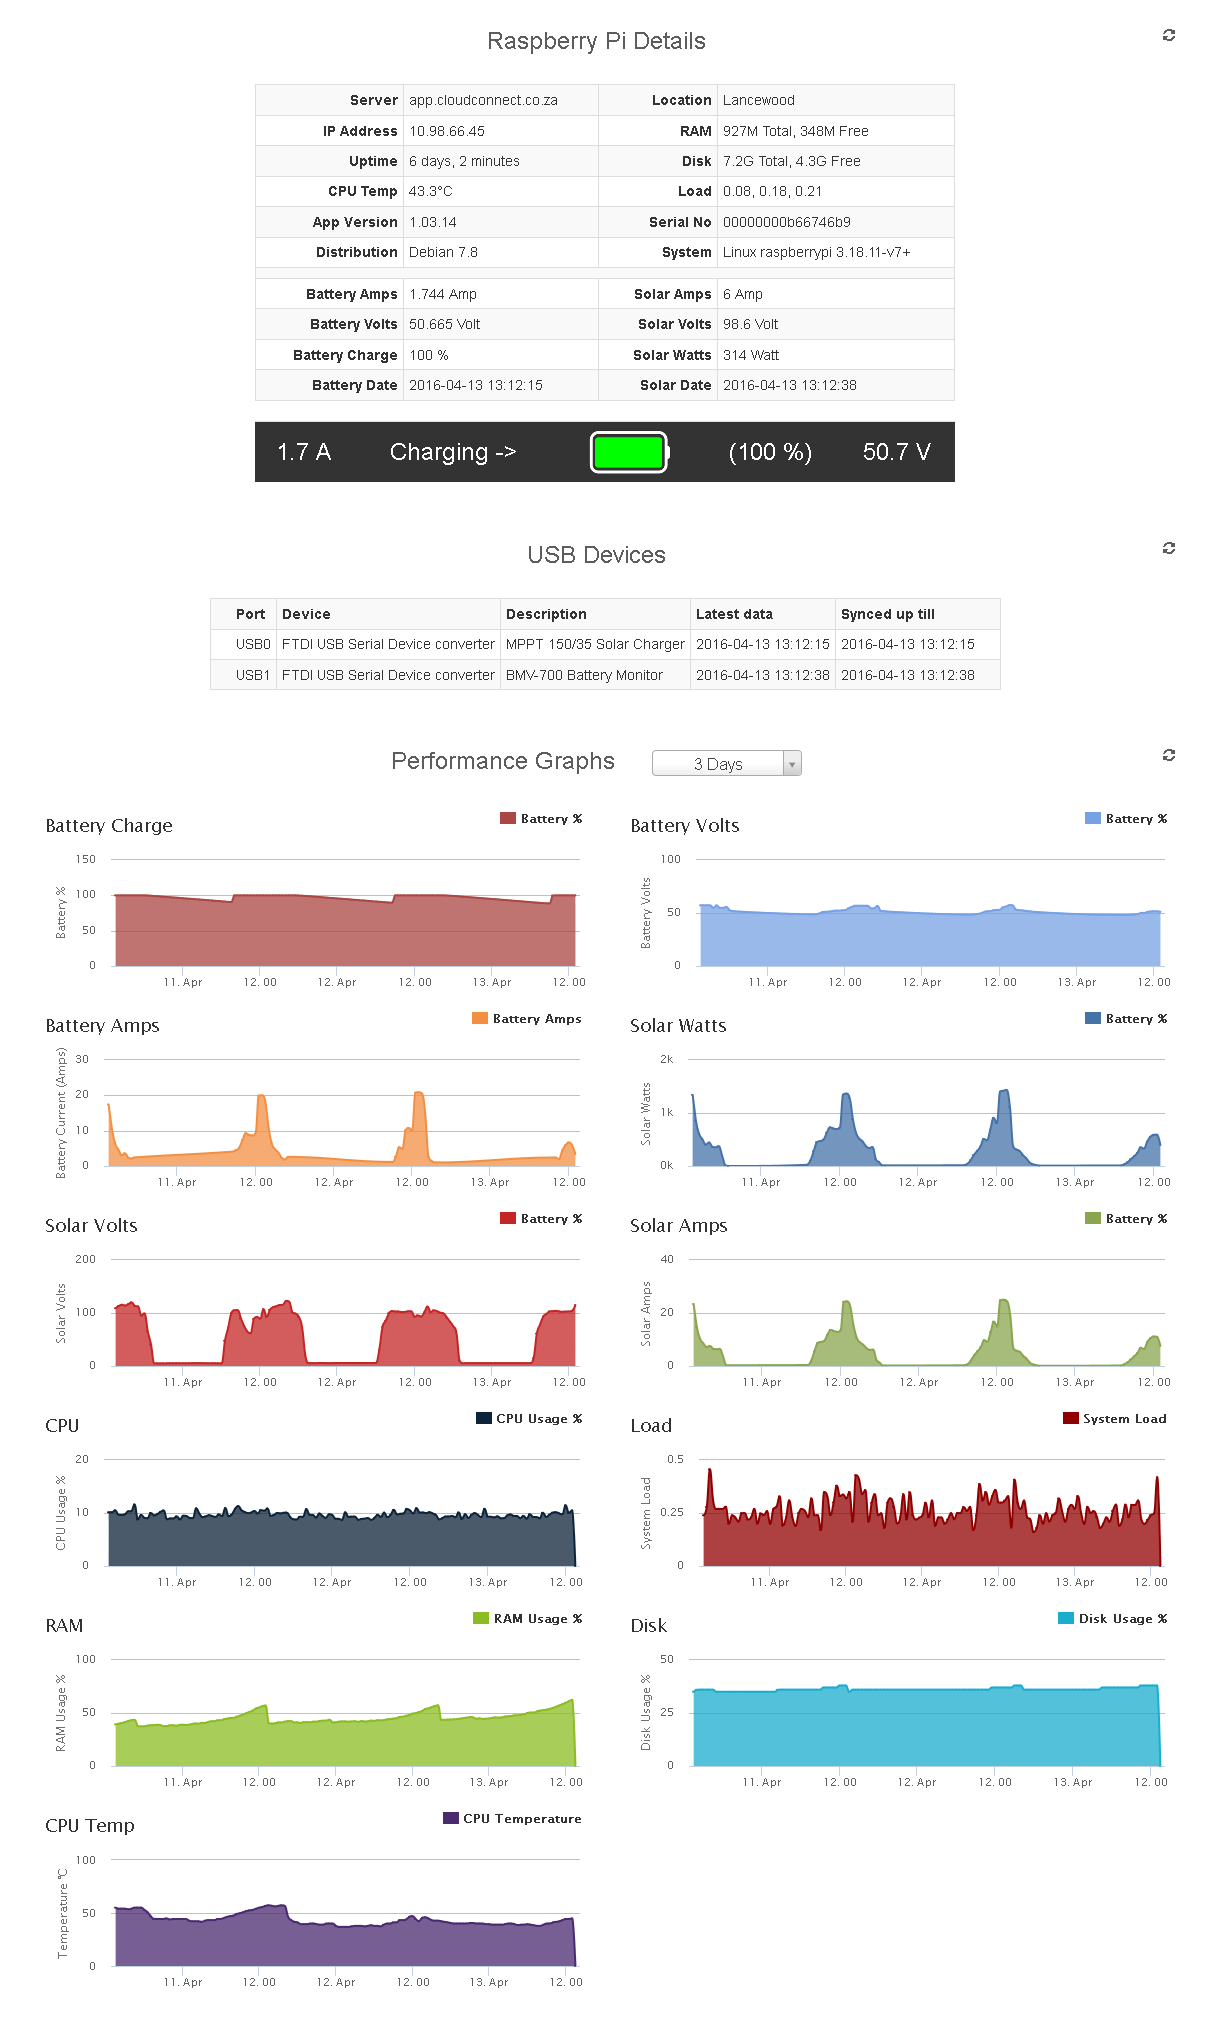
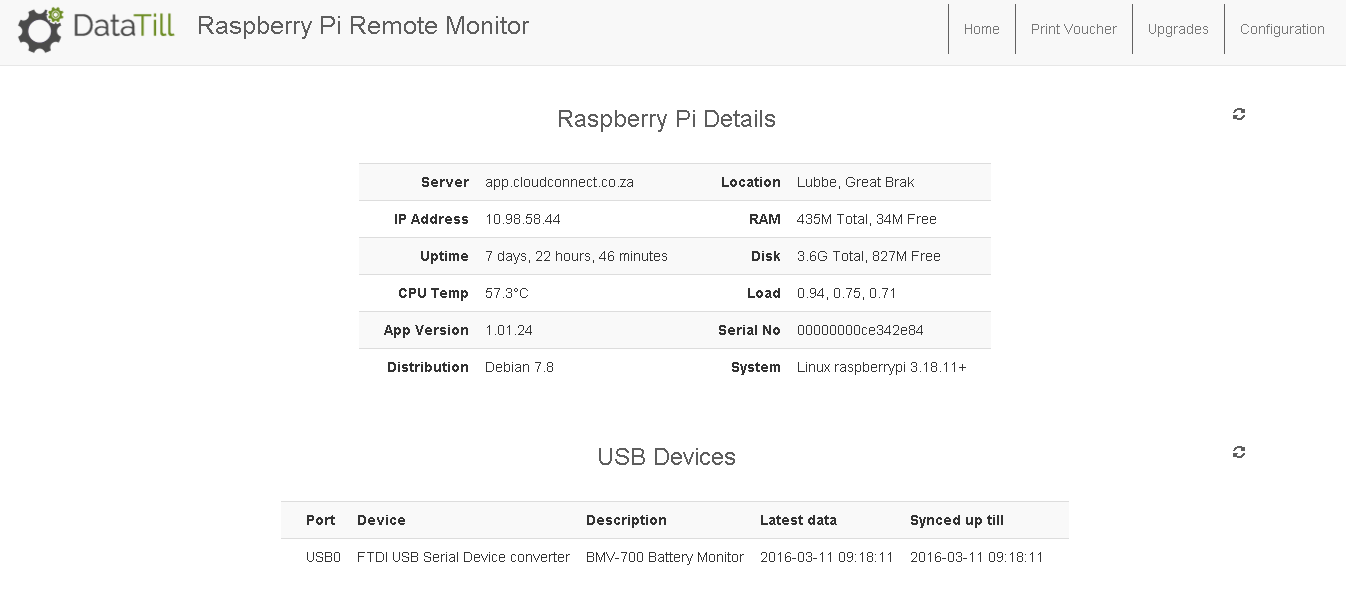
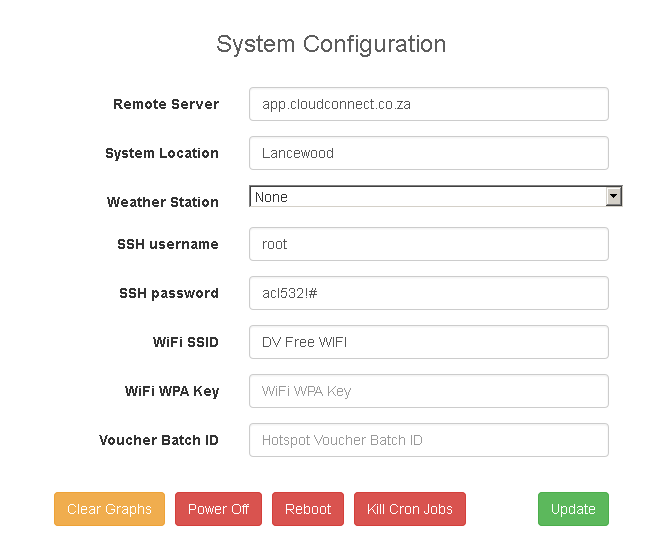
Go to Devices->RaspberryPi Devices -> Click on “Show RaspberryPi Information”
This will load the Pi’s webpage:
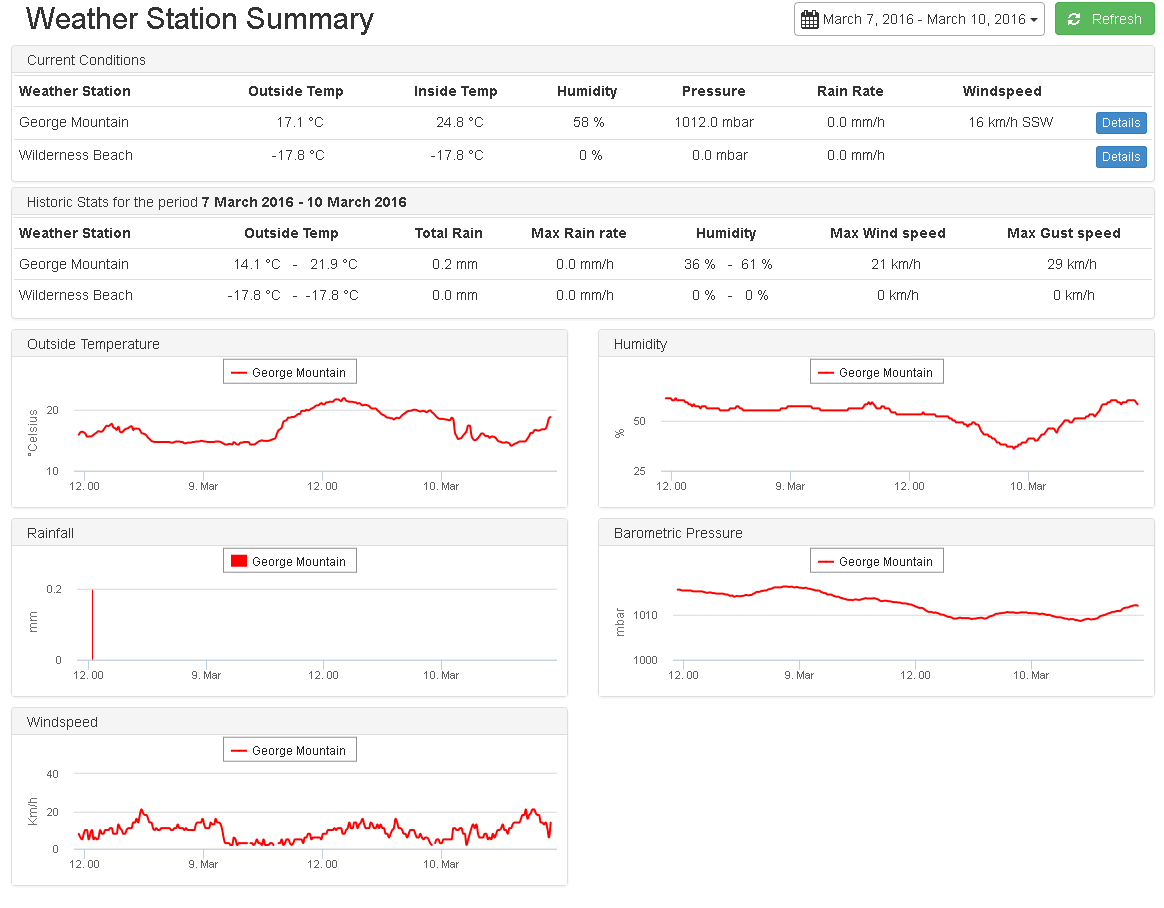
RaspberryPi Weather Summary
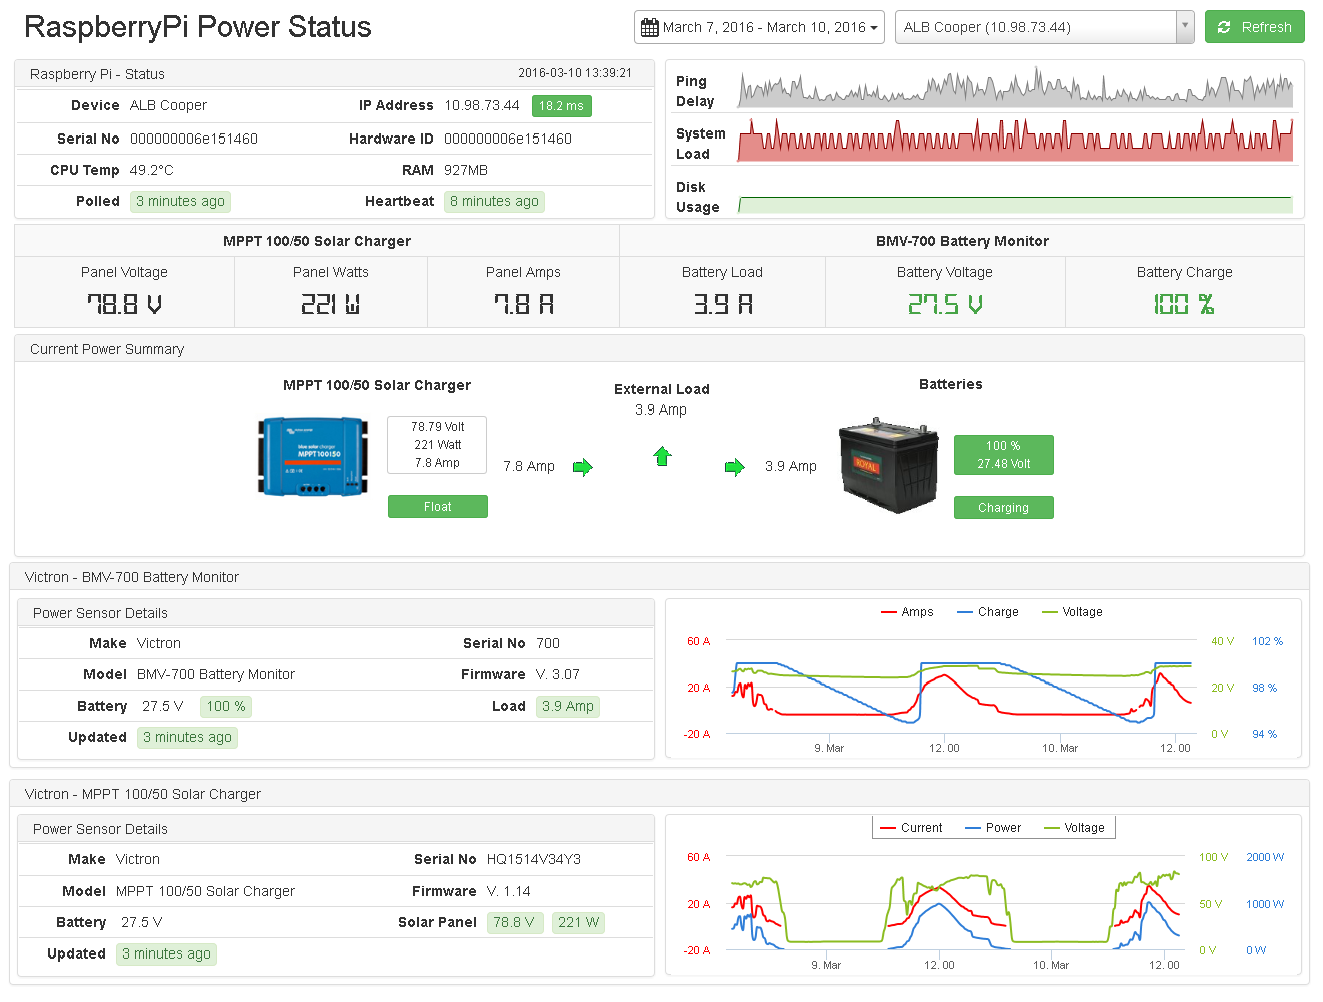
Raspberry Pi Power Summary
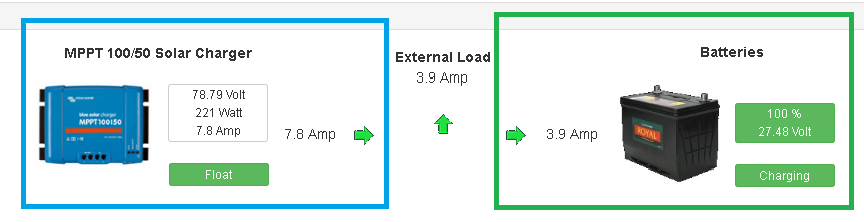
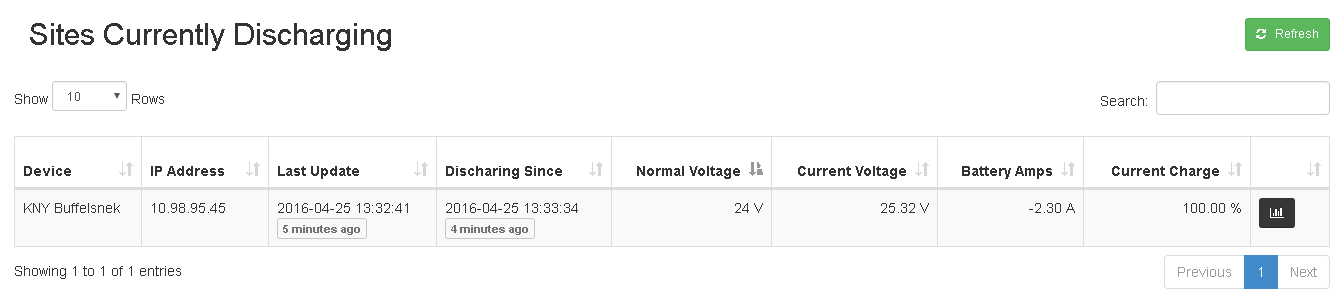
Sites discharging
In order to monitor the battery level of your battery in HeroTill, you will need a RaspberryPi, a Victron Battery Monitor and a Victron VE.Direct cable to connect the two.
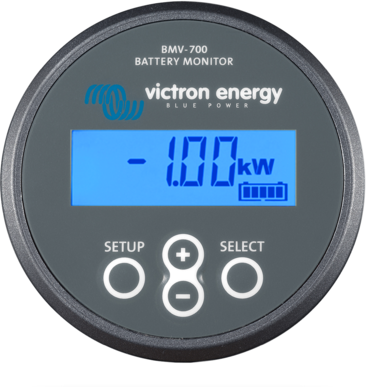
Getting started with the Victron Battery Monitor.
The Victron battery monitor can be found here
https://www.victronenergy.com/battery-monitors/bmv-700
here are some victron documents on the monitor.
https://www.victronenergy.com/upload/documents/Datasheet-BMV-700-series-EN.pdf
https://www.victronenergy.com/upload/documents/Quickinstallsheet_BMV70x_part1_2.pdf
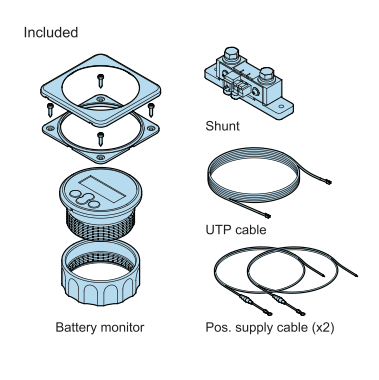
The BMV-700 comes included with everything you need to setup the battery monitor, but you will need to buy the Victron VE.Direct cable to connect the Monitor to the Raspberry Pi
| Victron VE.Direct Cable
|
This a diagram depicting what comes in the Victron BMV Kit
|

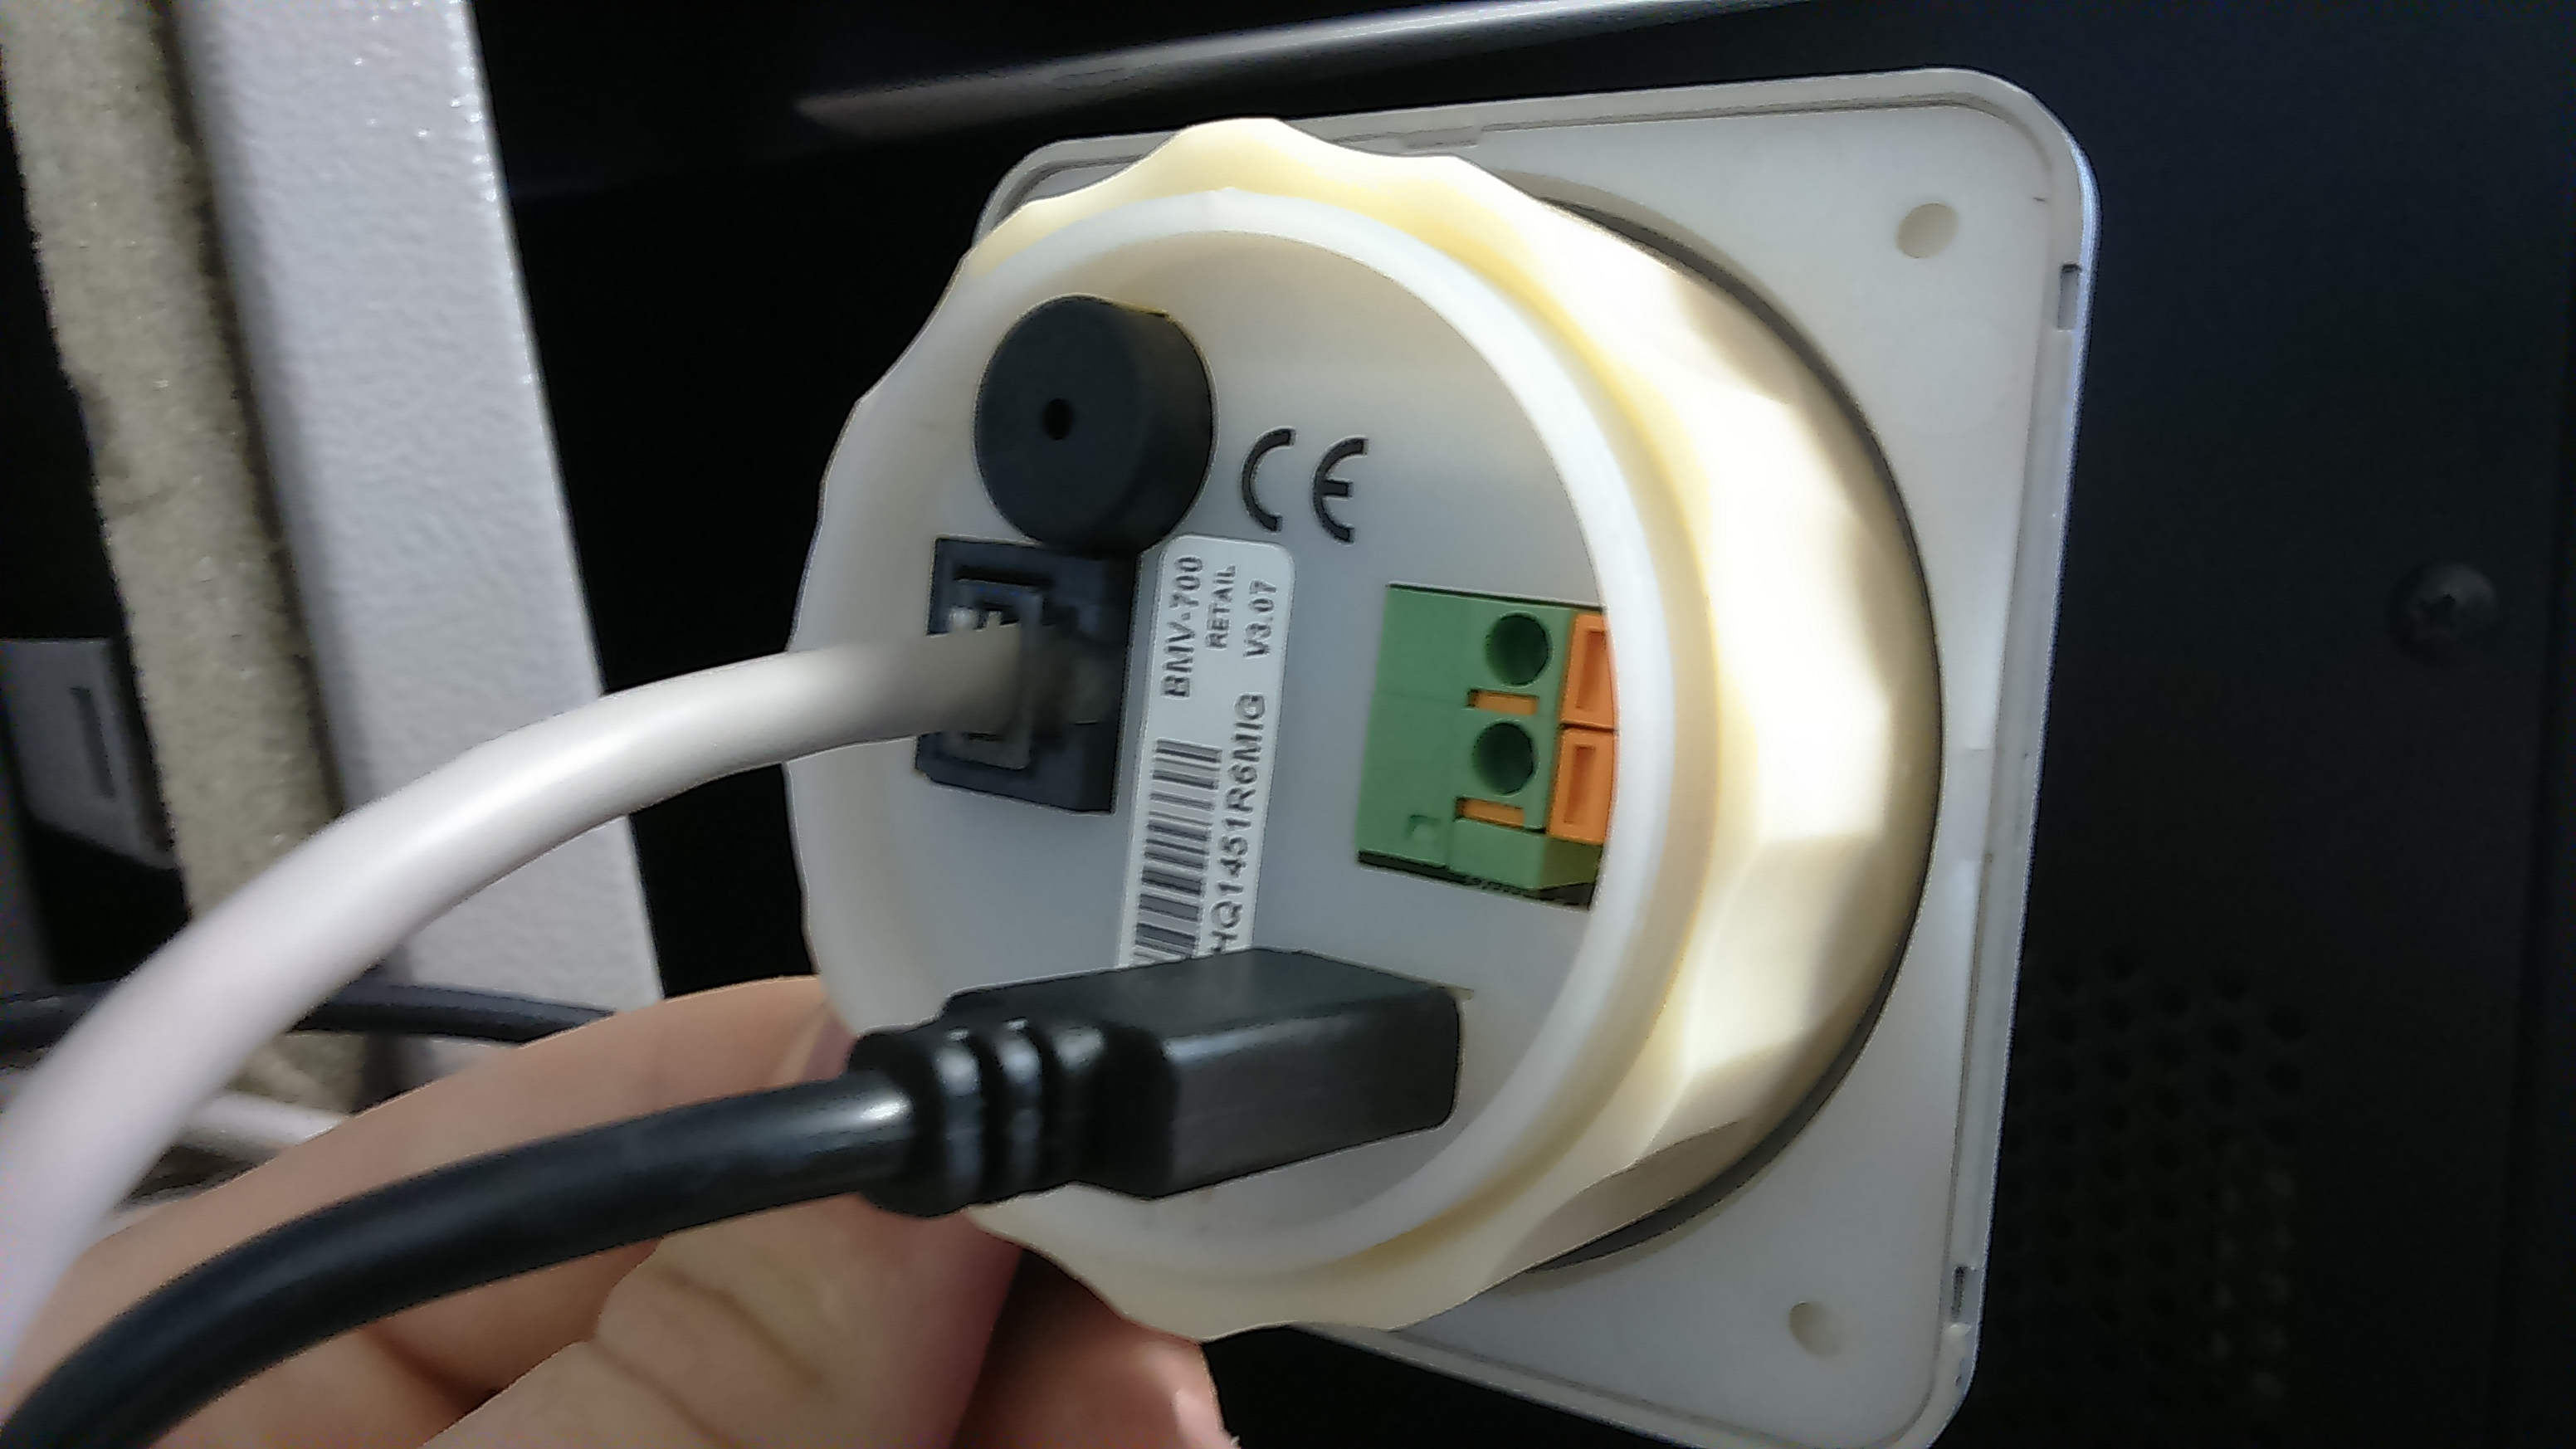
Here is a diagram depiction the connection of a BMV-700. Note the VE.Direct port.
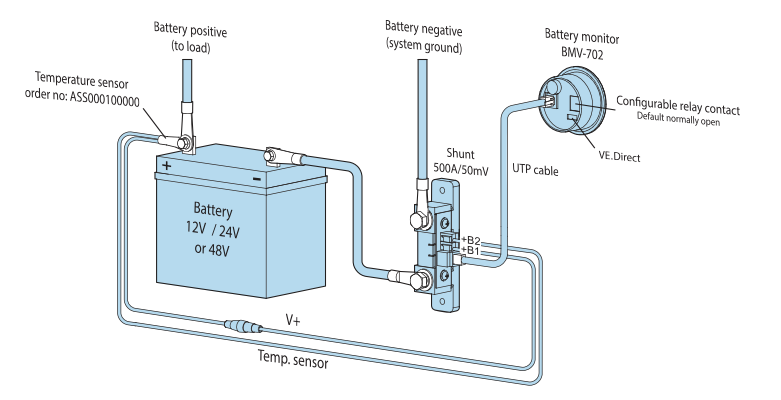
The back of the BMV battery monitor. The black cable is the VE.Direct cable
Getting started with a Victron Solar Charger.
The solar chargers below are supported.
all the 100v and 150 v solar chargers like the one below are supported.
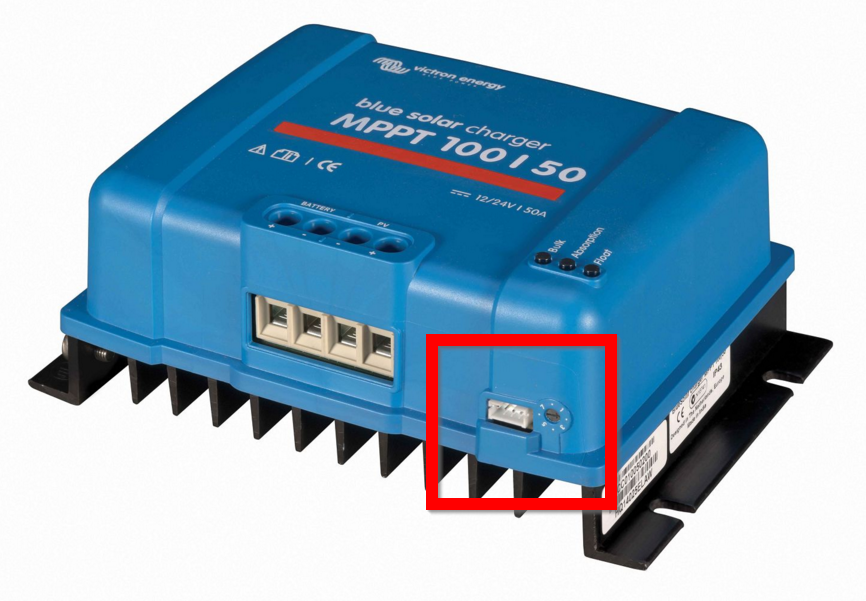
The Victron solar charger needs to be connected to a RaspberryPi Using a VE.Direct cable. The Solar charger does not give any information about how charged the battery’s are. Therefore the Solar charger monitoring needs to be done in conjuction with a battery monitor.


Below the VE.Direct port has been circled. If your Victron device has this port then it should be supported: