
1. How to access your List of Customers on HeroTill
Video: Customer Overview
Webinar: Introduction to HeroTill for new users
To find a list of your customers, you will need to go to “Customers” and then click on the “List Customers” option.
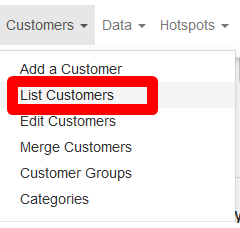
Your next screen will consist of a list of all your customers. Here you can search for the customer and open his or her profile.
1.1. Viewing additional information
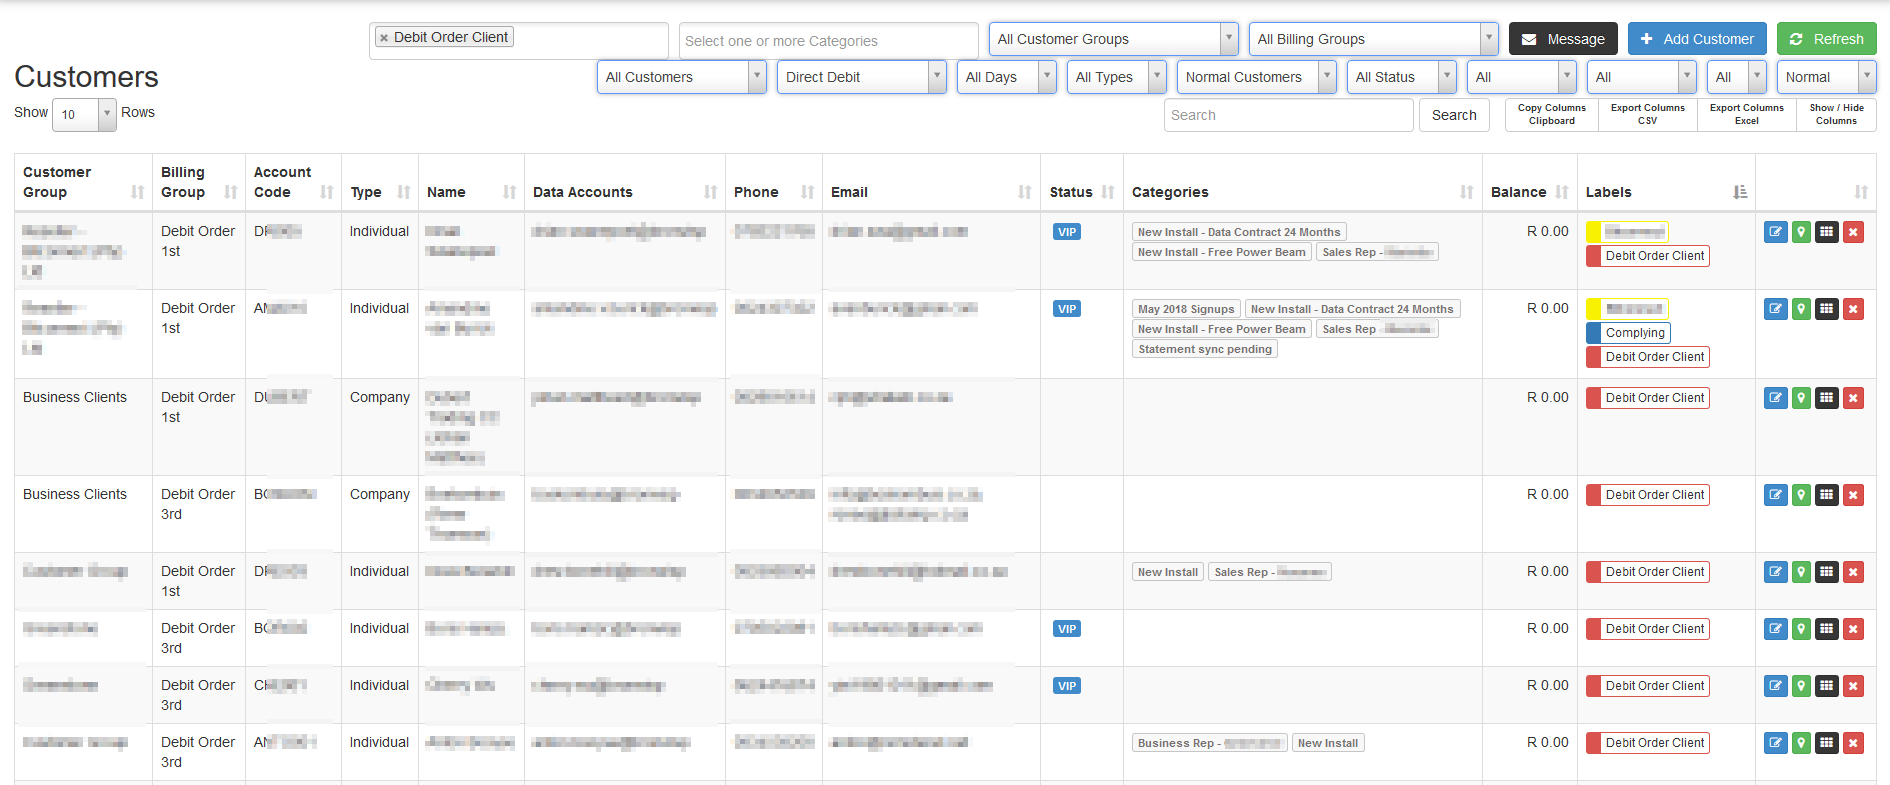
If you are looking for specific details on the customer list – like the customer’s physical address or payment method – you can add it to the list by clicking on the “Show / Hide Columns” button. A drop-down menu will appear and here you can choose additional fields to add or fields that you want to remove. All the options in blue, are options that you can currently view on your customer list. To add or remove an option, just click on it.

* Should you leave the customer list and open it again later, you will see that the list has reverted back to the normal columns. Should you wish to see the extra fields again, you will have to choose them again in the “Show / Hide” option.
1.2. Filter functions
* If you are looking for a searching for a specific customer but can’t find them, please check to see if you have removed all filter functions before logging a query with support.
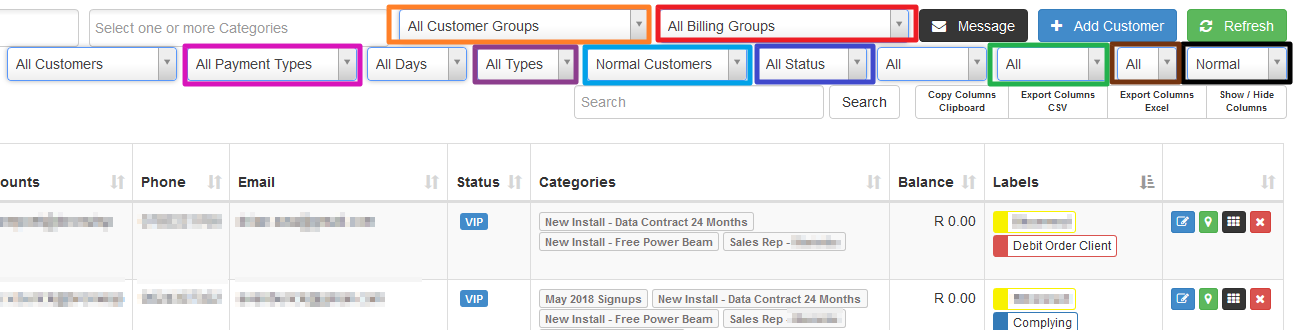
| Customer Groups: | Select an option here if you only want to see customers in certain groups, for example, certain estates, contractors, High sites, No LOS Customers and so forth. |
| Billing Groups: | This is used as an in-house monitoring system for processing debit orders. |
| Payment Types: | Here you can view all customers that pay via Direct Debit (Debit Order), EFT, Credit Card or Cash. |
| Company / Individual: | You can choose whether you only want to view individual customers or if you only want to view companies. |
| Normal / Prepaid Customers: | Some WISPS have customers that work on a pre-paid concept similar to Vodacom or MTN airtime. |
Verified / Not Verified: |
During the migration process, this can be used to mark customers whose details, radius account and billing have been checked. This is only necessary if you plan to check each customer individually. |
| All / Suspended Customers: | Here you can choose to view all customers or if you want to follow up on debt collection customers, you can choose to only see a list of all suspended customers. |
| All / VIP Customers: | To view a list of all customers marked as VIP, you can use this drop-down menu. VIP customers are usually high paying customers. |
Normal / Deleted Accounts: |
During the migration process, human error combined with a new system tends to cause confusion and small errors like duplicated accounts. This will be the only time your financial manager is allowed to delete an account. |