
HeroTill IP Pools Guide
Introduction
Radius IP Pools can be added on HeroTill and no longer has to be set up on NAS’s. This means that IP Pools only has to be set up once and HeroTill will recognize it globally instead of configuring it one by one on your NAS’s. IP Pools that has been set up on NAS’s will still be used by freeradius, if the NAS exists in HeroTill’s NAS List.
Important: Note that fixed IP’s will always get precedence over an IP pool. Realms take precedence over the IP Pool. If the pool has not been defined on HeroTill or the Highsite but has been defined on the Data Package it will have to be defined on either a HeroTill IP Pool or Highsite IP Pool. Otherwise the user will not authenticate.
1. Adding a new IP Pool
- Go to Devices -> IP Pools -> IP Pools.
- Click on Add IP Pool.
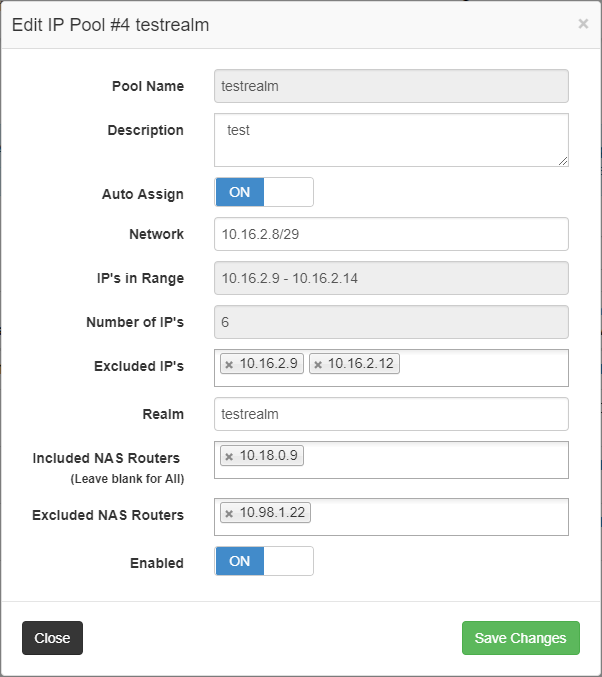
Field Descriptions:
- Pool Name:
- This will be the name you will use to assign the pool on a Data Package.
- Description:
- Here you can add a description about the IP Pool if needed for special case.
- Auto Assign:
- If Auto Assign is switched on then it will automatically allocate IP’s to the users from the IP range. If the filter conditions are met (realm, included, excluded NAS routers).
- Network:
- This will be the IP subnet range that you wish to use (example: 10.16.2.8/29).
- IP’s in Range:
- This will display the range of IP’s within the subnet (example: 10.16.2.9 – 10.16.2.14).
- Excluded IP’s:
- Here you can select or deselect any of the IP’s within the range to exclude from the pool if you don’t want them to be allocated to a user (For example highsite devices like camera monitors, power monitors etc).
- Realm:
- The radius users will be allocated an IP from this pool using this realm in their username. For example, the user will authenticate using: user@testrealm (username). The user will then be allocated an IP within this IP pool regardless if it has been set up on the Data Package.
- Included NAS Routers:
- This is a filter to specify that the IP Pools will only work for users on the selected NAS Router or Routers.
- Excluded NAS Routers:
- This is a filter to specify that the IP Pools will not work for users on the selceted NAS Router or Routers.
- Enabled:
- This is to specify whether or not the IP Pool is in use.
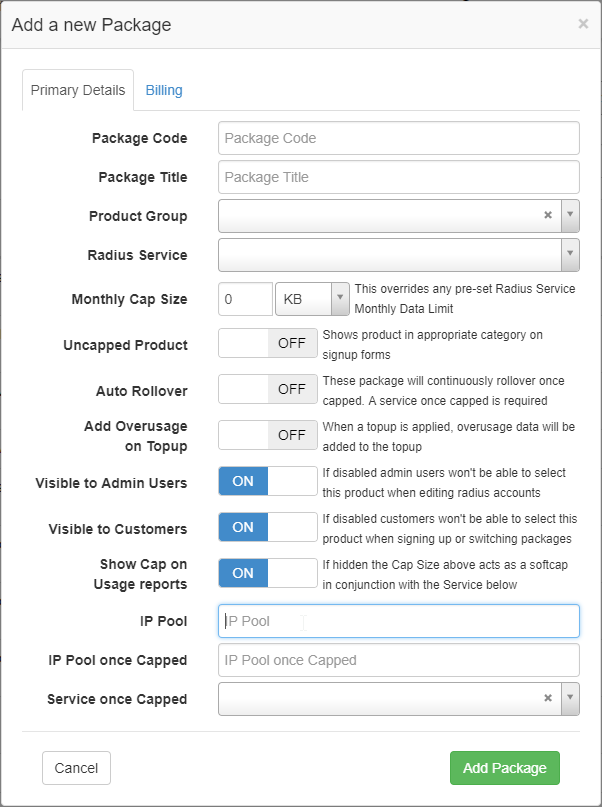
2. Assigning an IP Pool to a Data Package
- Go to Radius -> Data Packages
- Edit or Add a Data Package
- Add in the necessary settings for the Data Package or leave as is if the Data Package already exists.
- In the IP Pool field add in the name of the Radius IP Pool that you have added on HeroTill.
- Click Save Changes or Add Package.
- Note that it will still pick up IP pools that you have set up on your highsite routers. But it should have the correct name. You can still use the IP Pool names that has been set up on the Highsite routers but if the IP Pool does not exist on either the Highsite router or HeroTill the user will not authenticate.
- HeroTill will now use the IP Pool for all users on the Data Package it was defined on, as long as the filter conditions are met.
- The user can also authenticate using a realm (user@realm). If the realm has been defined on an IP pool on HeroTill. This will override the IP Pool defined on the Data Package.
3. View IP Allocations
- Go to Devices -> IP Pools -> IP Pool Allocations
- Here you will see a summary of which IP has been allocated, on which pool, which radius user etc.