
1. Introduction
Customer Overview: Customer Overview
This guide will give you an overview of all the different widgets found on the customer profile. The customer edit screen is a very busy screen with a lot of information on it. In essence, this will be one of the best screens from which can solve most of your customer queries.
The permissions allocated to you as an admin user will determine the information which you will be able to view or even edit on this screen. If there is information which you need, but are not able to view, please speak to your system administrator about your permissions.
2. How to get to your customer’s profile
To find the customer profile, you can either find your customer in your customer list or select the customer from the customer edit screen.
2.1. List customers
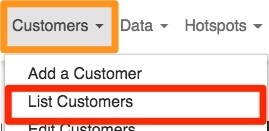
To find your customer list, go to “Customers” and then click on “List Customers”.
You will now see the following screen:
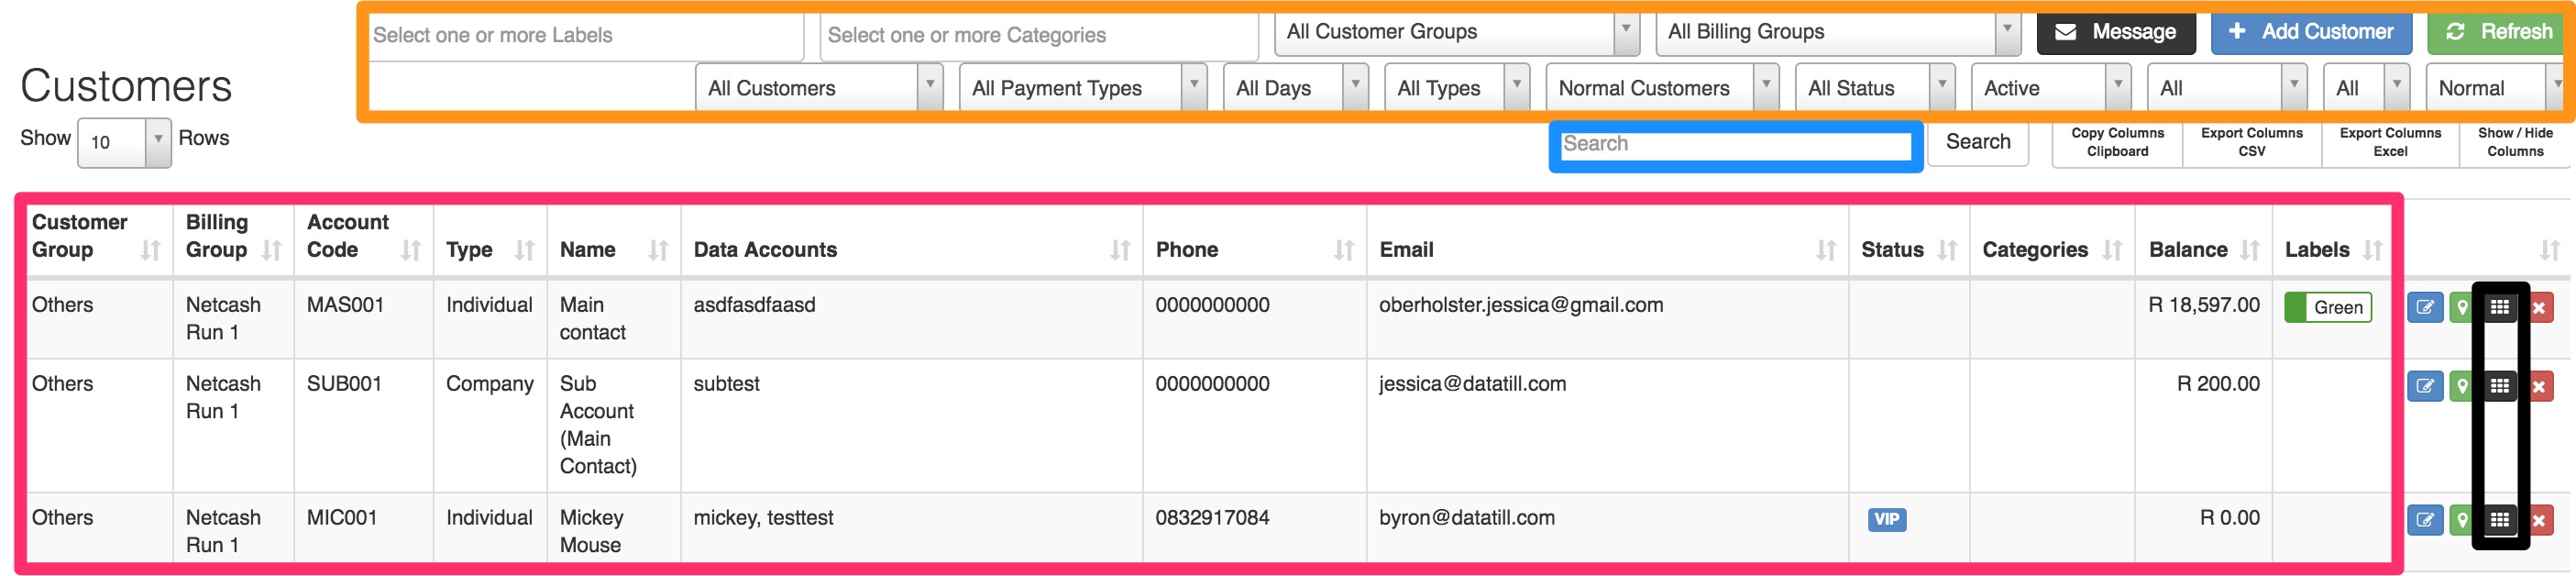
In the orange section, you will find different filters which will allow you to filter your customer list i.e. a list for all customer paying with credit card or all customers linked to a specific reseller. In the pink section, you can view your customer’s information. In the blue section, you can search for a specific customer. By clicking on the black button found on the right-hand side of the customer name, you will be able to go to the customer’s profile.
2.2. Customer Edit screen
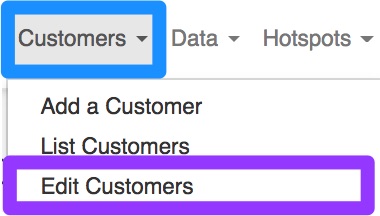
The other way to get to the customer profile is by going to “Customers” and then clicking on the “Edit Customers” option. You will then see the following blank page. In the right-hand side corner, click on the drop-down list and choose the specific customer whose profile you would like to view.
You will then see the following blank page:

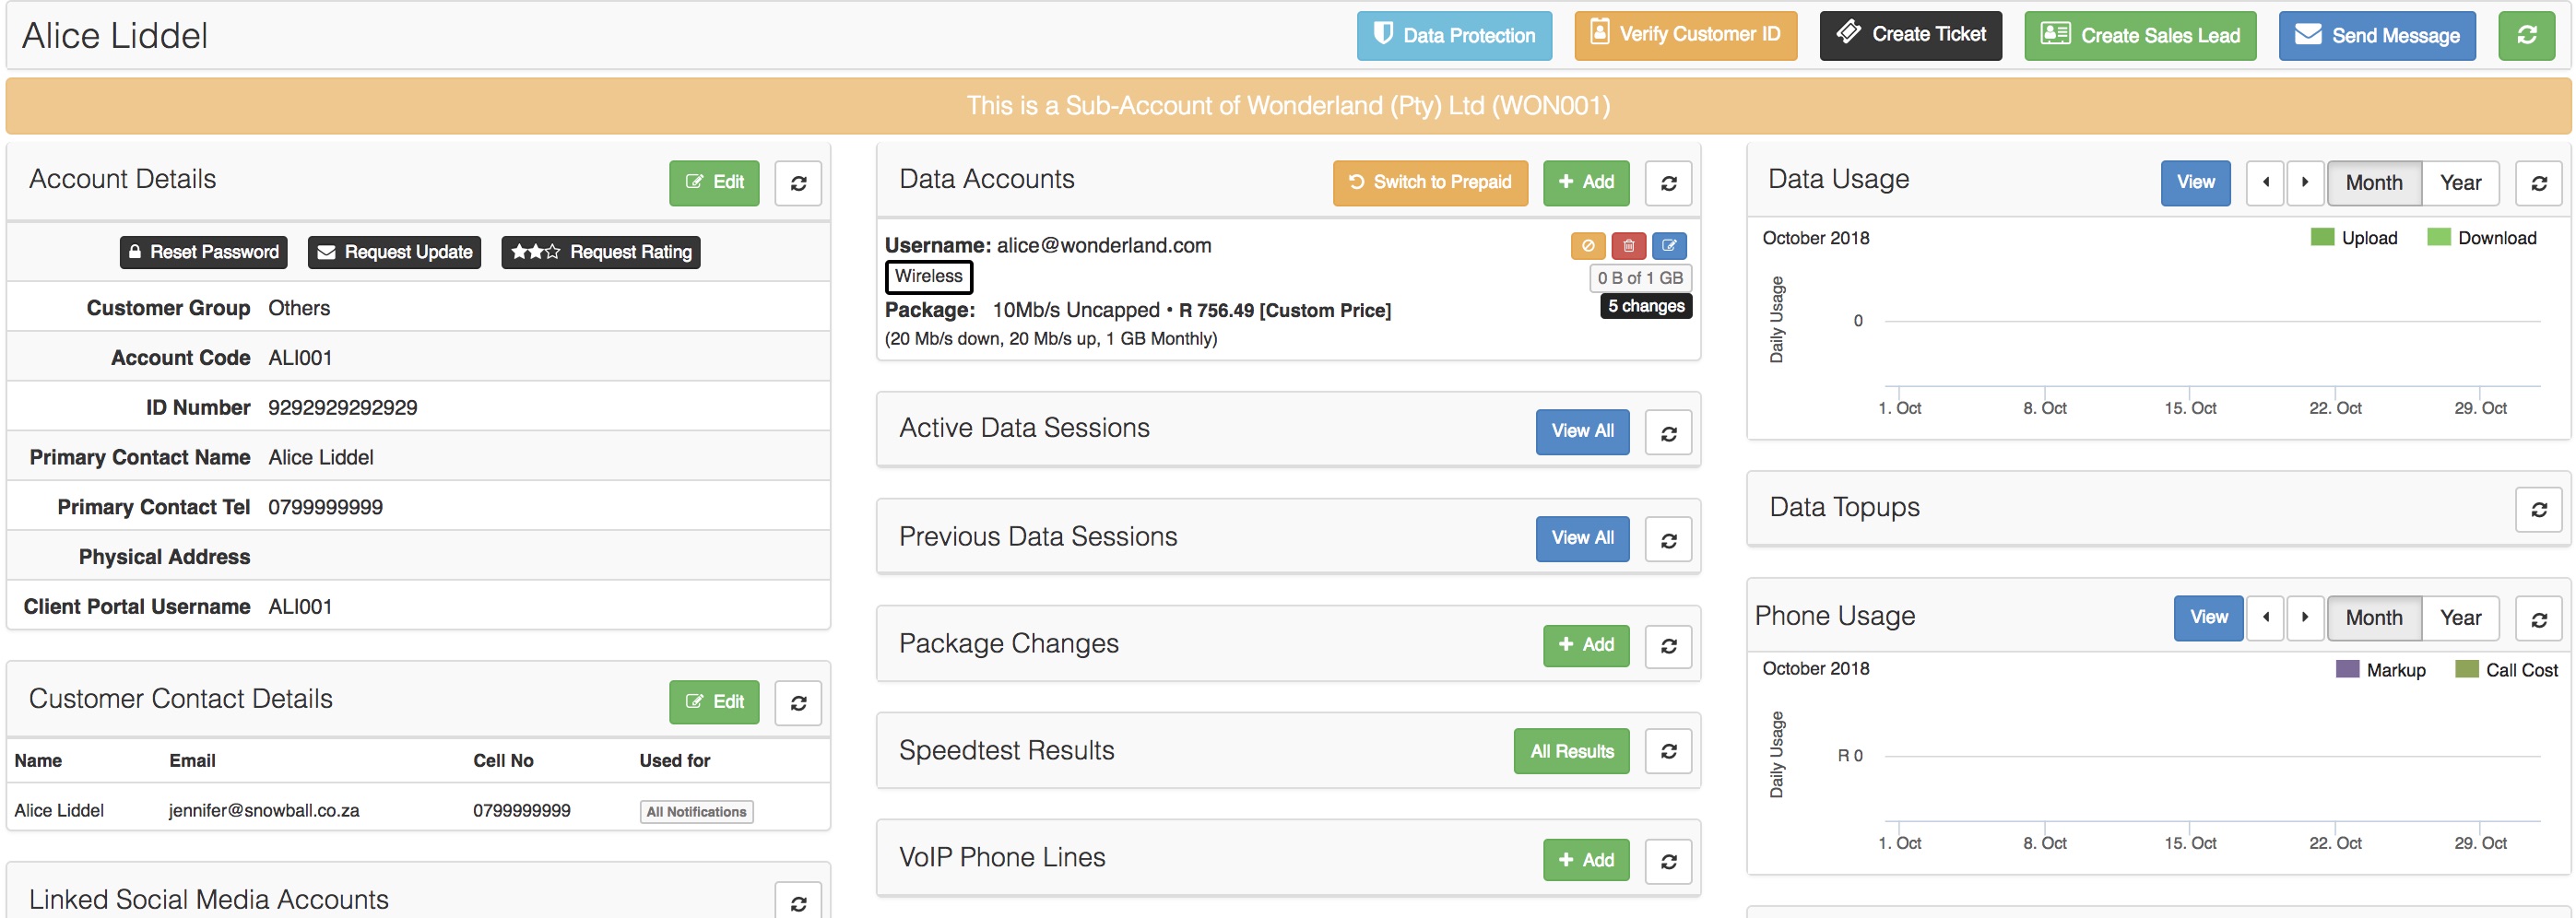
In the right-hand side corner, click on the drop-down list and choose the specific customer whose profile you would like to view. After the customer’s information has loaded, you will see a screen similar to the one below. Please remember that you might not be able to see some of the widgets due to your permissions.
3. Explaining the Customer Profile: Summary
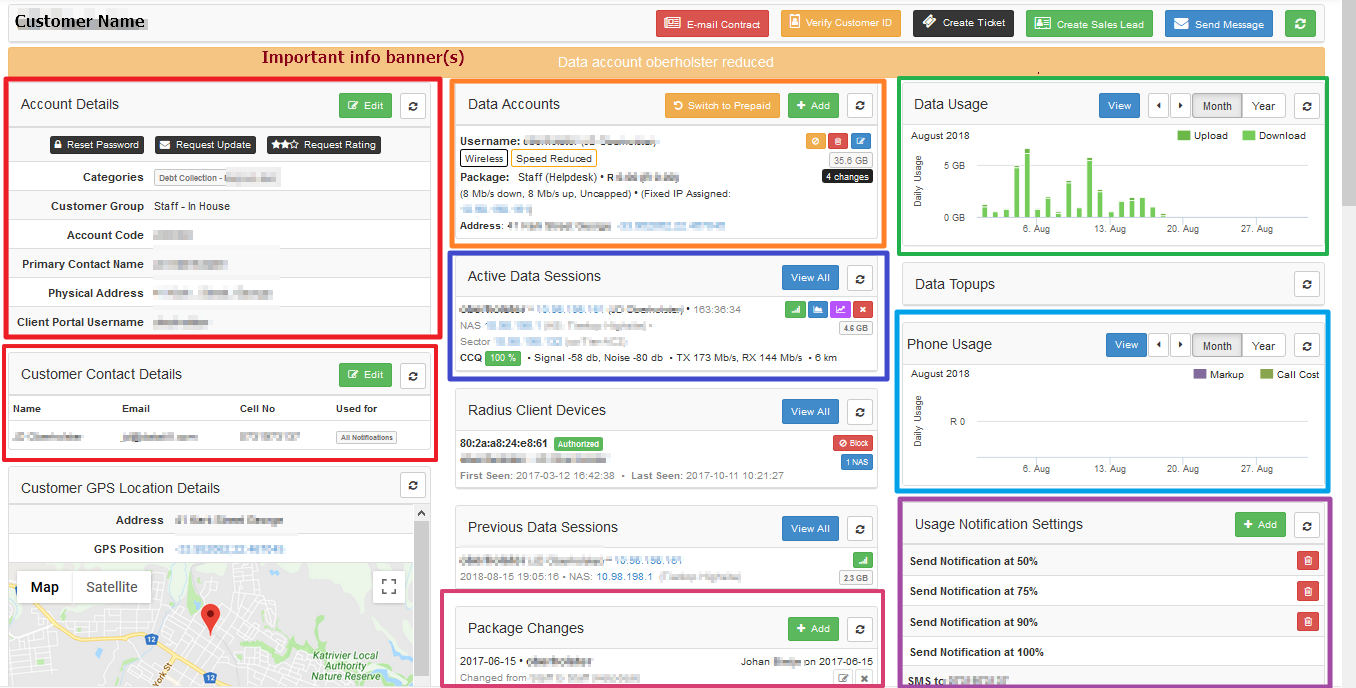
| 3.1 Account Details: | In this section, you can see all the customer’s details like the address and contact information. This is also where you can make changes to the customer’s details. A customer can have multiple contact persons, and all the contact details will be shown in the block below the account details block, called customer contact details. |
| 3.2. Data Accounts: | Here, you can view the customer’s data account(s), as well as add and suspend or cancel (terminate) certain or all accounts on the profile. |
| 3.3 Data Usage: | This section gives a summary of the customer’s data usage. You can either choose to view it per month or per year. |
| 3.4. Active Data Sessions: | Here, you can see if the customer is actively using their internet or not. This will be of more value to the technical or support teams. |
| 3.5. Phone usage: | This section gives a summary of the customer’s VoIP usage. You can either choose to view it per month or per year. |
| 3.6. Usage Notification Settings: | This function allows you to see where the messages sent to the customer, gets delivered. After changing the customer’s contact details, remember to change the details here as well. |
|
3.7. Package Changes:
|
Even though you are able to change packages at the above mentioned “Data Accounts”, it is better to schedule the packages changes in this section. This will enable us to track when the change took place, as well as who submitted the package change. |
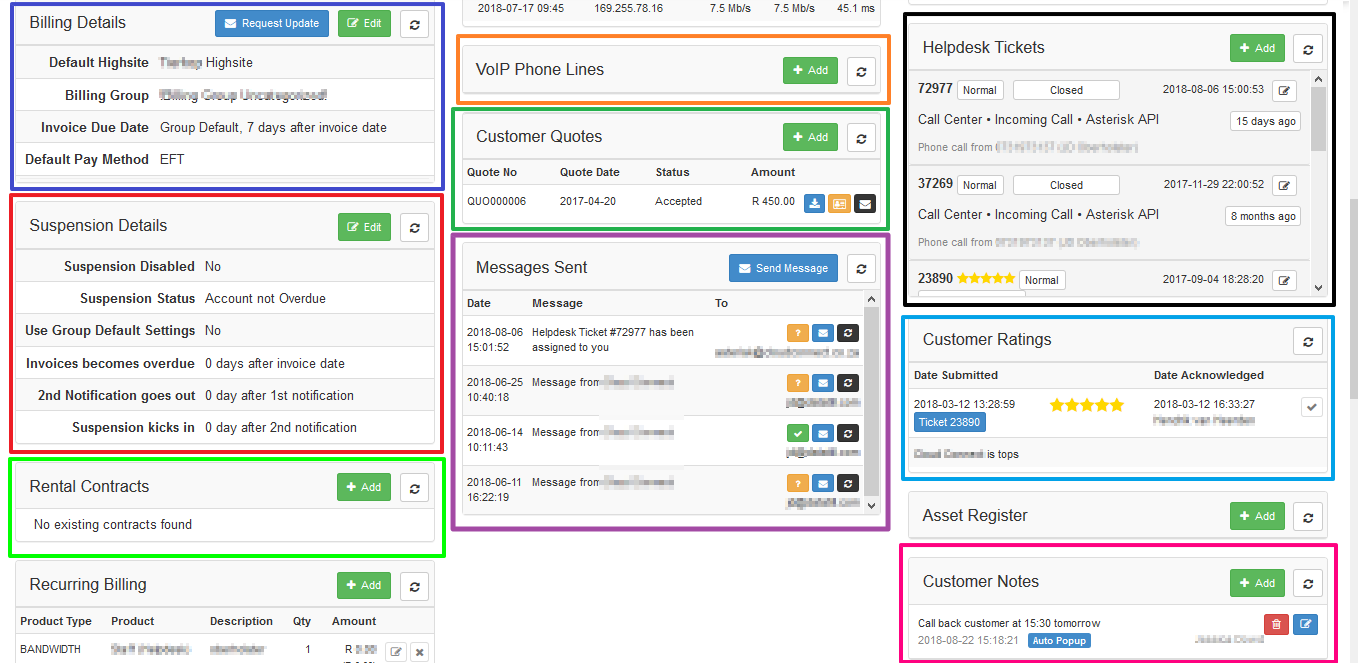
| 3.8. Billing Details: | In this section, you can change the customer’s billing details. You can set the customer’s payment method here, as well as fill in all debit order details. The payment method can be set to EFT, Debit Order, Cash or Credit Card. Customer’s need to verify their own credit cards through the VCS system. |
| 3.9. Suspension details: |
This section is for all customer’s who are not paying their invoices on time. Data accounts get suspended when the customer’s account is suspended. |
| 3.10. Customer Quotes: | Quotes from the Sales Workflow that is linked to this customer. |
| 3.11. VoIP Phone Lines: |
Here you can see all the VoIP lines that the customer has with you. You can also add new lines here. These lines can be billed for the physical line usage as well as VoIP call usage if manual or automatic VoIP imports has been imported for this customer’s phone line(s). |
| 3.12. Messages Sent: | This section allows you to see all the messages that have been sent to the customer – whether it be monthly invoices sent out, an SMS or tickets that were answered. |
| 3.13. Helpdesk Tickets: | In this section, you can see all active and closed tickets on the customer’s profile. You are also able to see in which department the ticket was/is and to whom the ticket was/is assigned to. |
|
3.14. Customer Notes:
|
Here you can add customer notes like extra account or billing information or other issues. Even though customers are not able to see these notes, please use discretion when creating them. Your name and the date will automatically be added to the note when you submit it. There is an option to make the note automatically pop up in a red block on the top right-hand side of the screen each time someone opens up this customer’s profile. (edit customer screen.) |
|
3.15. Customer Ratings:
|
This is a new feature brought in along with the sales workflow. Customers can give general ratings for the Company/ Wisp (Wireless internet service provider). The customer can give ratings after helpdesk tickets have been closed after a job card has been marked as completed or just in general from their customer profile. All these need to be set up in the Sales settings. |
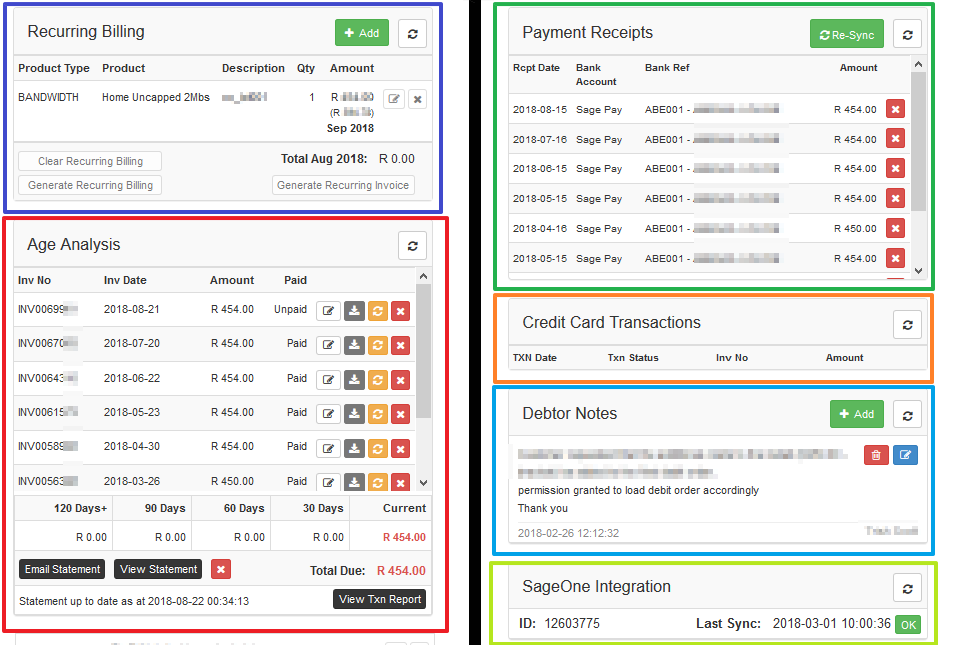
3.16. Recurring Billing: |
This is the monthly billing that takes place for each customer. The “generate recurring billing” button can be used the refresh the monthly recurring billing while the “generate recurring invoice” button creates the DRAFT monthly invoice. |
| 3.17. Age Analysis:
|
This is the customer’s specific age analysis. Here you can see invoices that are still outstanding as well as any credit notes and adjustments. Always click on the update button before handling any customer queries. |
| 3.18. Credit Card Transactions: | If the customer paid invoices/ top-ups/ hotspot vouchers via credit card, it will appear here. |
| 3.19. Additional Address Details: | This field is for customer’s who have more than one address – for example customers with home and business packages on one profile. |
| 3.20. Attachments: | All service apps, site survey forms, installation photo’s, job cards, AOD letters, EFT letters and Debit Order details can be uploaded in the attachment section. This comes in handy because it helps you keep track of bad jobs that were done and signatures of approval from the customer saying you may take his money via debit order. |
| 3.21. Payment Receipts: | Here you can view all the payments made by the customer. If the payment does not yet reflect here, it may because the system hasn’t synced the new receipts yet. It syncs automatically a few times throughout the day. To fasten the process, click on the update button in the age analysis section. |
| 3.22. Debtor notes: | This section is for our debt collectors. Please make notes on all communication with the customer but keep it short and sweet but understandable for anyone who reads it.
Similar to the customer note block, but more related to billing. Here you can add customer notes like billing suspended due to connectivity issues or invoice credited because … Even though customers are not able to see these notes, please use discretion when creating them. Your name and the date will automatically be added to the note when you submit it. |
| 3.23. SageOne Integration: | Here you can see the last time the customer’s profile synced with SageOne as well as if the syncing process was successful or not. If the word “error” appears instead of “Ok”, please inform your financial manager and ask them to investigate. |
| 3.24. Customer Audit Trial: |
Admin users can check who updated a customer. Please ensure that you do not leave your PC unlocked and unattended and that you do not give your login details to anyone. |