
7. Invoicing:
In this step of the workflow, the customer will be billed for the job that has been done. To find a list of all leads that need to be billed, go to Invoicing – New.

7.1. Creating the invoice:
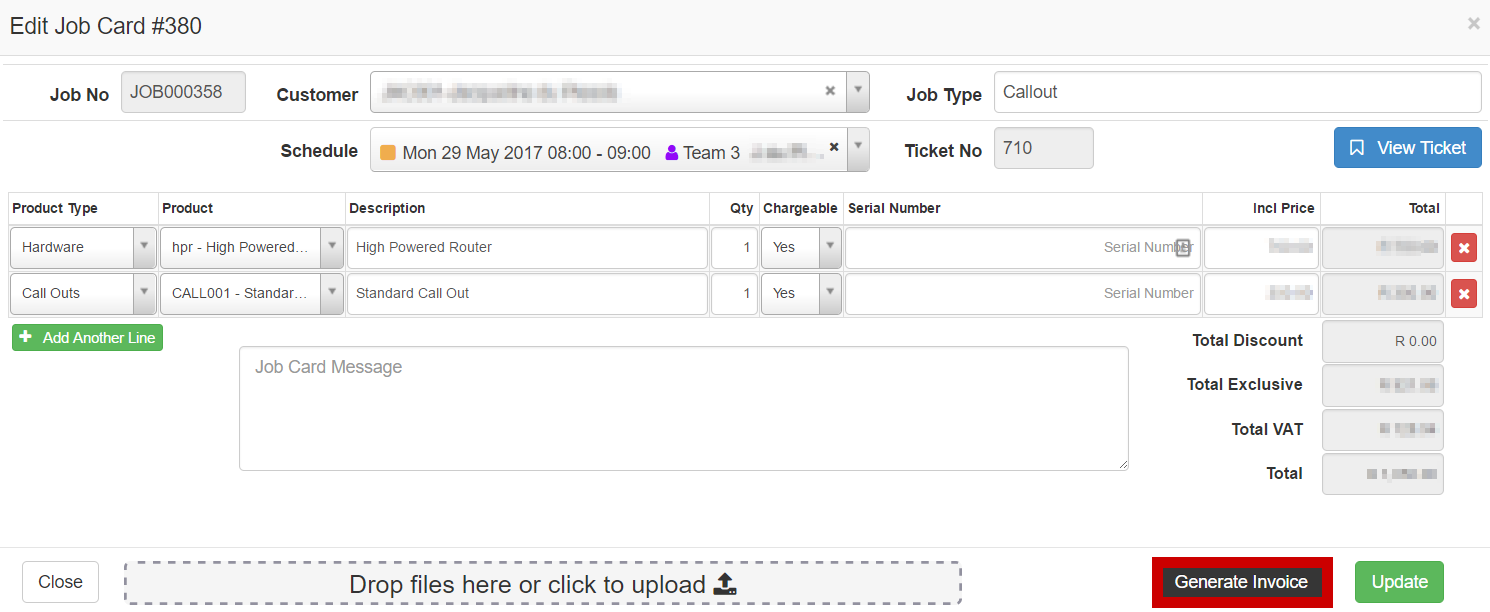
To generate the draft invoice, click on the green hand found on the right hand side of the lead that you want to work on. Check to ensure that the details on the job card is correct and then click on the “Generate Invoice” button.
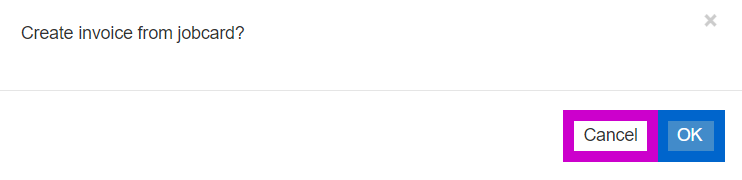
After clicking on the “Generate Invoice” button a pop-up screen will appear. If you want to generate the invoice, click on the “OK” button. If you still need to amend the job card, click on the “cancel” button.
Another pop-up screen will now appear confirming the successful invoice generation.
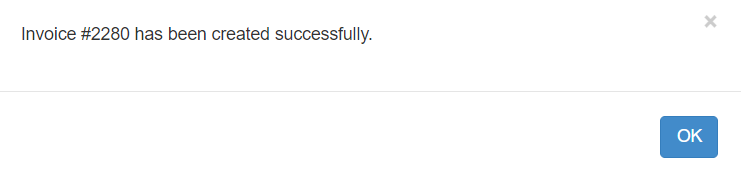
After clicking on the above “OK” button, you will see the following screen:
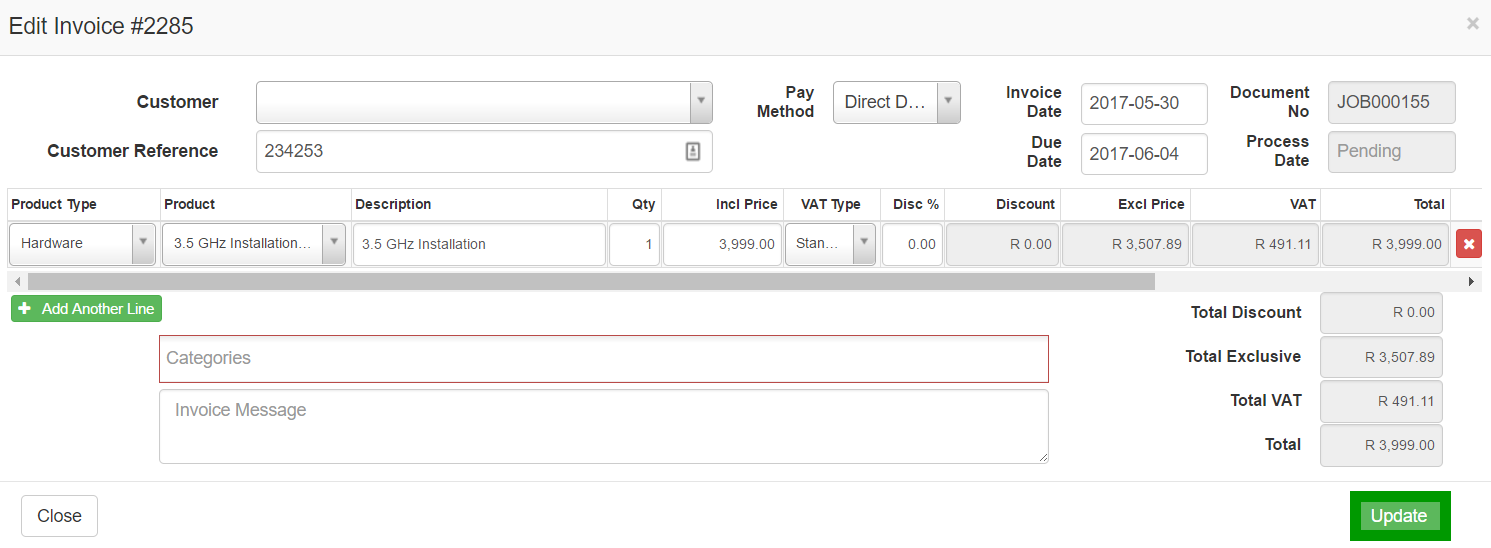
Click on the update button to save the draft invoice. The invoice screen will close and the lead will move to Invoicing – Active.
7.2. Invoicing – Active:
7.2.1. Updating the job card:
After the customer’s invoice has been generated, the lead will move to invoicing – active. This is to ensure that all needed information has been added. If there is still any information relating to the job that needs to be added to the job card, the job card can still be updated. If no additional information needs to be added, push the invoice to sage one to send it to the customer.

7.3. Sending the invoice to the customer:
To send the invoice to the customer, you first need to generate the sage one invoice. To do this, go to the “Billing” tab and then click on the “Invoices” option.
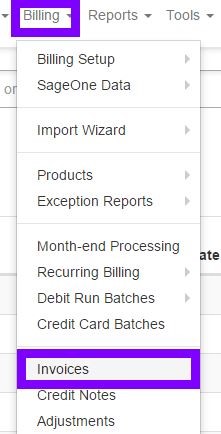
On this screen, you can see a list of all documents that need to be pushed through to Sage One. Type the name of the customer to whom you want to send the invoice to in the “search” box. If you need to update the invoice, click on the blue button (left of the green section). If the invoice is ready to be sent to the customer, click on the orange button in the green section to generate the sage.

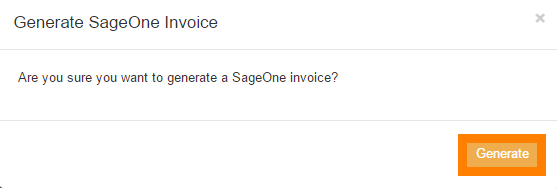
After clicking on the “Generate Sage One Invoice” button, a pop-up screen will appear. Click on the “Generate” button to send the invoice to the customer. The invoice will now automatically be sent to the customer.
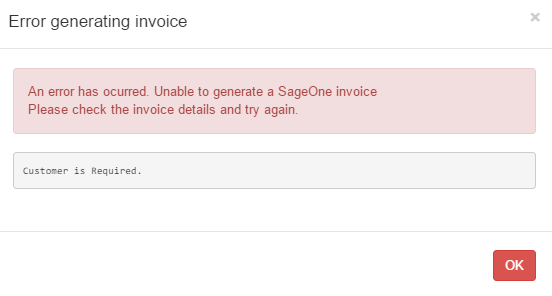
5.3.1. If you receive an error when generating the invoice.
If a pop-up notification appears giving you an error message after you have click on the generate button, please consult with your financial manager.
(Please check under SageOne syncing for errors.)
7.4. What happens after the invoice has been sent to the customer?
After the invoice has been generated, the lead will be closed and moved to invoicing completed.