
Customers Guide
The purpose of this guide is to provide you with more information on how to create customers, customer groups, assign data packages etc. Below are links to your Youtube channel with different videos which may come in handy.
Webinar: Customer Profile
Webinar: Introduction to HeroTill for new users
Webinar: Customer Portal
Video: Customer Overview
1. Customer groups:
Before you can import or add customers to HeroTill, you will first need to create your customer groups. These groups will be used to group your customers i.e. business customers, VIP customers, resellers, home users etc. Please note each customer can only be assigned one customer group, but to be able to further drill down for reporting purposes, you can always add categories.
To find your customer groups, go to “Customers” and then click on the “Customer Groups” option.

You will now be able to see the following page:
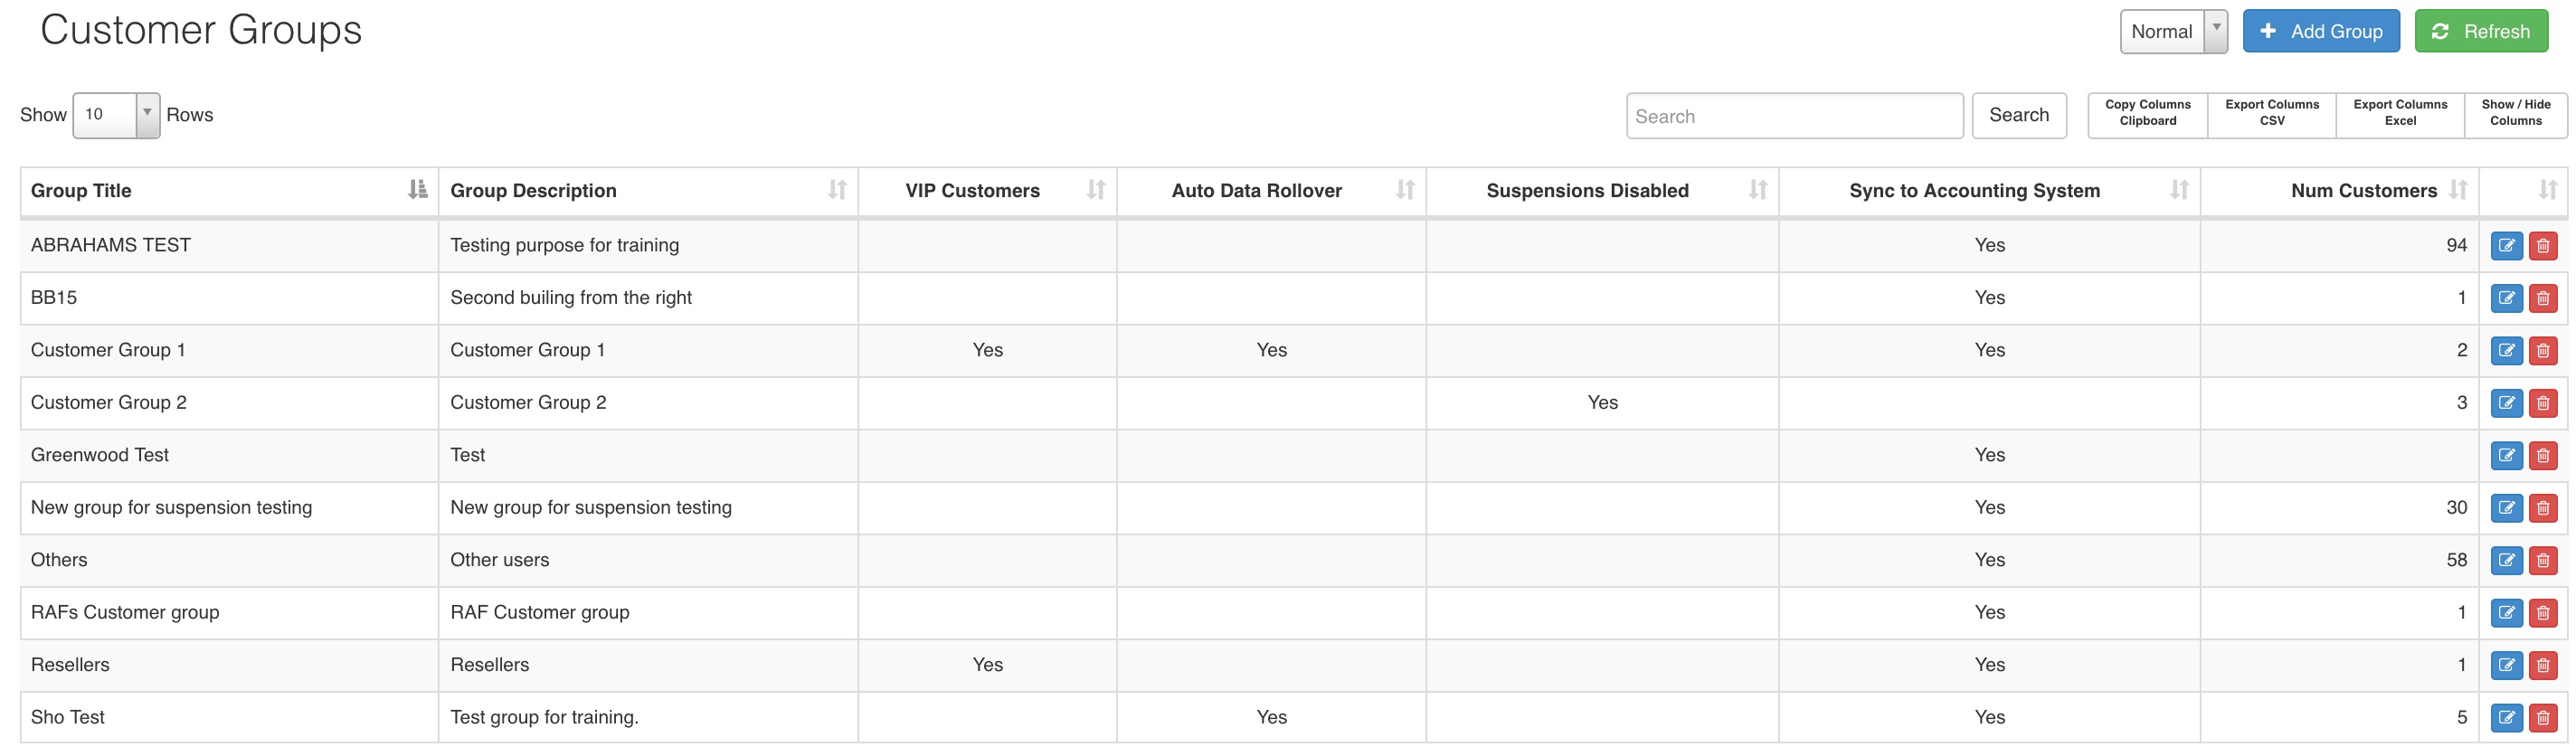
1.1. Adding Groups
To add a new group, click on the “Add Group” button. On the pop-up screen, you will need to complete the “Group Details“, “Billing” and “Suspension” tabs.

After adding all the relevant details, click on the “Add Group” button.
1.2. Editing Groups
To edit a customer group, you can click on the “Edit” button found on the right-hand side of the group. You will now be able to make changes to the “Group Details“, “Billing” and “Suspension” tabs. Remember to click on the “Save Changes” button after making any changes.
1.3. Deleting Groups
To delete a customer group, click on the “Delete” button found on the right-hand side of the customer group. This will allow you to delete the group. All customers linked to this group will then be reassigned to the first listed customer group.
2. Customers
2.1. Adding customers
There are two ways in which new customers can be added in HeroTill:
- Sales Module – Please refer to the Lead to Receipt guide for
- Manually adding new customers if you are not making use of the sales module.
For more information on how to add customers, you can refer to the following guide:
- Manual: How to add a new customer
*Tip: After successfully adding the new customer, go to the customer’s profile and send them a password reset link. Even though they will receive a welcome email with their username and password in it, they might want to choose a password which is easier for them to use.
2.1.1. Accounting code conventions used by Some ISPs
Client codes are generated by using the:
- Individual customers / normal home users:
- First three letters of the client’s first name, followed by
- a sequential number starting at 001.
- In the case of a company,
- First three letters of the company’s name (ignoring any special characters) follow by
- a sequential number starting at 001.
Notes on Exceptions:
- Prefix such as Doctor or Mr. or Mrs. are ignored
- If you don’t have the client’s first name, try to get their first name. For example,
- Don’t do: PSL001 for Mr. Piet Slabbert.
- Rather do: PIE001.
- If you can’t get the client’s first name, just use the first initial and his surname, e.g.:
- G Joubert becomes: GJO001
- Remove special characters like “@”.
- Don’t use “A” for &, simply ignore the “&”.
Client Code Examples:
- 2D Consulting will become: 2DC001
- Frikkie Visser will be: FRI001
- Tannie Poeke Smit is simply: POE001
- Dr. K Retief: KRE001 (first try to get the first name.)
- I @ U Consulting: IUC001 (we’ve dropped the special character).
2.2. How to get to the customer profile
Once you have successfully created your customer, you will be able to view your customer details in the customer list as well as go to your customer’s profile.
2.2.1. Customer list
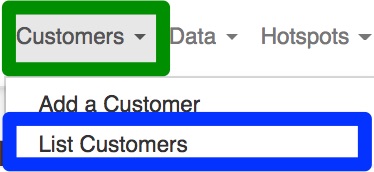
To view a list of all your customers, go to “Customers“ – “List Customers“.
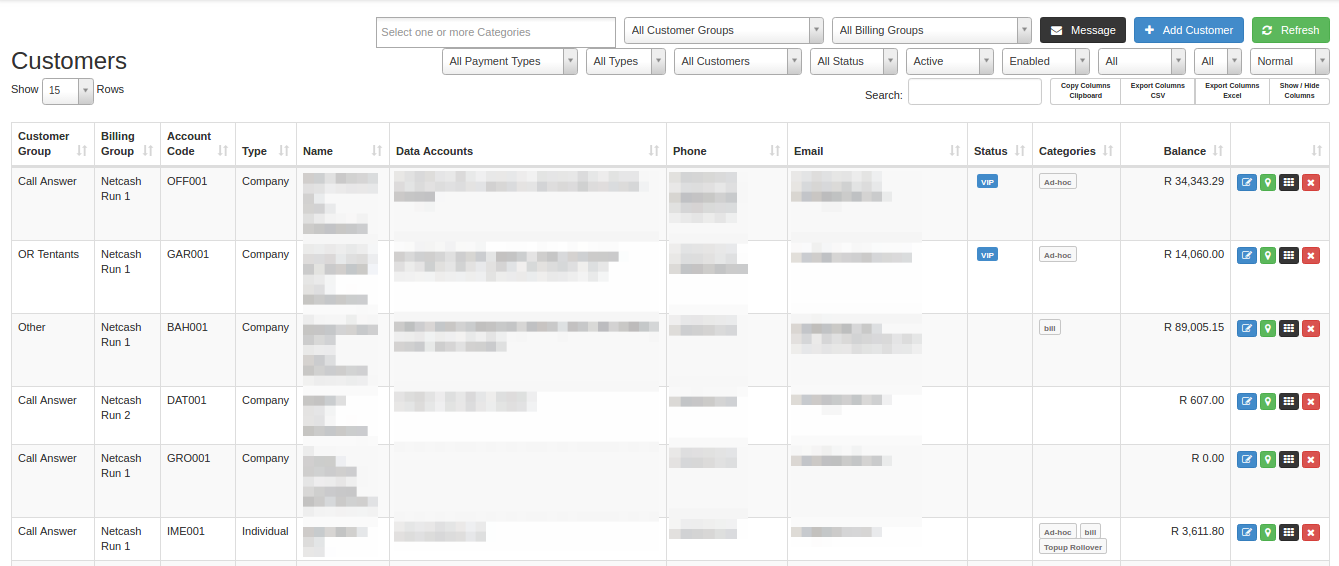
From this page you will be able to:
- Message customers
- Filter the customer list using the different filter functions.
- Edit the customer details
- Add new customers
- Go to the customer profile.
You will also be able to look for customers based on:
- Contact numbers,
- addresses (show/hide columns for this function)
- customer codes or
- customer or business names.
2.2.2. Customer profile:
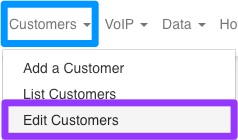
For a quick overview of the customer profile, you can refer to our Customer Profile: Summary guide. To find your customer profile, go to “Customers” and then click on the “Edit Customer” option.
In the right-hand top corner, click on the drop-down menu to find your customer. You will be able to search according to account code, name, surname or even resellers.

*If you are looking for the customer based on address or contact number, please use the customer list to find your customer and open the profile from there by clicking on the black button found on the right-hand side of the customer’s details.
2.3. Updating customer details
2.3.1. Updating account details:
To update your customer’s account details, go the “Account Details” section and then click on the “Edit” button.
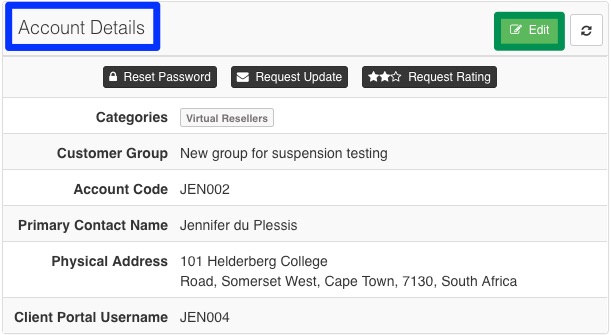
On the pop-up screen, ensure that you are on the “Account Details” tab. From here, you will be able to change the:
- Customer group
- Billing group
- Categories
- Labels
- VIP Customer
- Customer Type
- Contact Name
- ID number
- Primary Telephone number

2.3.2. Updating address details:
To update the customer’s address or postal address, you can edit the account details and then go to the “Address Detail” tab.
Please note that you should add the address lines underneath each other as shown in the pink section. After adding the address, you can click on the “Show on Map” button. This will then pinpoint the customer’s address on the map as well as give you the GPS coordinates.
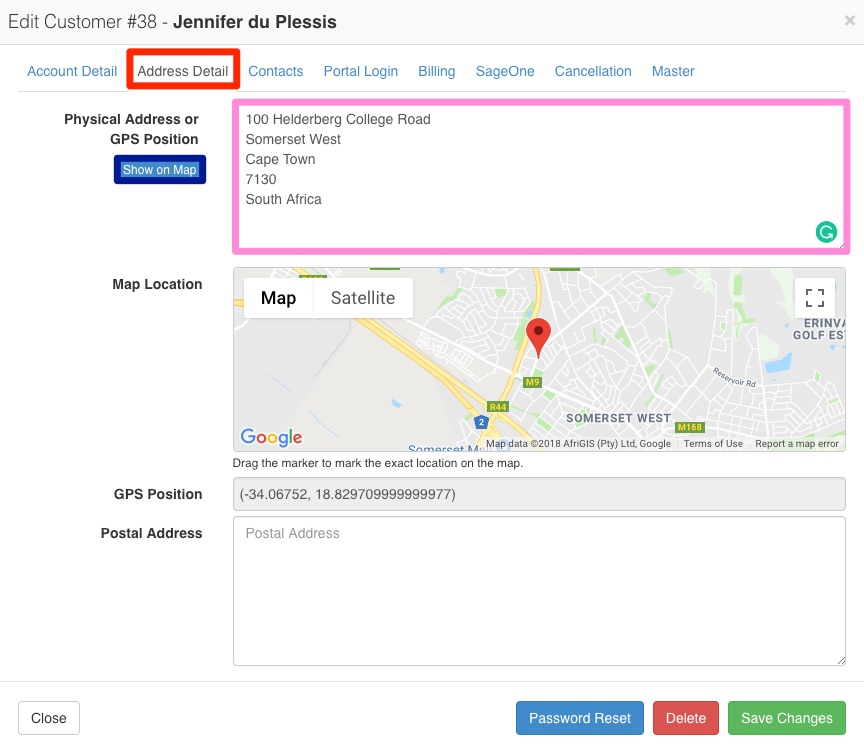
*Please note:
To make use of the maps functionality, please refer to the following guides:
- Blog: Google Maps API has been changed
- Blog: How to get your Google Maps API key
- Webinar: Google Maps API configuration
2.3.3. Updating contact or additional contact details:
Under additional contacts, you will be able to:
- Change your customer’s cell phone number and email address (by clicking on the edit button)
- Add additional contacts
- Remove additional contacts
- Determine who the primary contact is (only one primary contact per customer)
- Determine the notifications that should be received by which contact.
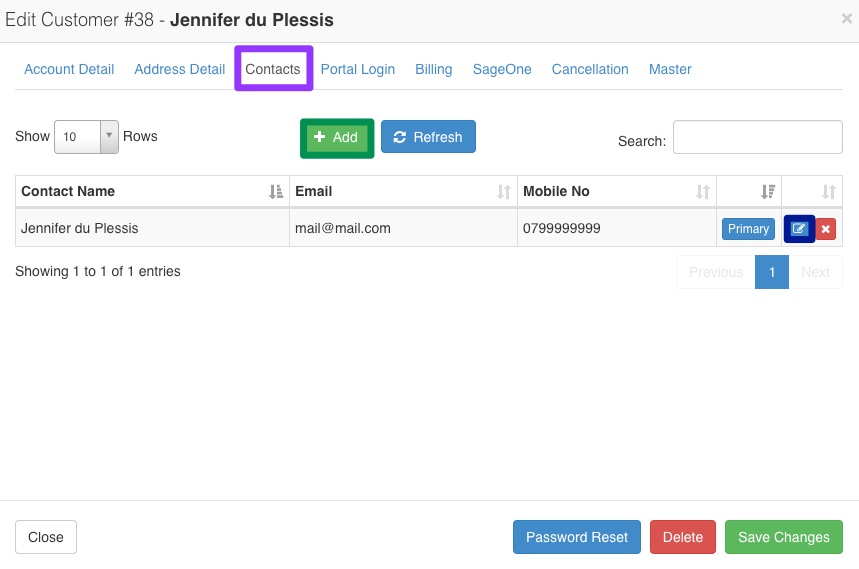
Remember to click on “Save Changes” after making any changes.
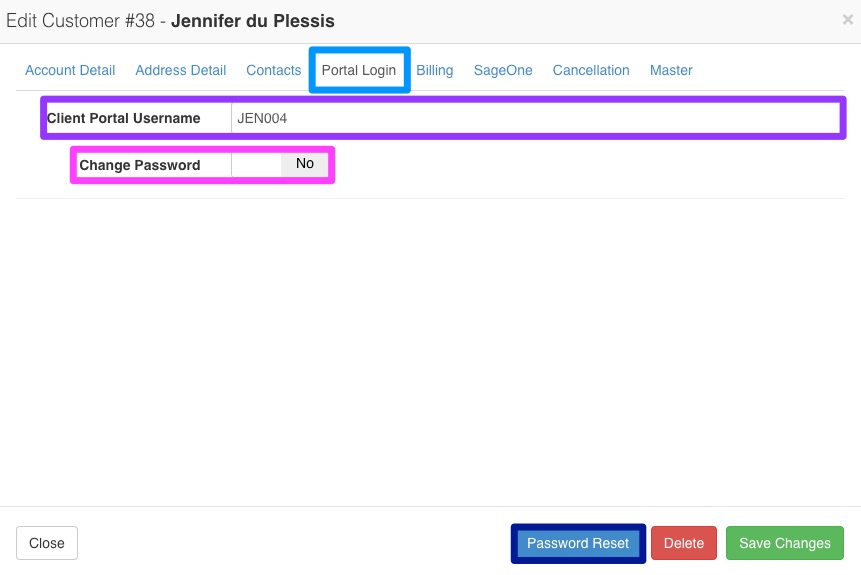
2.3.4. Client portal login
Next, you will have the client portal login. In this section, you can manually change the customer’s password to their customer portal. Best practise would be to rather send the customer a password reset mail. This can be done from the account details section or by clicking on the blue Password Reset button at the bottom at the screen.
*The customer portal username will usually be their account code, but they will also be able to log in with their email address.
- Webinar: Customer Portal
2.3.5. Billing
On the billing tab, you will be able to determine the customer’s default due date settings. This will be very useful in cases where you have big business customers have 30-day accounts etc.
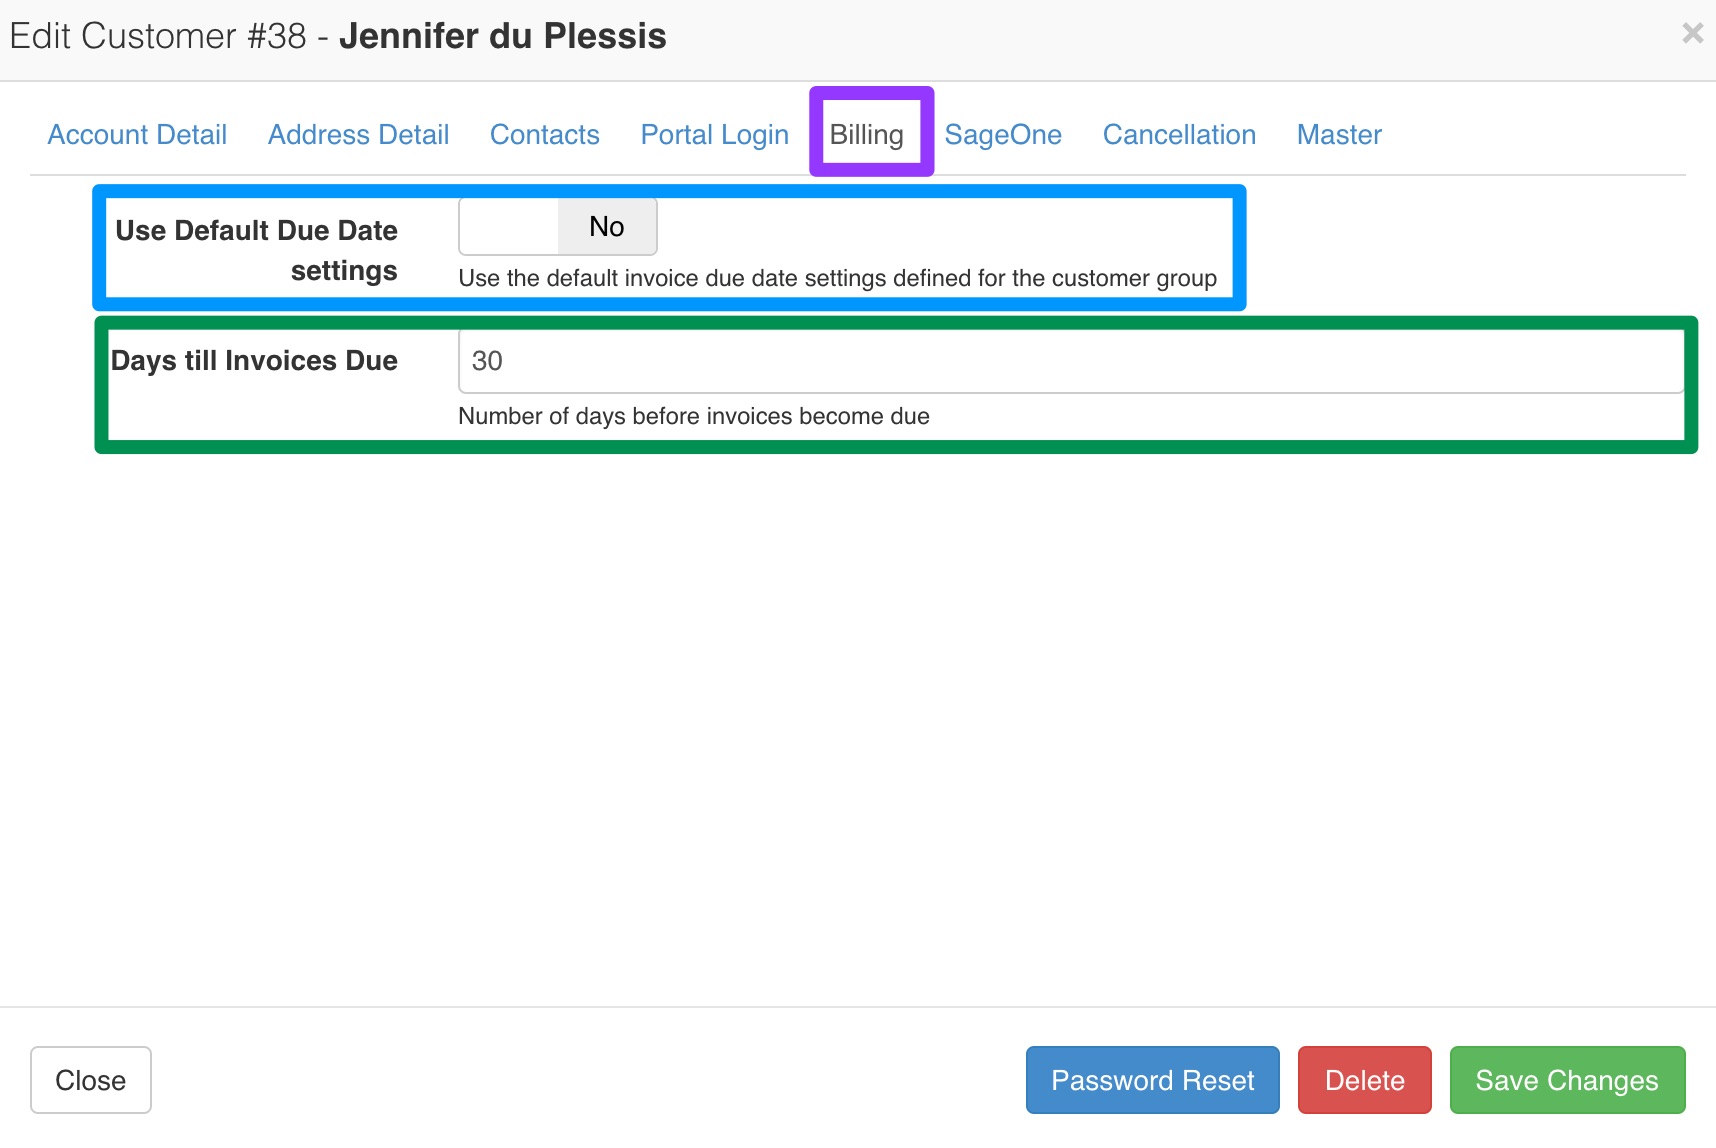
| Blue: | If this button is switched to yes, then the customer will use the normal due date settings as per your billing setup. If this button is switched to no, then you will be able to change the days till invoices due option. |
| Green: | In this section, you will be able to determine the days until invoices for this specific customer becomes overdue. |
2.3.6. SageOne
This tab will only be visible if you are integrated with SageOne. Even though you will be able to change the SageOne ID, it is advised that you do not do this as this will cause syncing issues and essentially have unhappy customers as their payments won’t be able to sync to their profile.

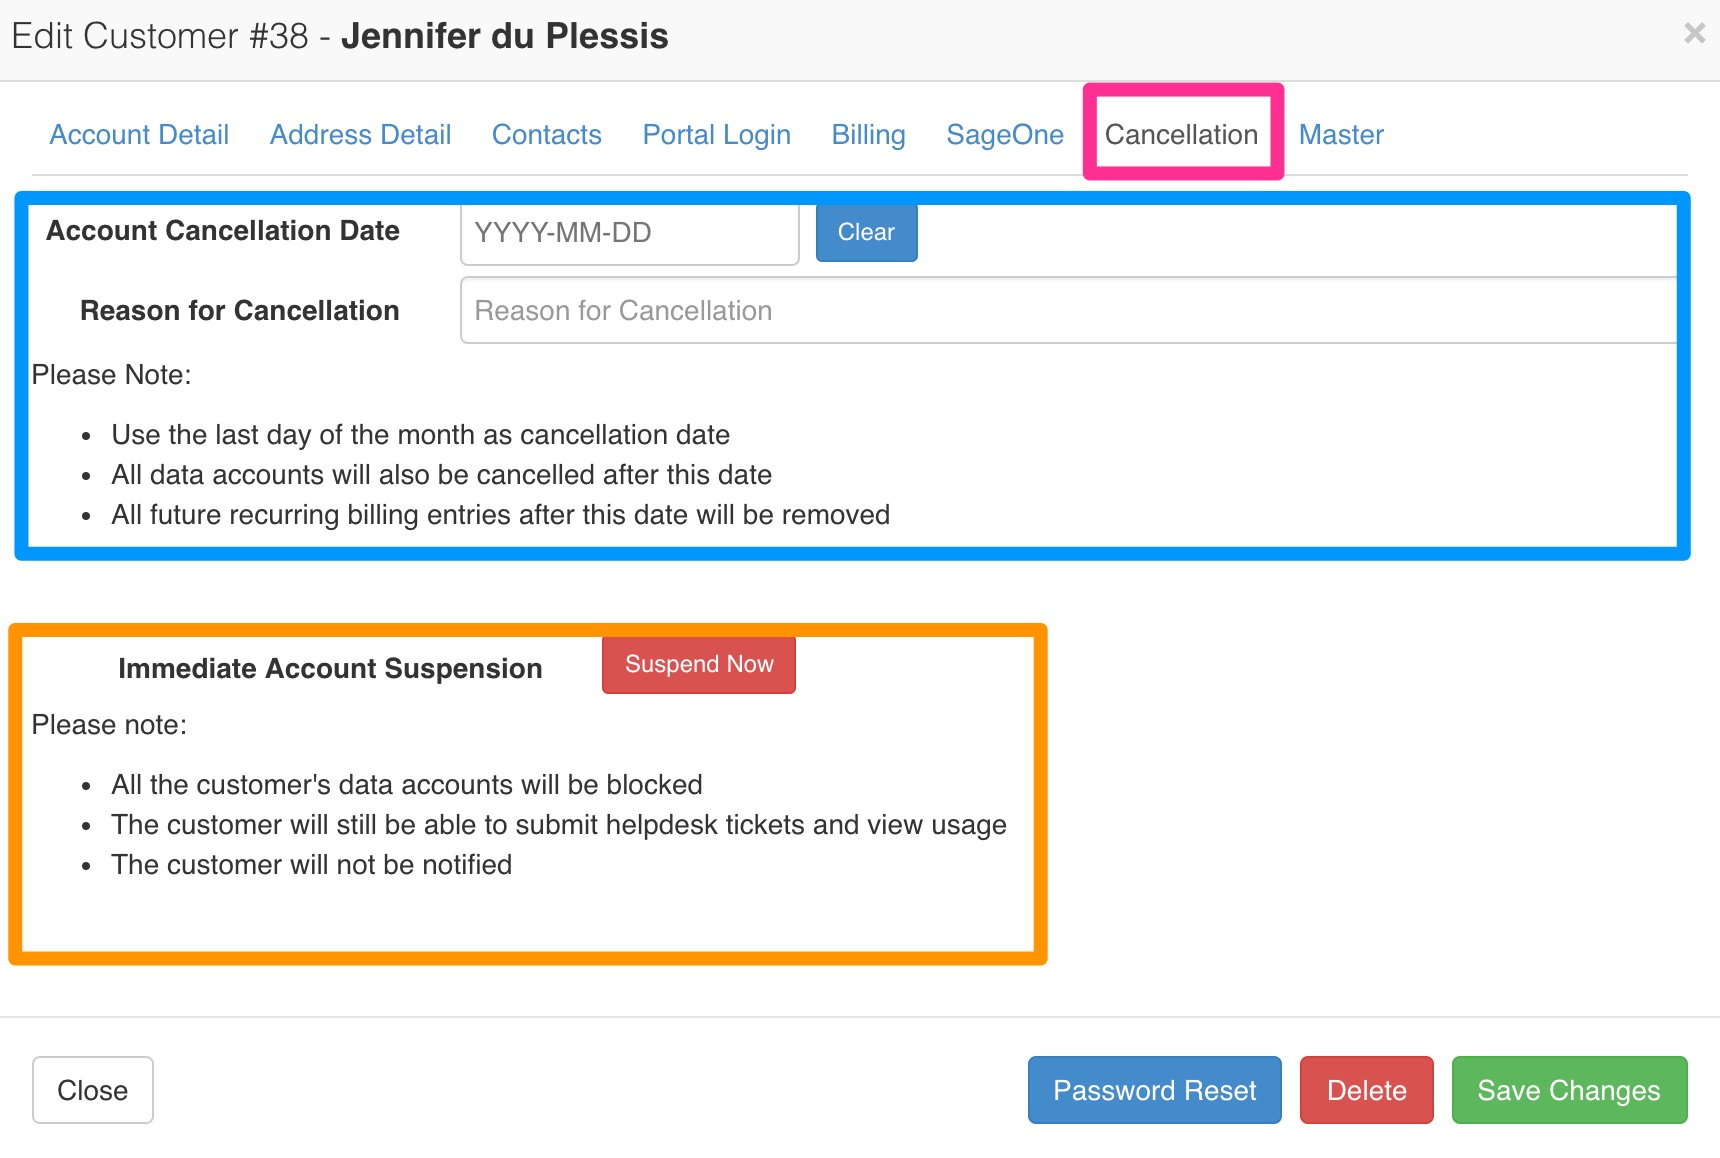
2.3.7. Cancellation
The cancellation tab will allow you to do the following:
- Add a cancellation date and reason for the customer (to cancel all services)
- Or immediately suspend or un-suspend the customer.
Please note:
- When the cancellation date is reached, the customer will no longer authenticate and will no longer be billed.
- When suspending a customer account, billing will not stop.
If you are making use of the new cancellation module, please refer to the following:
- Guide: Account Cancellations
- Webinar: Cancellation Module Webinar
If you are making use of the new suspension module, please refer to the following:
- Guide: Account Suspensions
- Webinar: Suspension Module Webinar
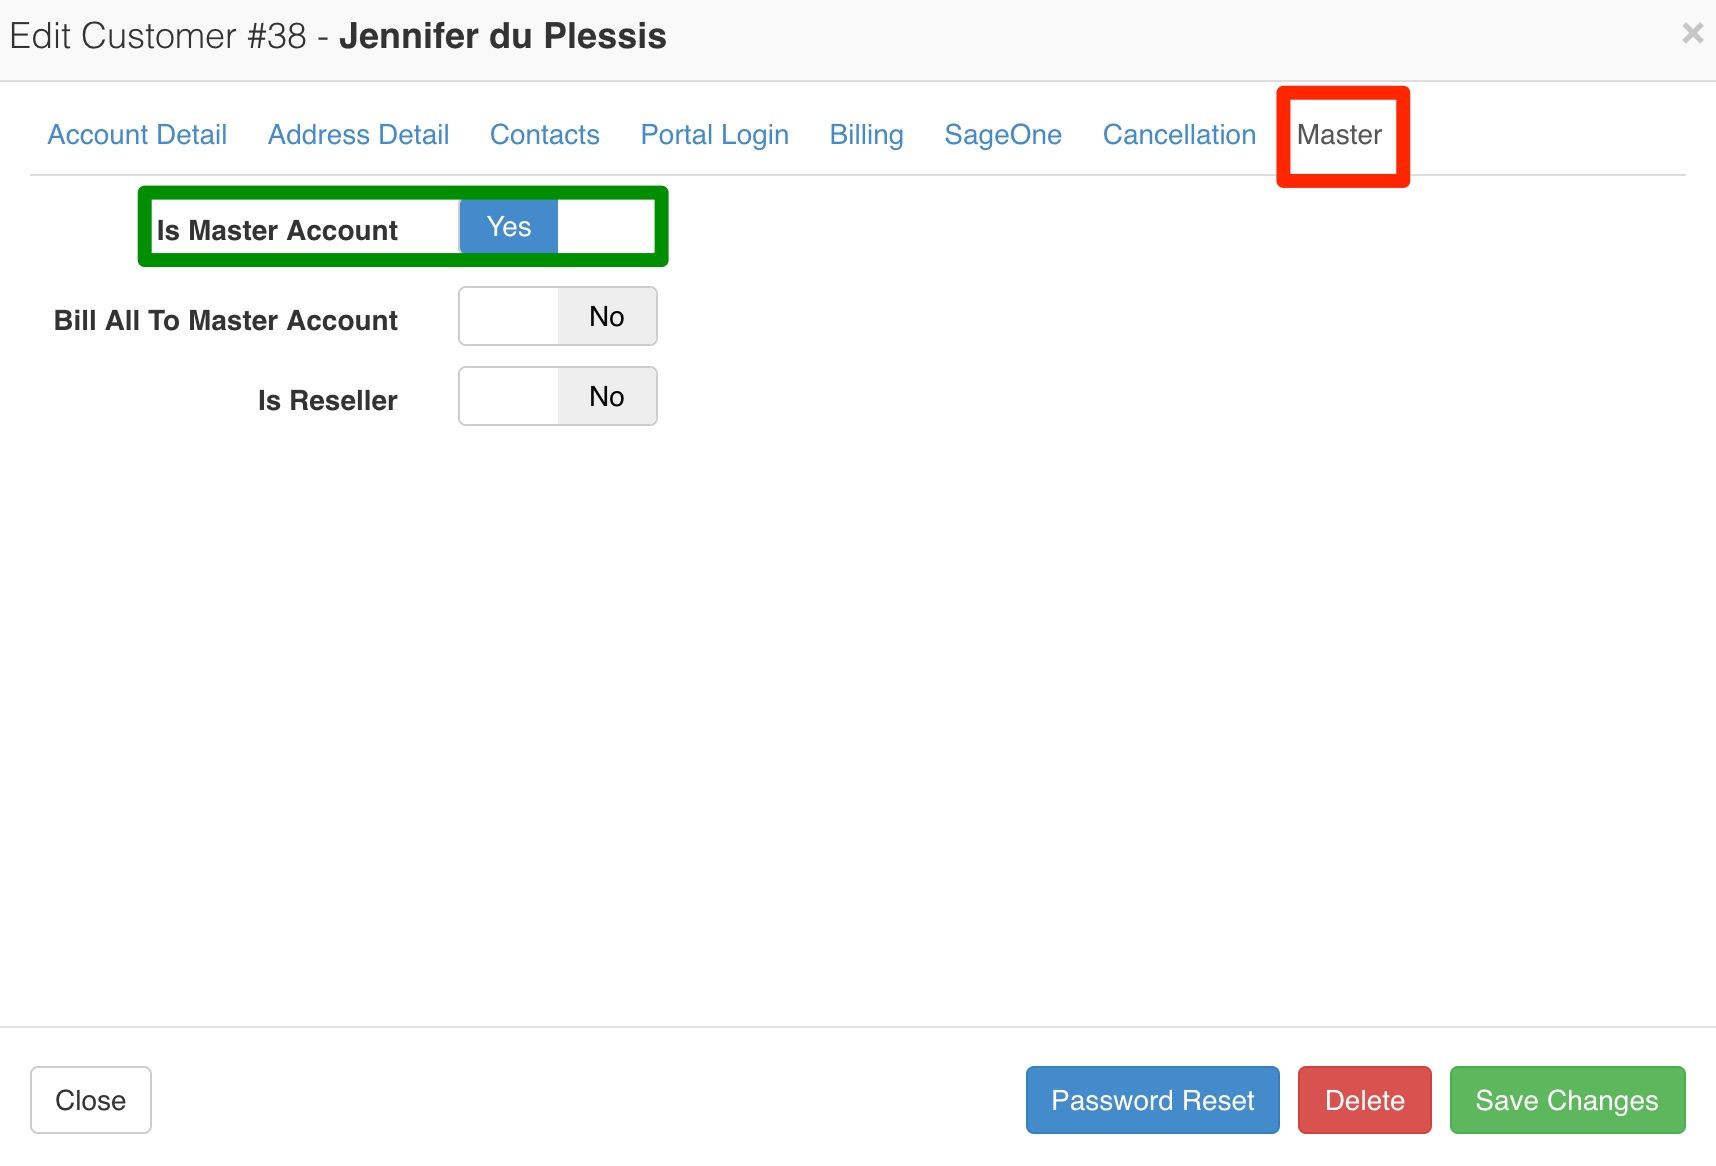
2.3.8. Master Tab
The master tab will allow you to change a normal account to a master account. After this is done, you will be able to link sub-accounts to the master account. This can be used for normal businesses with multiple branches or when you are setting up reseller accounts.
For more information on aster and sub-accounts, please refer to:
- Guide: Master and sub-accounts
For more information on the reseller module, please refer to the following:
- Guide: Reseller module
- Webinar: Suspension Module Webinar
- Videos: Reseller Module Setup
- Videos: Marking a customer as a reseller
- Videos: Linking customers to a reseller
- Videos: Reseller Portal
- Webinar: Reseller Module Webinar
2.4. Password Reset
To send a password reset link to your customer, you can start by going to the customer’s profile. In the account details section, you will see the password reset mail. You can simply click on this Reset Password button and within a few minutes, your customer will receive the email.
*Tip:
- If the customer phones in and asks for a password reset, confirm the email address with them to ensure that the email will be received by them.

2.5. Messaging your customers:
There are several ways HeroTill can allow you to message your customers:
- Messaging specific groups
- Individual SMS
- Bulk SMS
- Individual Email (ticket)
- Bulk Email
- Notifying Offline customers / HS Maintenance
- Mobile App
Blog: Messaging your customers
Webinar: Mailbox Scraping
Guide: Helpdesk Setup Guide
Blog: Notification Rules
Blog: Notification Templates
3. Customer Profile
On the customer profile, you will be able to view or amend various customer details including:
- Account details
- Billing details
- Data accounts
- Package changes
- Suspension details
- Age Analysis
- Recurring Billing etc.
For more information on this, you can refer to:
- Webinar: Customer Widgets
- Video: Customer Overview
- Guide: Customer Profile: Summary
4. Customer Data Usage
There are two different places in which you can view a list of customer data usage:
- Bulk usage view for all customers
- Individual usage view for specific customers
4.1. Bulk usage view:
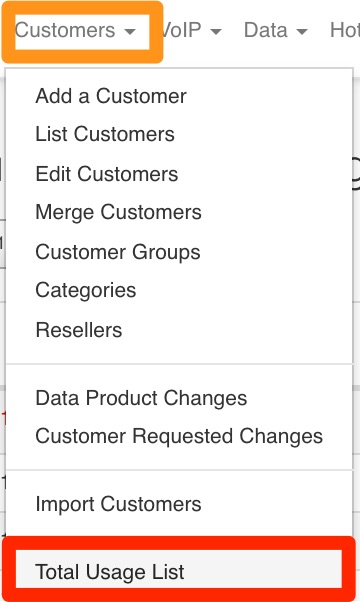
To find a list of all your customers’ data usage, you can go to “Customers” and then click on the “Total Usage List” option.
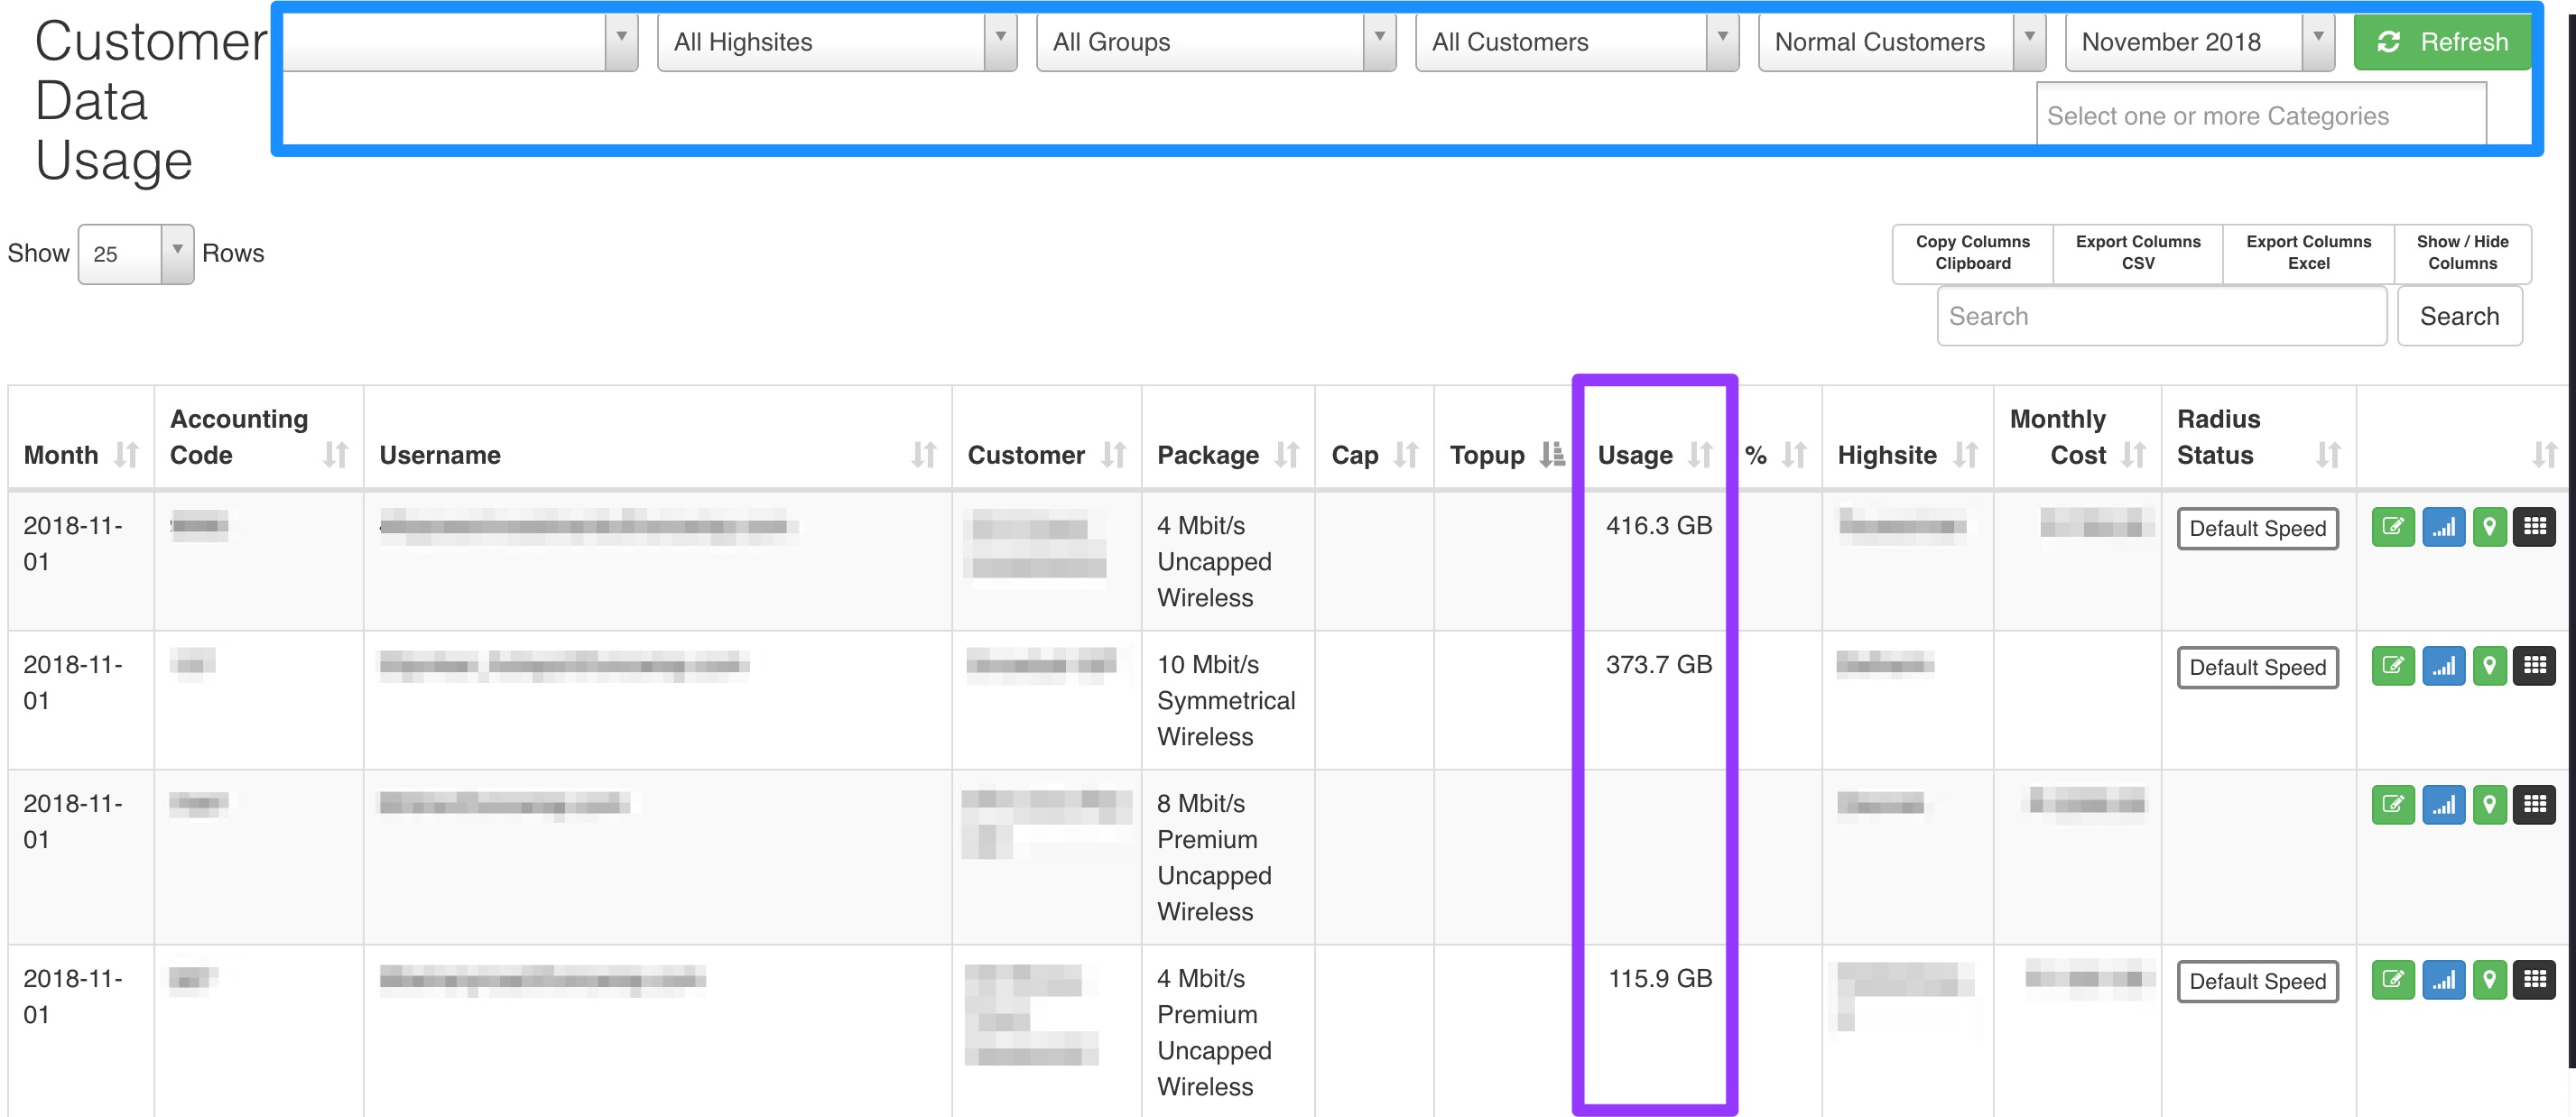
On the following screen, you will see a summary of the total data usage of your customers. You will be able to filter this list, view customer details as well as the total usage for each customer.
4.2. Detailed customer usage:
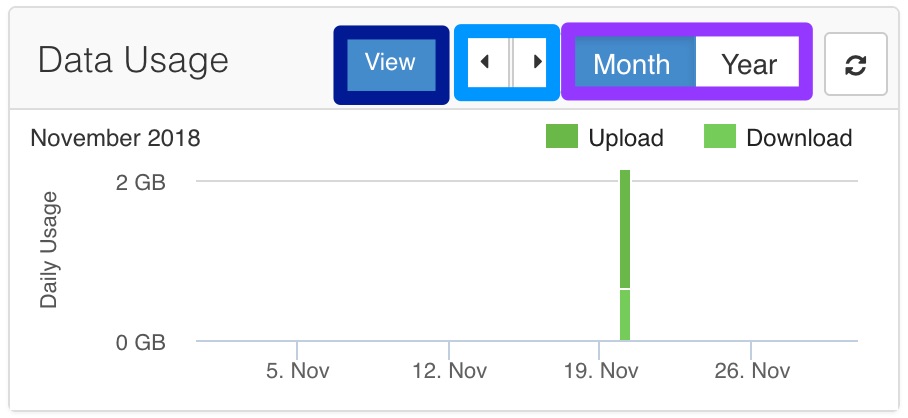
To view a specific customer’s data usage, you can go to the usage details section on the customer’s profile. From here, you can choose to view “monthly or yearly” data usage or view previous monthly or yearly data usage.
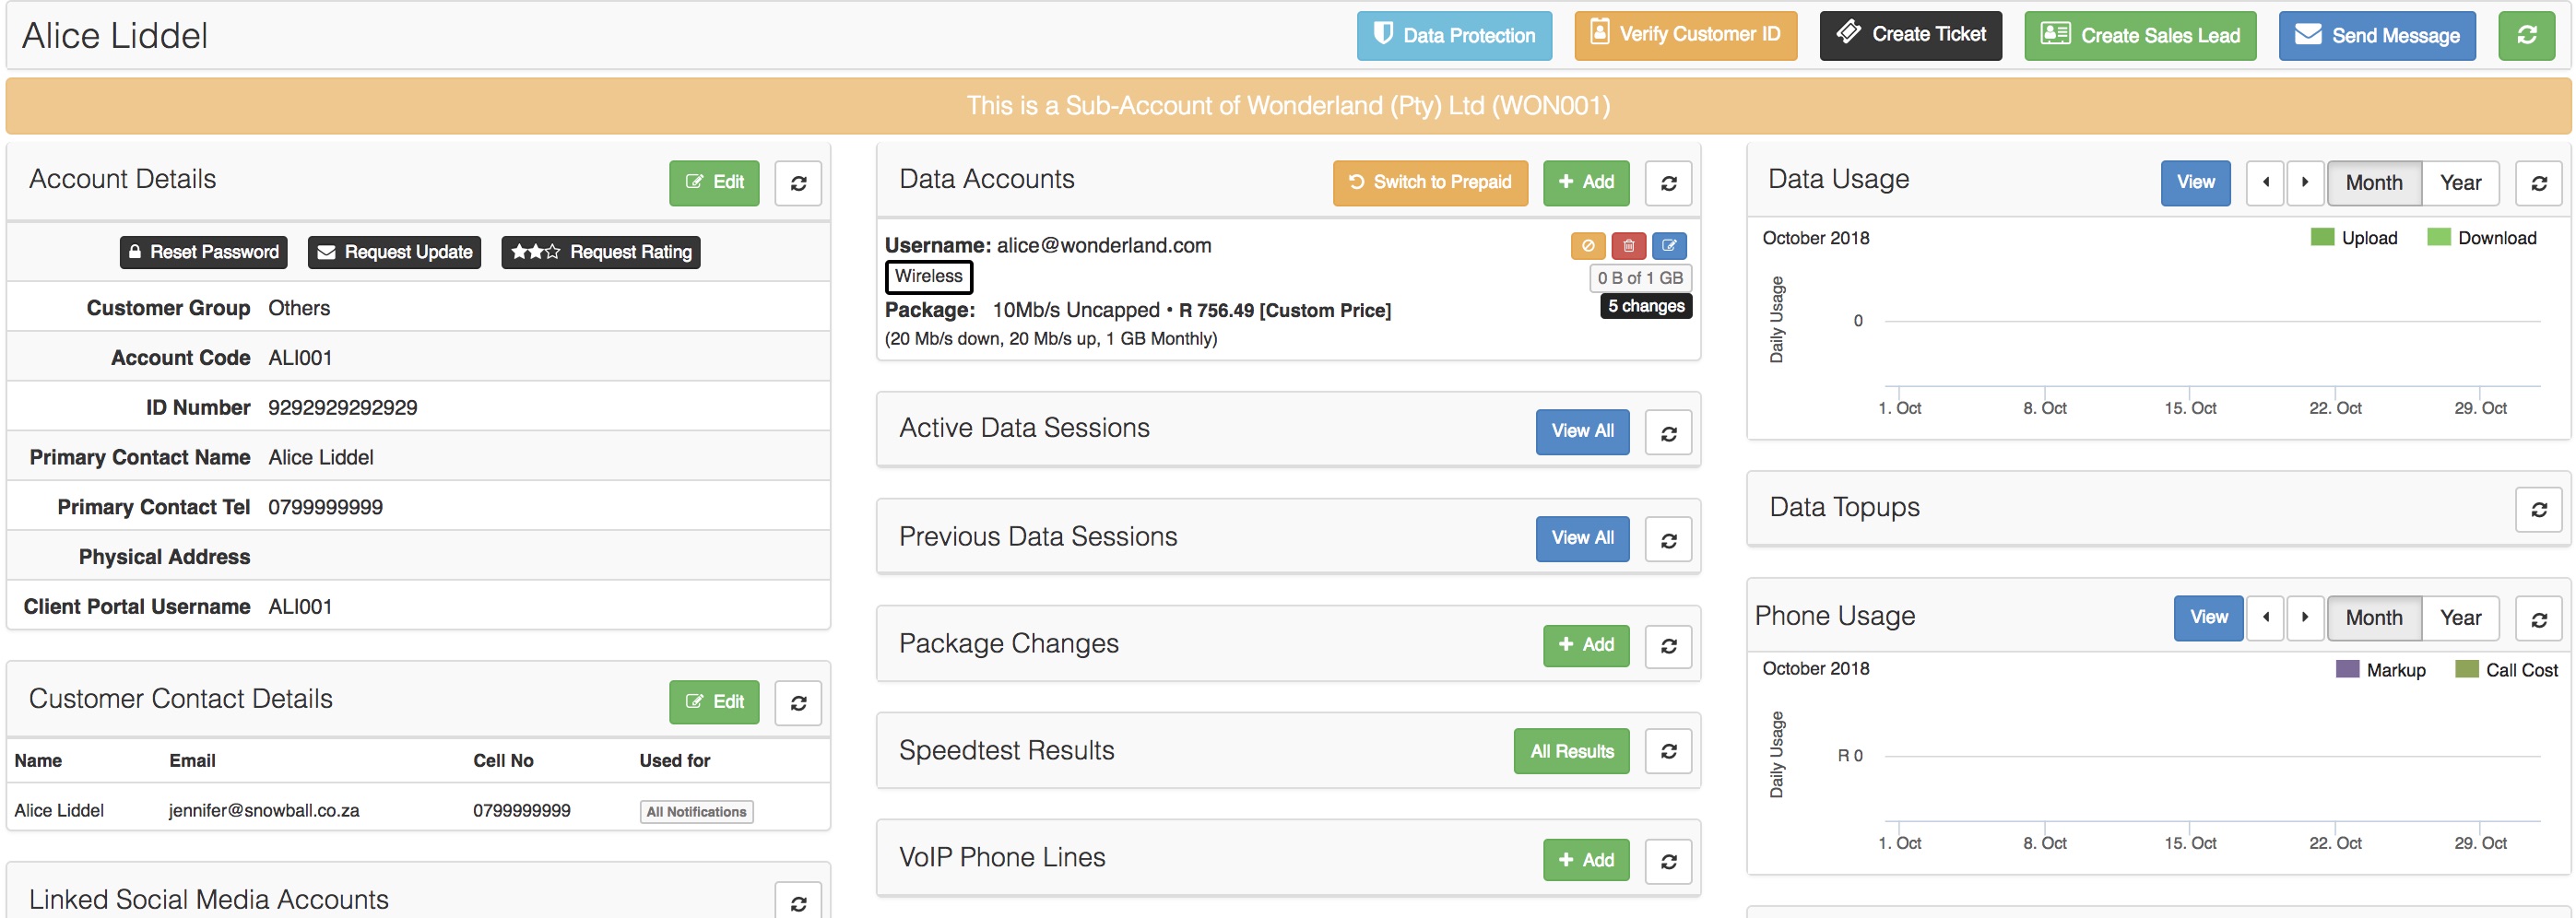
To view more details regarding the customer’s usage, click on the “View” button. The following page will then open:
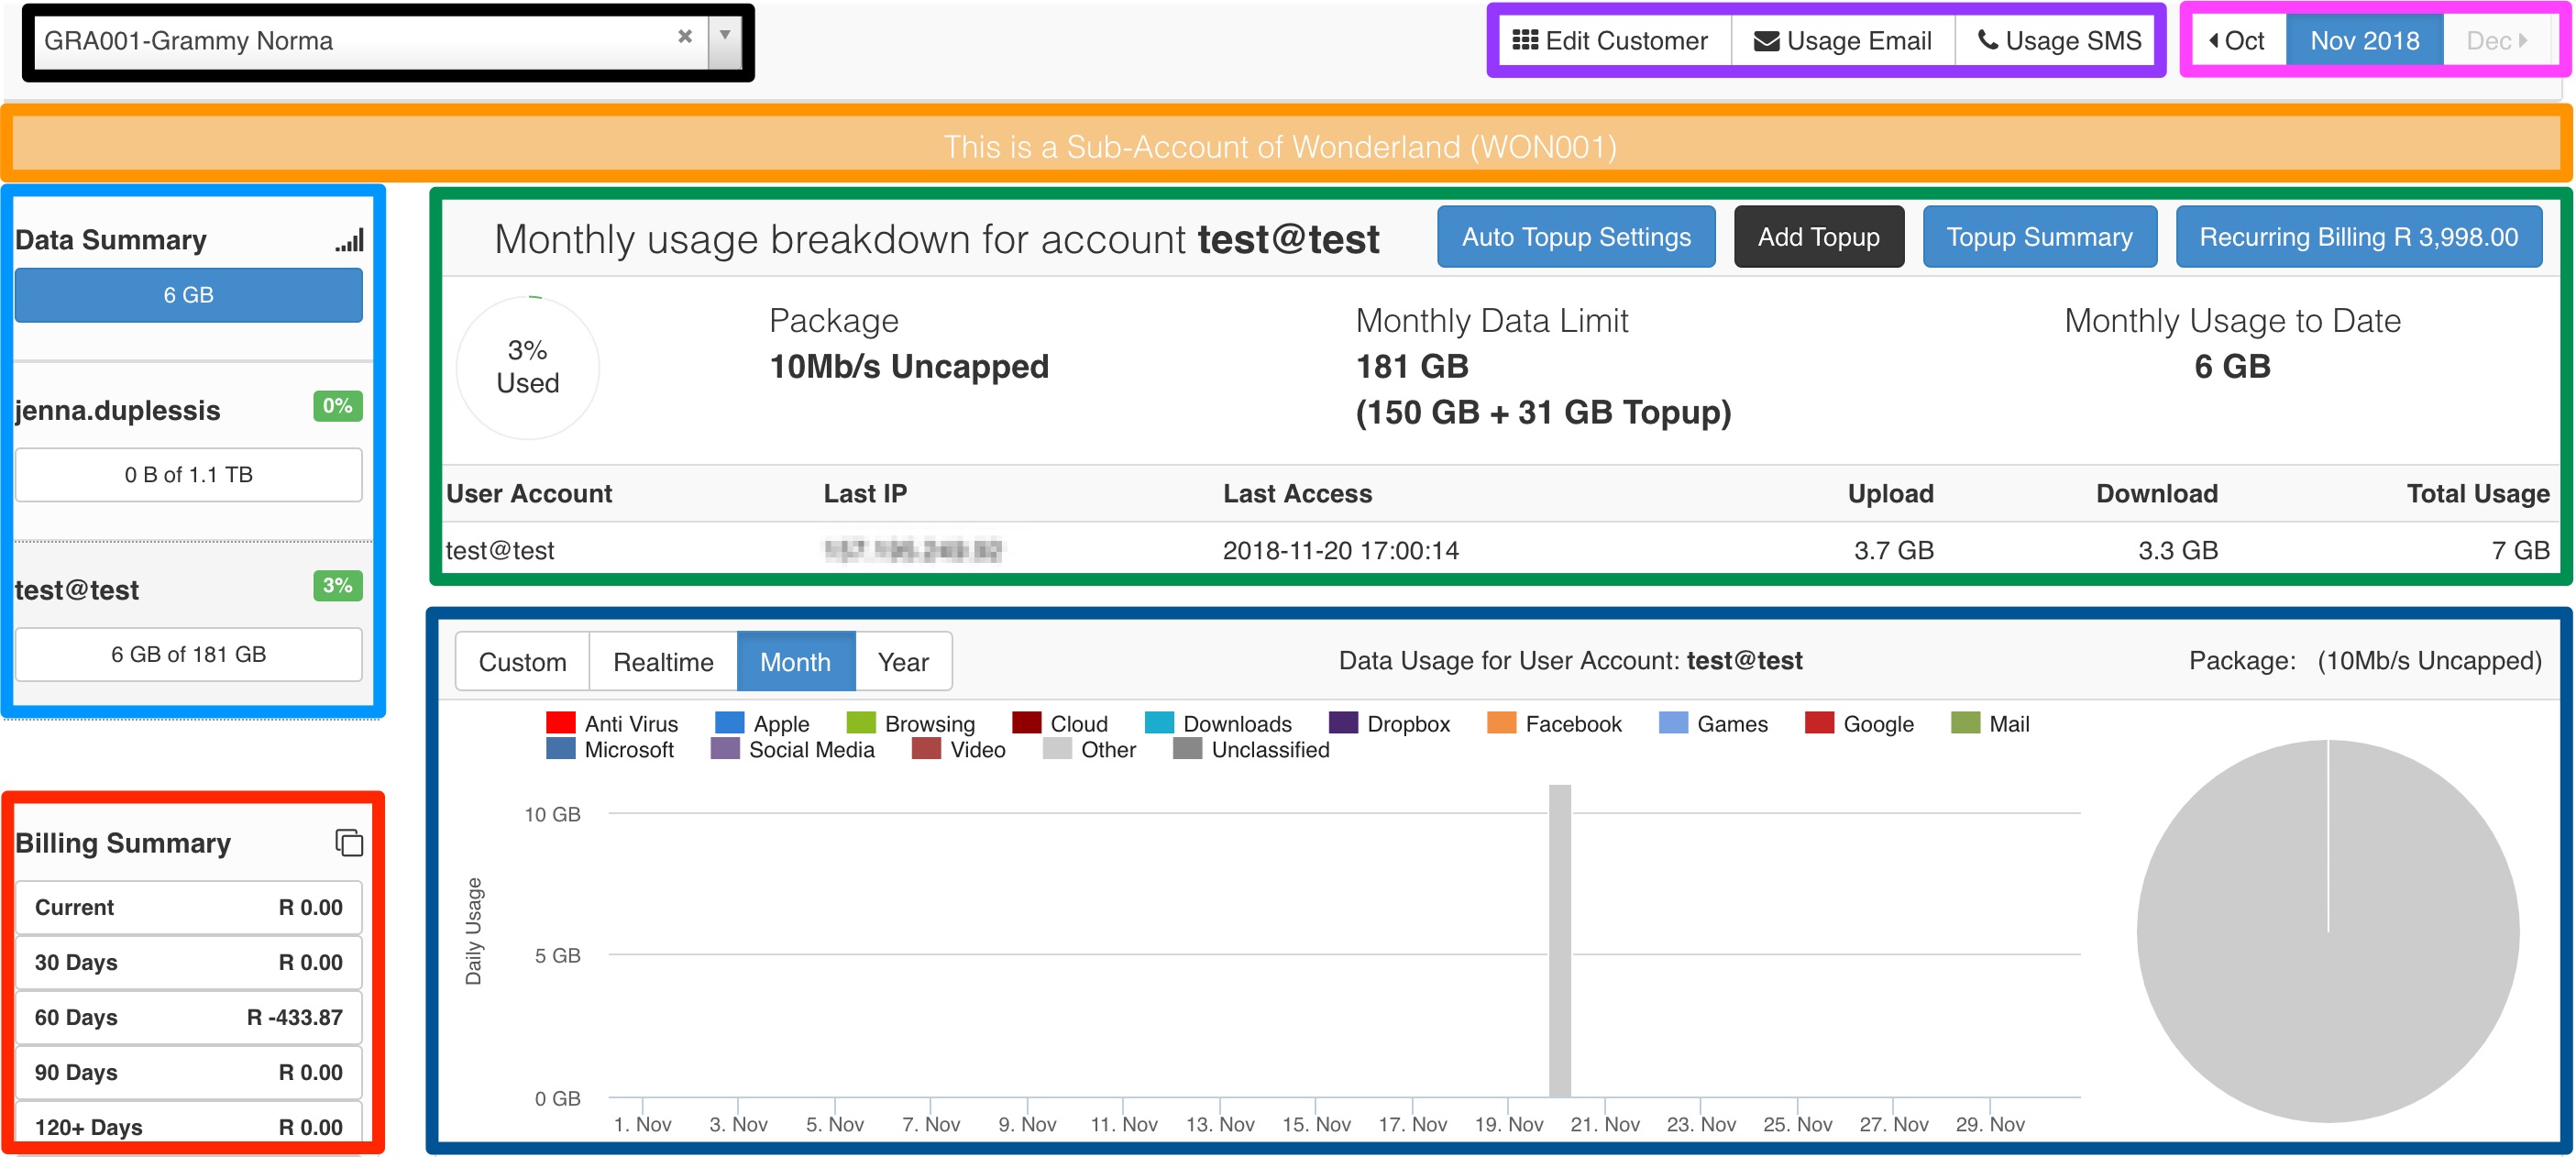
| Black: | In this section, you will be able to change between customers. |
| Purple: | From here, you can quickly go to the customer’s profile or send them their current usage via email or SMS. |
| Pink: | This section will allow you to view previous monthly data usage. |
| Orange: | Generally, in this section, there are informative banners that appear to tell you more about the customer account:
|
| Light Blue: | If the customer has multiple data accounts, you will be able to view their combined usage details or switch between the different data accounts to view their usage individually. |
| Green: | This section will give you more details about the specific data account i.e. what package the customer is on, last access and cap. If the package is uncapped, you will also be able to do top-ups from here. |
| Dark Blue: | Here, you will be able to see a usage graph for the customer’s usage. |
| Red: | In this section, you can see a quick summary of the customer’s billing. |
5. Customer Portal
Each customer will also have their own customer portal. In the online portal, they will be able to to do things such as:
- Request account information updates
- View invoices and statements.
- Viewing usage and doing top-ups
- Create and respond to helpdesk tickets.
For more information you can refer to the following:
- Guide: Customer Portal
- Webinar: Customer Portal