1. Introduction:
The purpose of this guide is to assist you with how to gain the Correct Rate Limits for your IPC Fibre Accounts. HeroTill can automatically create static queues to manage these speed limits. These auto queues can be implemented either on the core router or at the individual on-premise client routers.
Please ensure that the following has been added and is set up correctly:
| No | Description | Link |
| 1 | The Main Core Router for IPC needs to be added to your Network Devices: | https://yourcompanyurl/devices/ethernet |
| 2 | The Main Core Router for IPC needs to be added to your NAS List: | https://yourcompanyurl/radius/nas |
Once the above has been completed, you will have two ways in which you can make use of the MikroTik Queues:
- Add the queues on the data package if you plan on using the core router for speed limits or
- add queues to specific data accounts if you wish to use the on-premise routers for speed limits.
For more information, please refer to the following:
| No | Description | Link |
| 1 | MikroTik Queue | https://wiki.mikrotik.com/wiki/Manual:Queue |
| 2 | HeroTill IPC | https://support.herotill.com/guides/datatill-ipc/ |
1.1. Adding Queues on data packages
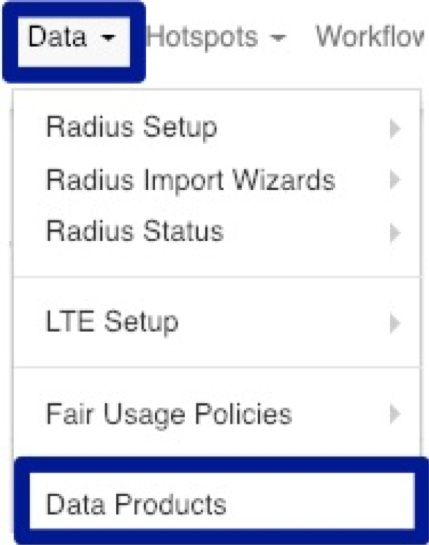
This will allow you to set a data package to queue on a specific MikroTik router. This means that all customers linked on that specific data package will queue off the router that has been selected. To find your data packages, go to “Data” and then click on “Data Products”.
Find the data package on which you would like to add the queue and then click on the edit button.

Go to the “Data Limits” tab and in the “Queue Routers” section, choose the relevant routers. (Please see screenshot on next page).
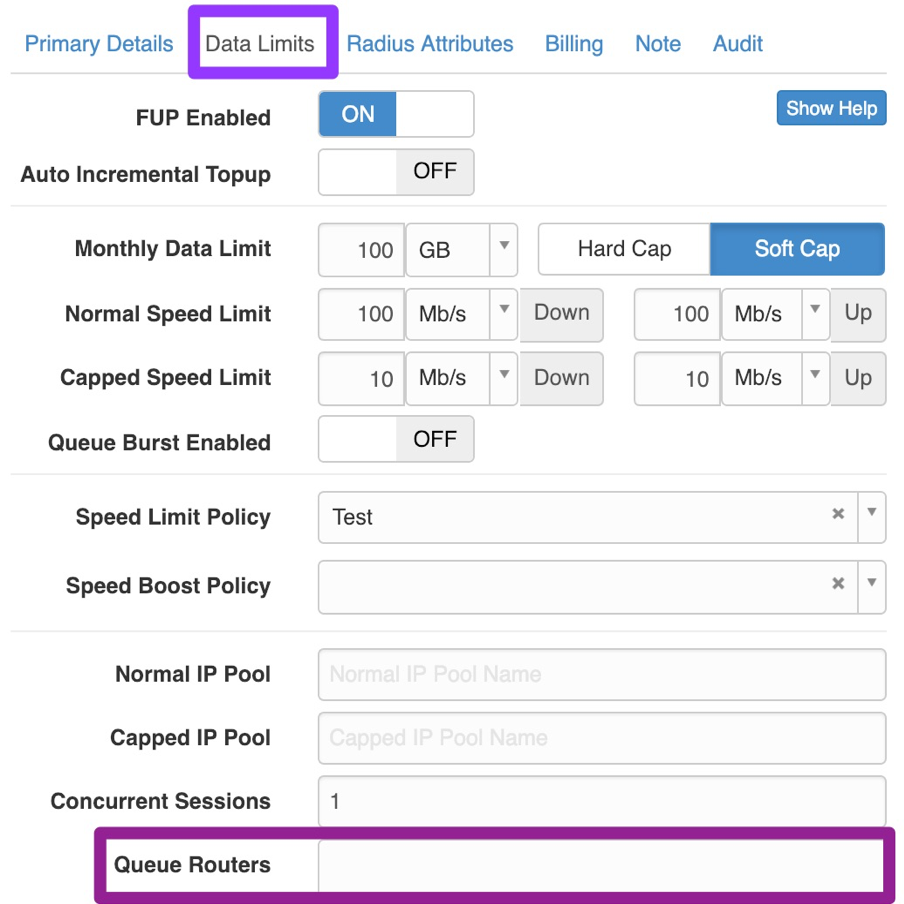
Remember to click on the “Save Changes” button after you have made any changes. Once this has been completed, the static queue will automatically be generated on the MikroTik router.
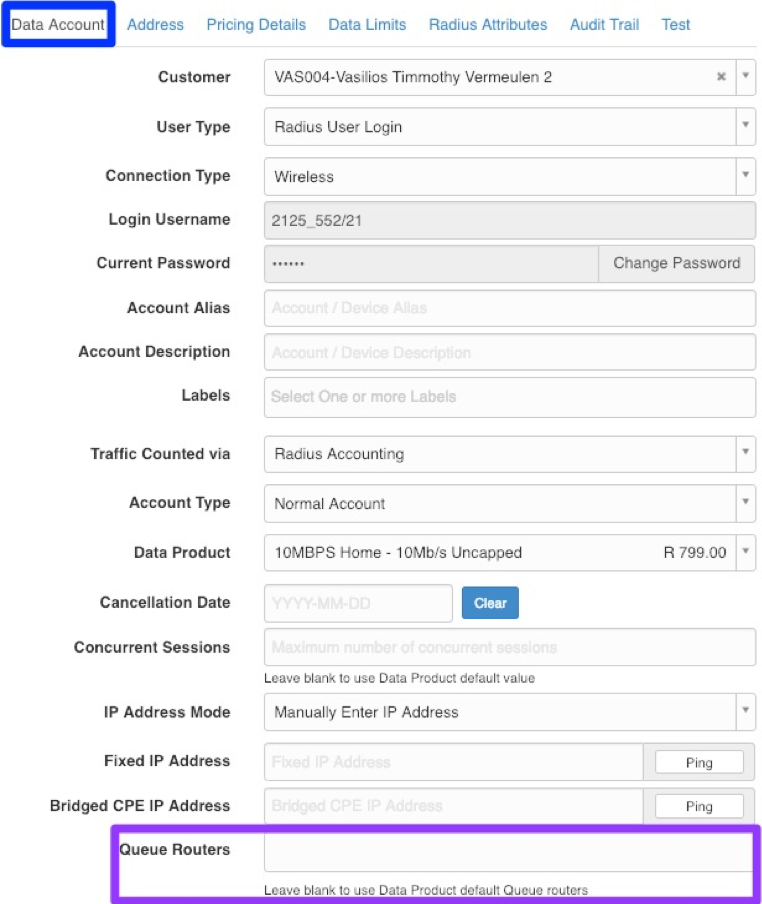
1.2. Adding Queues on data accounts
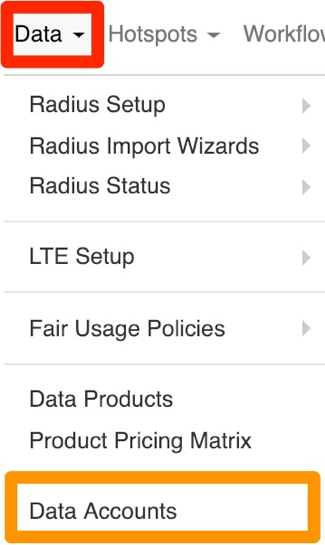
Additionally, you will be able to queue to a router from a specific data account linked to a customer. Only customers selected will be able to queue from the selected MikroTik router. To find your data accounts, go to “Data” and then click on “Data Accounts”.
Find the data account on which you would like to add the queue and then click on the edit button.

Go to the “Data Account” tab and in the “Queue Routers” section, choose the relevant routers. (Please see screenshot on the next page).
Remember to click on the “Save Changes” button after you have made any changes. Once this has been completed, the static queue will automatically be generated on the MikroTik router.
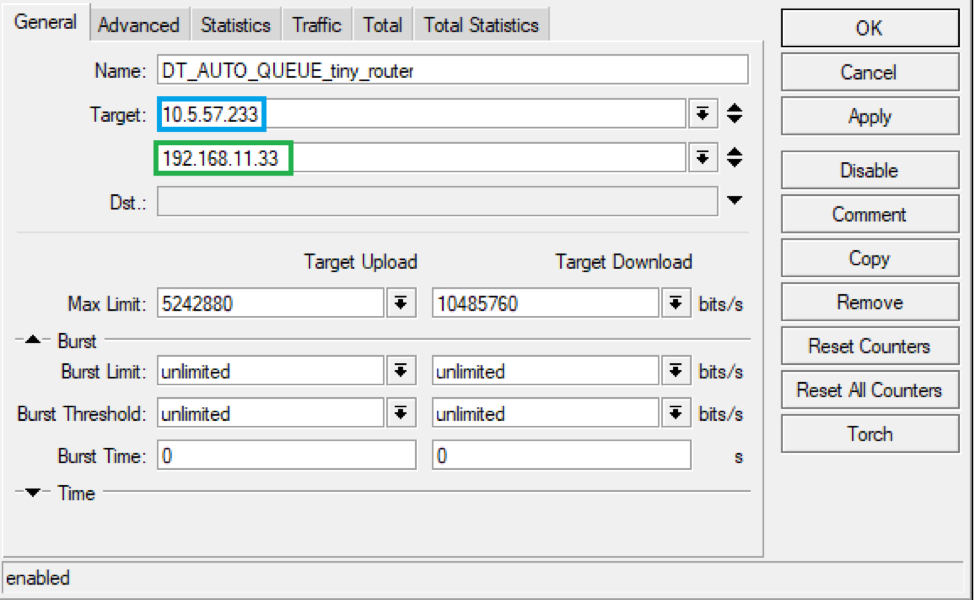
1.3. What happens when there is a sub-account?
Should the data account have sub-accounts linked to it, the queue will be created containing the IP addresses of the main accounts as well as all sub-accounts. Please refer to the example below: