
1. Overview
The refer a friend module was created to ensure that we can give our customers the chance to refer their friends to your company and be rewarded with some credit if the customer signs up and their installation is successfully done.
Customers will be able to refer customers in one of two ways:
- By logging into their customer portal and clicking on the refer a friend button.
- By submitting a good rating (4 and 5-star ratings only).
When referring a potential customer, customer’s will need to add the names and email addresses of the people that they would like to refer. The referees will now receive an email with a link. When they click on the link, they will be taken to the specials page. On the specials page, they can choose one of the specials that the ISP has created.
If they decide to choose one of the specials, then they will be redirected to a page where they will need to complete their customer details. This screen will look similar to the screen the customer will see when completing an online application from your website.
After the customer submits their details a new sales lead will be generated, and the lead will follow through the normal lead to receipt process. The referrer will now also be able to keep track of how far the lead has processed through the lead to receipt process.
Once the installation successfully takes place, credits will be allocated accordingly:
- The referrer will receive credit towards the full amount of the data product chosen by the referred.
- The referred will receive credit for the amount which is pre-determined by the relevant service provider. Should the service provider enter the amount of credit to be allocated as 0 (nil), then the referred client will not receive any credit.
The referred customer will be able to claim credit once they have paid their installation invoice in full. The referrer will receive their credit once the next recurring billing run takes place. Unlike the referred customer, the referrer will not need to pay the invoice before being able to claim the credit.
2. Setup
To start the setup, you will need to create an account in SageOne. This account should be named something along the lines of “Discount Allowed – Refer a friend”. Once this has been done, you will need to submit a ticket to the data still support team. The support team will then enable the refer a friend module in your database and sync the new account with your HeroTill.
After this initial setup has been done, we will let you will need to complete the rest of the refer a friend set up.
2.1. Finalising the refer a friend set up.
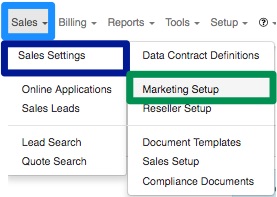
To finalise the refer a setup set up, go to “Sales” – “Sales Settings” and then click on the “Marketing Setup” option.
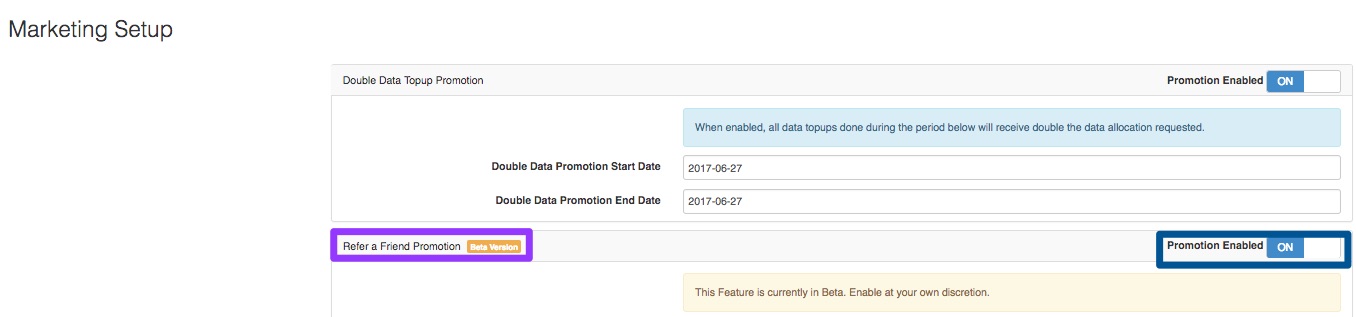
On the following screen, look for the “Refer a Friend Promotion” section and ensure that the “Promotion Enabled” button is switched to “On”.
You will need to check the following settings:
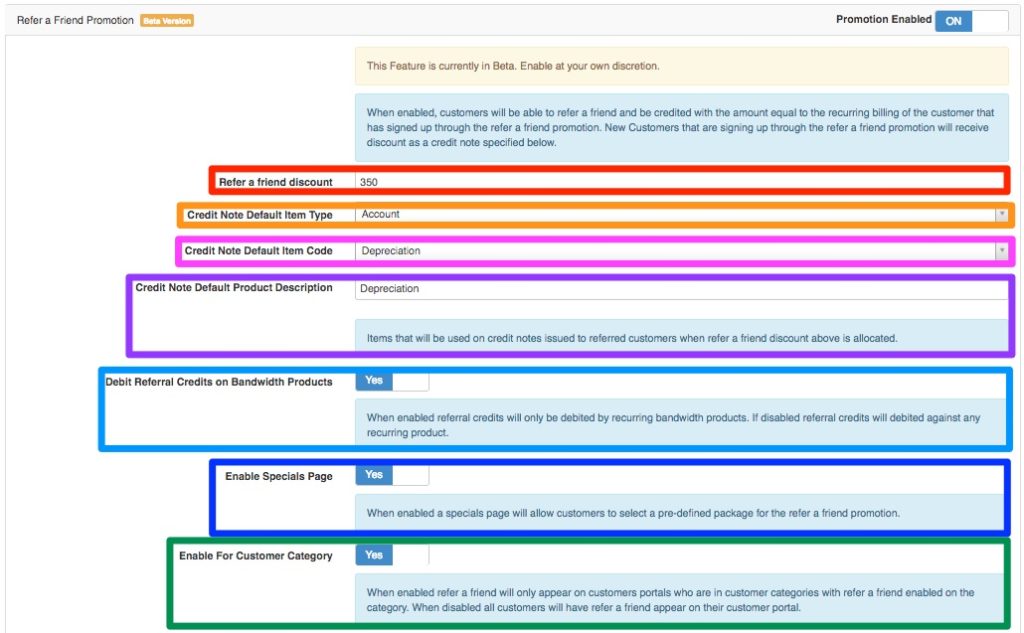
| Red: | In this section, enter the amount that the customers will receive for successfully signing up with your ISP after being referred by a friend. Should you not want to give credit to the customer signing up, then you can change this amount to 0 (nil). |
| Orange: | Here you will need to choose “Account”. |
| Pink: | In this section, you will need to choose the SageOne account that you created. |
| Purple: | The description here will automatically be pulled through from the account that you have chosen. Should you wish to give it an alternative description, you can do so by entering the description here. |
| Light Blue: | This switch will allow you to:
a) Only use the credit notes on recurring bandwidth products (Yes). b) Use the credit notes against any recurring products (No). |
| Dark Blue: | When this switch is enabled (Yes), then you will allow customers to select from a pre-defined package which they can refer to their friends. If the switch is disabled (No), then the customer will be directed to a normal sales lead page where they can complete their contact information. |
| Green: | If this switch is enabled (Yes), you will need to assign the virtual reseller category to the customer before they are able to refer a friend. This means that only specific customer will be able to refer friends. If this switch is disabled (No), then the refer a friend module will be accessible to all you customers. This means that all your customer will be able to refer friends. |
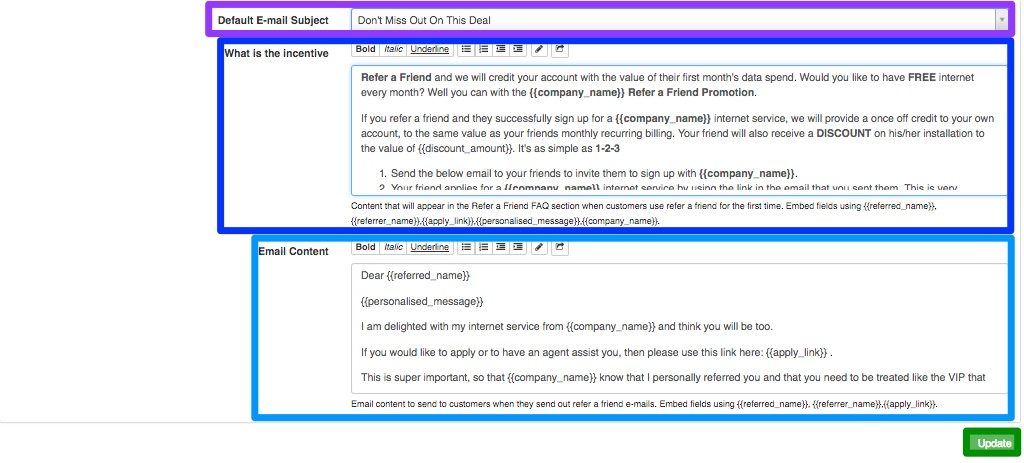
| Purple: | In this section, you will be able to see one of four message subjects that the customer will be able to use when sending the email to a friend. These email subjects are:
|
| Dark Blue: | In this section, you will be able to edit the refer a friend terms and conditions. |
| Light Blue: | Here you will be able to see the email message that will be sent to the customer. If need be, you will be able to edit the message here. |
After making any changes, remember to click on the “Update” button.
2.2. Categories
After you have completed the refer a friend setup, you will find that a new category has been created in your system. This category is called virtual resellers and you will use it to mark certain customers to be able to refer their friends. You will also be able to switch on the refer a friend module on other categories which are already linked to customers.
To do this, go to “Customers” and then click on the “Categories” option.
On the following screen, you will see a list of all your categories.
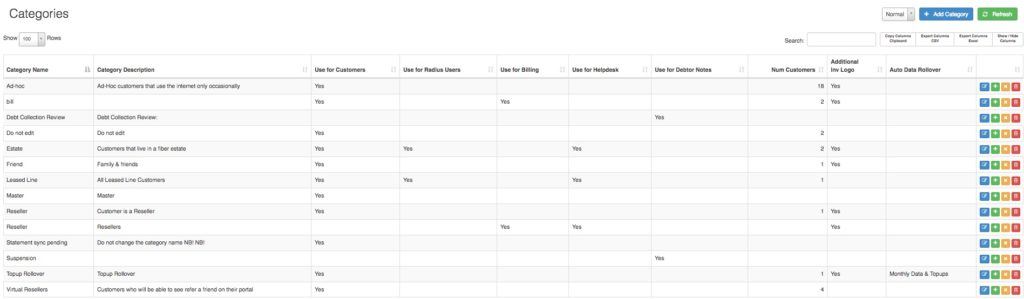
2.2.1. Adding new categories
To add new categories, click on the “Add Category” button found in the top right-hand corner.

After clicking on the “Add Category” button, you will see the following screen:
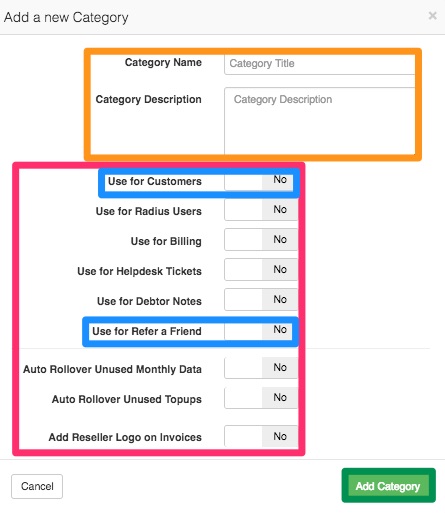
| Orange: | In this section, you can add a title and a description for the category that you are creating. |
| Pink: | Here you will need to decide which HeroTill aspects you would like to be able to use this category. For example, if you would like to be able to use this category on customers, switch the customer toggle switch to yes. |
*Please note that if you would like this specific category to enable refer a friend for certain customers, you will need to ensure that you have enabled the “Use for Customers” section as well as the “Use for Refer a Friend” section.
Click on the “Add Category” button after completing all the relevant details.
2.2.2. Editing categories
To edit a category, click on the “Edit” button found on the right-hand side of the specific category.

On the pop-up screen, you will see the same screen when adding a new category and you can update the details accordingly.
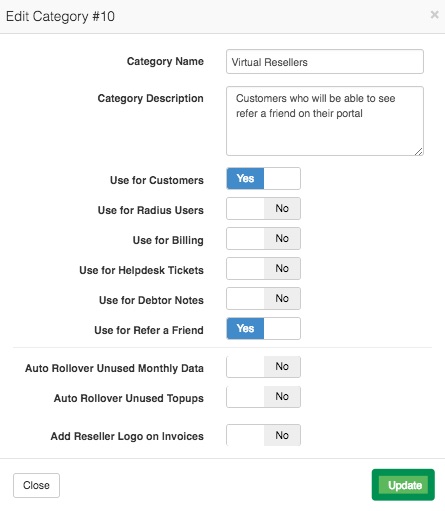
After making any changes to the category, remember the click on the “Update” button.
2.2.3. Assigning customers to a category
You can easily assign multiple customers to a specific category by clicking on the green plus sign found on the right-hand side of the specific category.

After clicking on the green button, you will see the following pop-up screen:

In the purple section, add the customer codes, separated by a comma, that you would like to assign this category to. After adding the list of customers, click on the “Add to Customer” button.
2.3. Specials page
To setup the specials that the customer can choose from, you will need to go to “Sales” – “Sales Settings” and then click on the “Document Templates” option. Please note that it is the ISP’s responsibility to create and keep these documents updated.

You will now see a list of all document templates.

2.3.1. Creating templates
To create a new document template, click on the “Add” button found in the top right-hand corner.

After clicking on the “Add” button, you will now see the following pop-up screen:
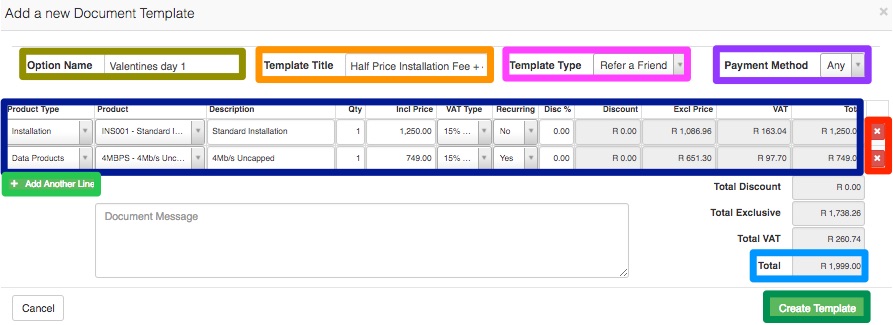
| Gold: | Here, you need to give your template a name – the customer will not be able to see this. |
| Orange: | In this section, you need to give template a title – the customer will be able to see this on the specials page. |
| Pink: | Please be sure that you choose refer a friend in this section. If you do not choose refer a friend, then the option will not be displayed on your specials page. |
| Purple: | If you would like, you can choose a default payment method here. |
| Dark Blue: | In this section, you will need to add your document details i.e. the installation or data product on special. |
| Red: | By clicking on the X, you will be able to remove a line item. |
| Light Green: | By clicking on the “Add another Line” you will be able to add another line item. |
| Light Blue: | In this section, you can view the total amount for the document. |
After completing all information on your template, click on the “Create Template” button.
2.3.2. Editing templates
To edit your existing templates, you will need to click on the “Edit” button found on the right-hand side of the template.

You will now see the same screen when you see when adding new templates.

After making any changes to the details, remember to click on the “Update Template” button.
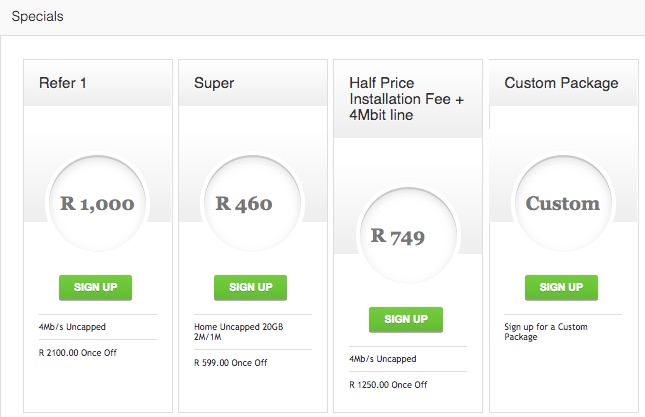
2.3.3. What will the specials page look like?
Your specials page that the customers see will look similar to the screenshot below.
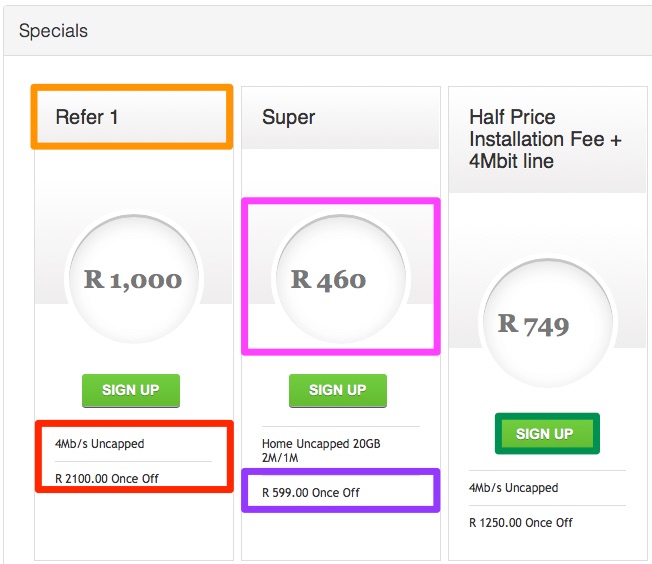
| Orange: | In this section, you can see the template title. |
| Red: | Here you can see all items listed on your template. |
| Pink: | This is the price of your data product. |
| Purple: | Here you can view the price of the installation. |
| Green: | If the customer likes one the options that they see, then they can click on the |
Please note that the screenshot above is just an example. You will need to set up your own document templates according to your specials.
3. Marking the customer for refer a friend.
When marking customers to be able to refer a friend, you can do it in three different ways:
- Mark all your customers to be able to refer a friend.
- Mark single customer to be able to refer a friend.
- Mark multiple customers to be able to refer a friend.
3.1. Marking all customers for refer a friend.
For more information on how to enable the refer a friend module on ALL of your customers, please refer to the “Enable for Customer Category” section found under the setup settings in 2.1.

3.2. Marking single customers for refer a friend.
If you would only like to enable the refer a friend module for customers who request such a feature, you can do this by individually tagging them with a category which has the refer a friend module enabled on it.
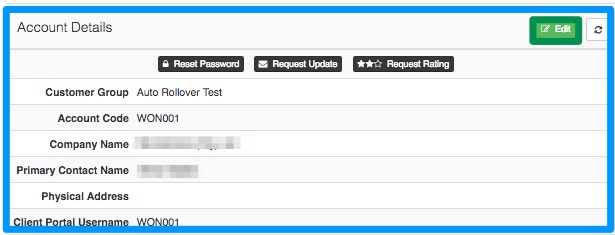
To do this, start by going to the customer’s profile. Once you are on the customer’s profile, look for the “Account Details” section and then click on the “Edit” button.
On the pop-up screen, look find the “Categories” section and the add the relevant category(ies) here.
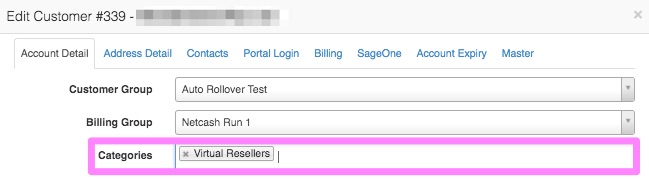
After making the necessary changes, remember to click on the “Save Changes” button found at the bottom right-hand side of the screen.
3.3. Marking multiple customers for refer a friend.
For more information on how to enable the refer a friend for multiple customers simultaneously, please refer to the assigning customers to a category section in 2.2.3.
In the purple section, add the customer codes, separated by a comma, that you would like to assign this category to. After adding the list of customers, click on the “Add to Customer” button.
4. How the process works: ISP
Customers will be able to refer a friend in one of two ways (depending on your setup):
- Logging into the customer portal and clicking on the refer a friend button.
- When the customer gives a 4- or 5-star rating from their customer portal.
The customer will need to add the potential customer’s name and email address.
4.1. The email
After the referrer has entered all his friend’s details, they will receive an email similar to the one below.
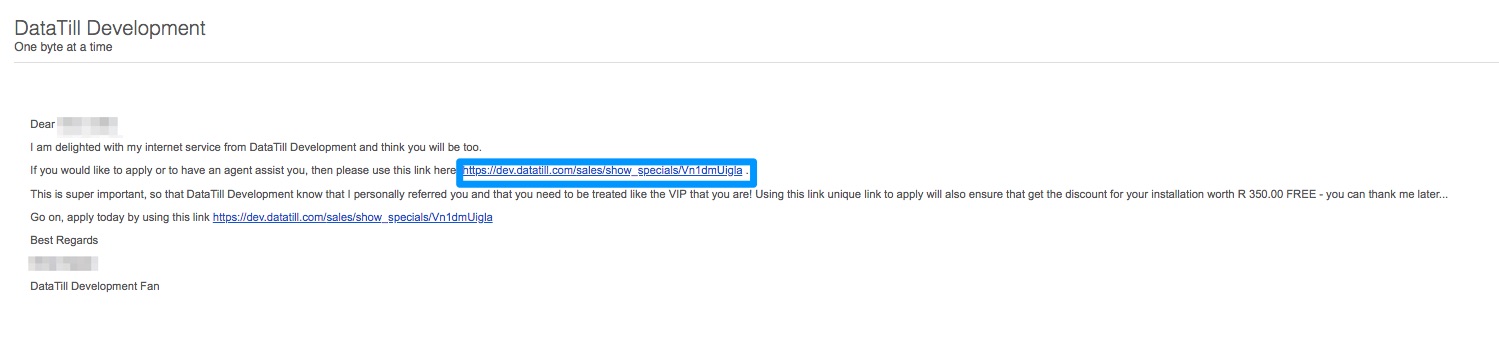
In this email, there will be a “Link” re-directing the referred to the specials page.
The referred will now choose the option which looks most appealing to them by clicking on the “Sign Up” button. After clicking on the “Sign Up” button, they will be re-directed to the sales lead page where they will need to complete all their information.
*Please note that above screenshot is just an example. Your specials page should not be created according to the above example. Please refer to section 2.3.3. for more information on how to do this.
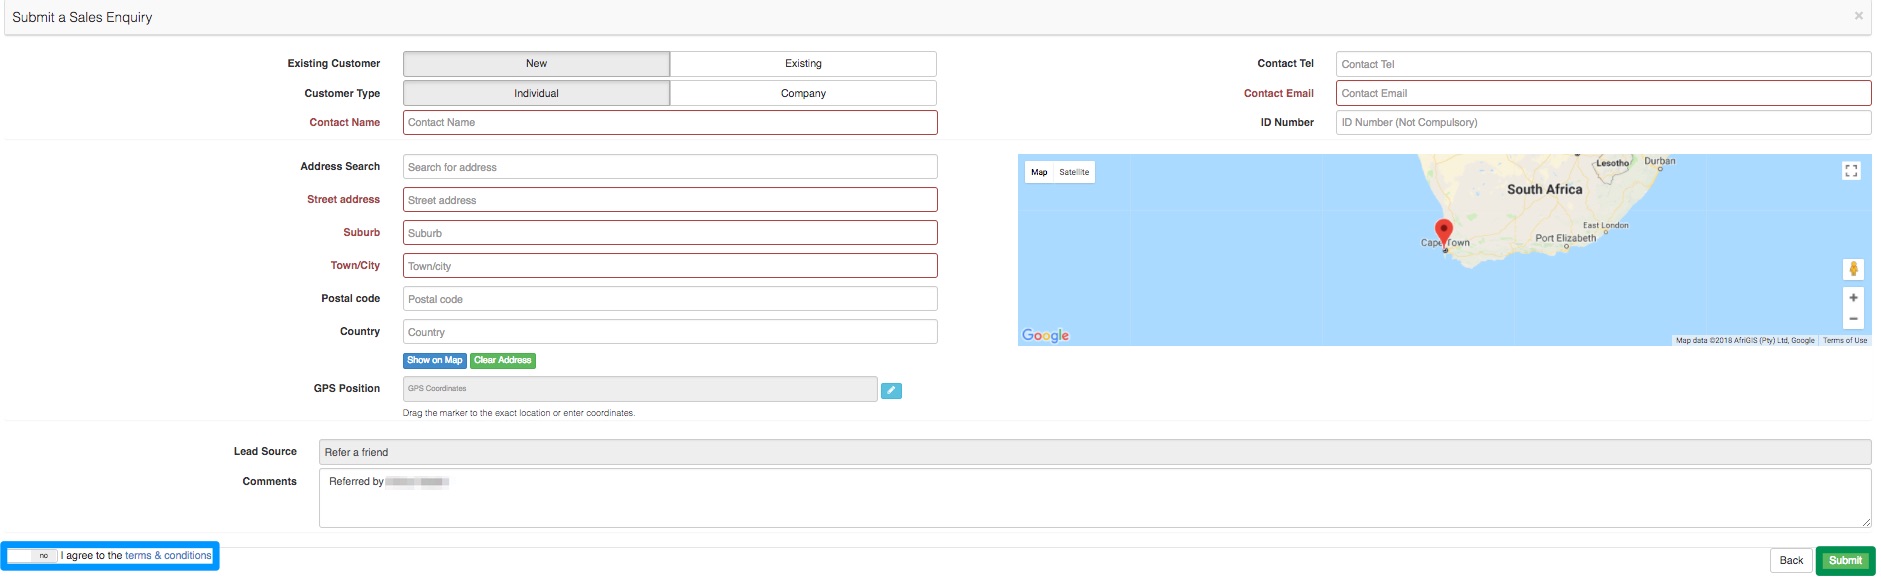
| Blue: | In this section, the customer will need to accept the terms and conditions. |
| Green: | After they have completed their information and have accepted the terms and conditions, they need to click on the submit button. |
4.2. Lead to Receipt
After the sales query has been submitted, a new lead will be generated and can be found in under sales “Leads” – “New”.
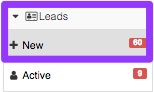
When you open the lead, you will be able to see a blue banner to mention that this is a “Refer a Friend Lead”.
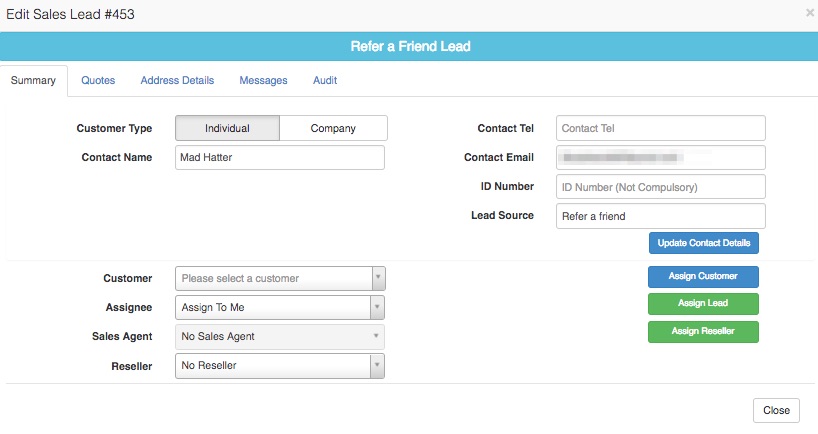
The process will now flow through the lead to receipt process just like any other lead would have. As the lead moves through the different workflow phases, the customer portal will be updated, and the customer will be able to track the progress for the friend that they have referred.
4.2.1. Quoting the customer
Once the lead is in the quotes – new phase, a quote will automatically be generated according to the special that the customer originally chose. You will still be able to edit this quote before sending it to the customer.
Please always ensure that the chosen data package is on the quote. If there is no data package on the quote, then credits will not be applied to customer accounts.
4.2.2. Invoicing the customer
The customer will be invoiced as per the normal lead to receipt process. All information from the quote and the job card will pull through to the invoice and if applicable, pro-rata will also be calculated. After the SageOne invoice has been generated, the new customer will need to pay the invoice in full before credit can be allocated.
4.3. Allocating credits
When explaining the process to the customer, it is important to mention to them the following:
- Credit is only applied IF the new customer’s installation is successful.
- The refer will receive their credit once they have fully paid their next recurring invoice.
- The referred will only receive credit once they have fully paid their installation invoice.
4.3.1. For the referrer
A credit note will automatically generate for the customer once:
- The customer they referred has paid their installation invoice in full.
- The next billing run is completed.
After the invoice has been generated, the ISP admin users will still need to manually push the credit note to SageOne.
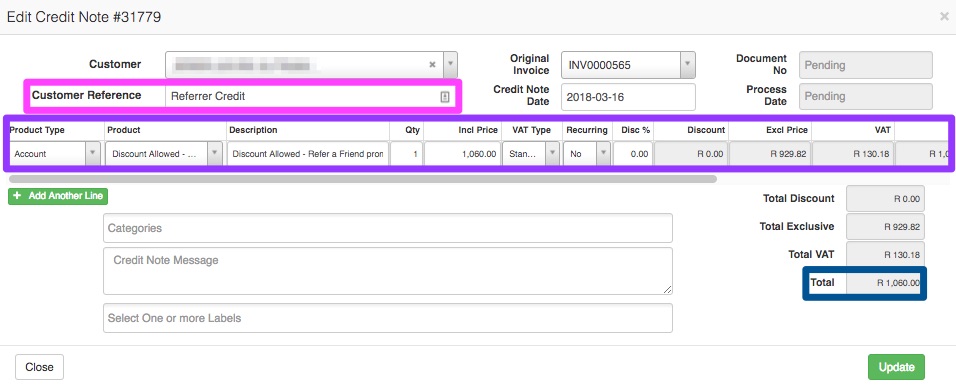
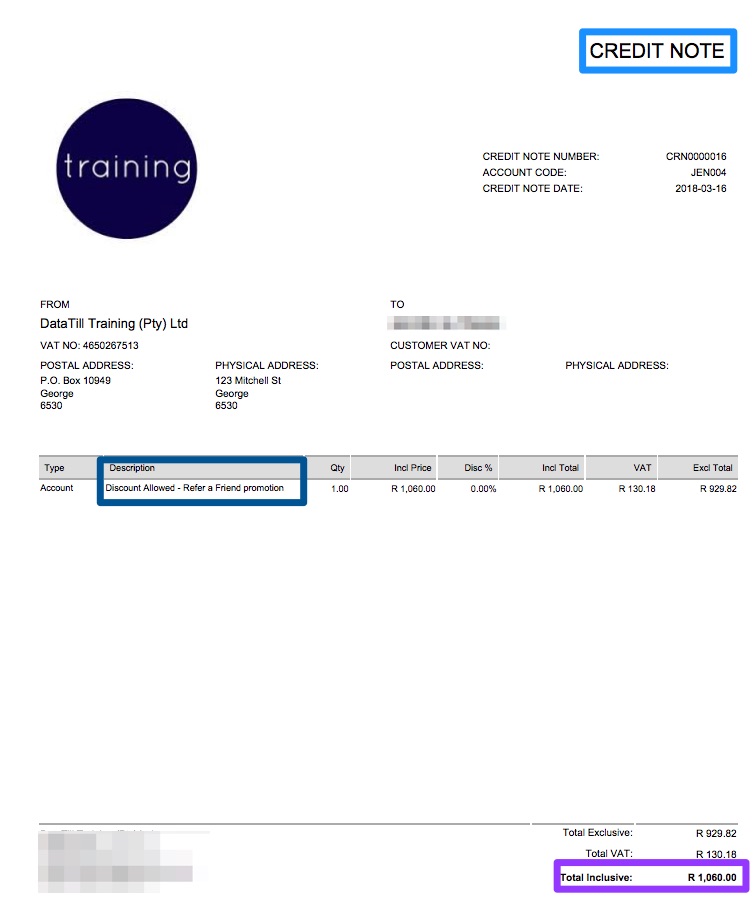
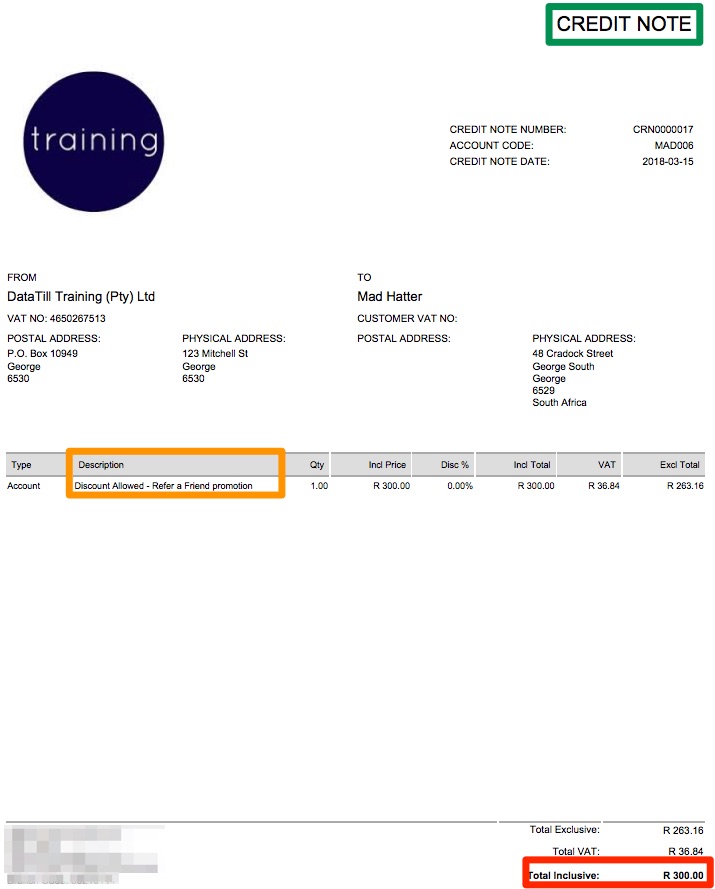
On the credit note, you will be able to see the “Customer Reference”, the credit note details and the “Total” amount of credit that the customer will receive.
The referrer will receive a discount amount that equals the price of the package that the new customer has chosen. In other words, if the referred chose a data package of R749, the referrer will receive credit for the amount of R749.
4.3.2. For the referred
The new customer that has been referred to your ISP, will need to pay their installation in full before they can receive their credit. After the invoice has been fully paid and the midnight cron has ran, the system will automatically create a credit note for the customer.
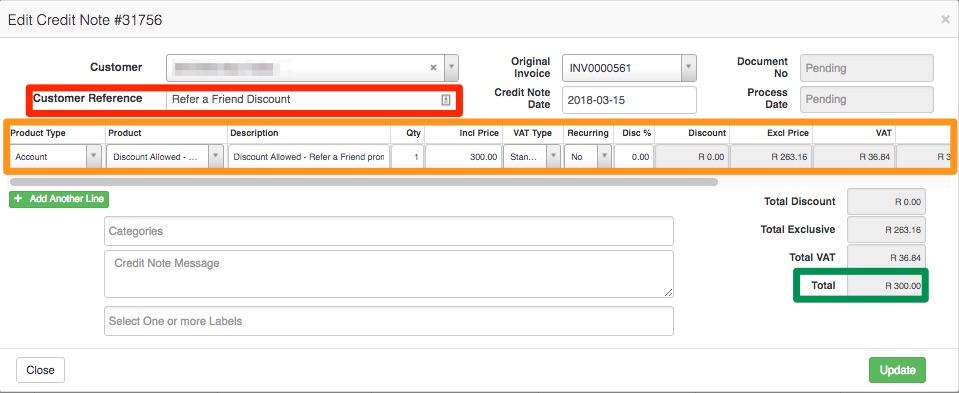
On the credit note, you will be able to see the “Customer Reference”, the credit note details and the “Total” amount of credit that the customer will receive. Referred customers will receive the amount of credit as per your setup in section 2.1.
5. How to refer a friend:
To refer a friend, you will need to start by logging into your customer profile.
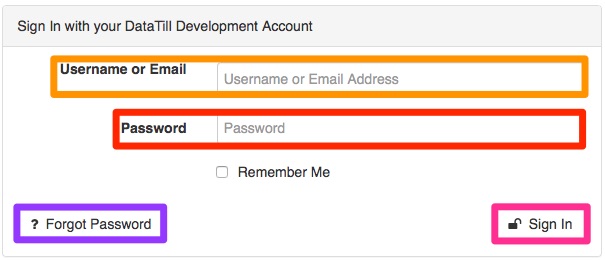
| Orange: | In this section, add your username (customer code) or your email address. |
| Red: | Here you will need to enter your password. Please note that passwords are case-sensitive. |
| Pink: | After completing the above details, click on the sign in button. |
| Purple: | If you do not know what your login details are, click on the forget password button and then follow the steps. |
If you do not have the link to your customer portal, as your ISP to please send you a password reset mail.
After you have successfully logged in, you will see a page similar to the following screenshot.
5.1. Refer a friend screen
Customers will be able to refer a friend in one of two ways (depending on your setup):
- Logging into the customer portal and clicking on the refer a friend button.
- When the customer gives a 4- or 5-star rating from their customer portal.
5.1.1. Referring a friend
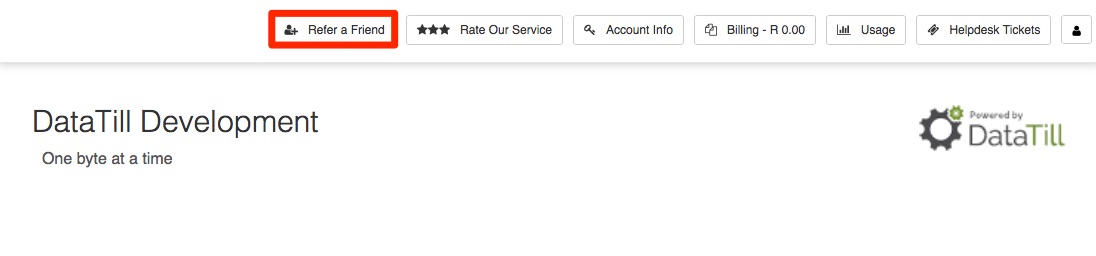
To start the refer a friend process, click on the “Refer a Friend” button found at the top. If you do not see this button, please contact your ISP and ask them to enable the refer a friend module for you.
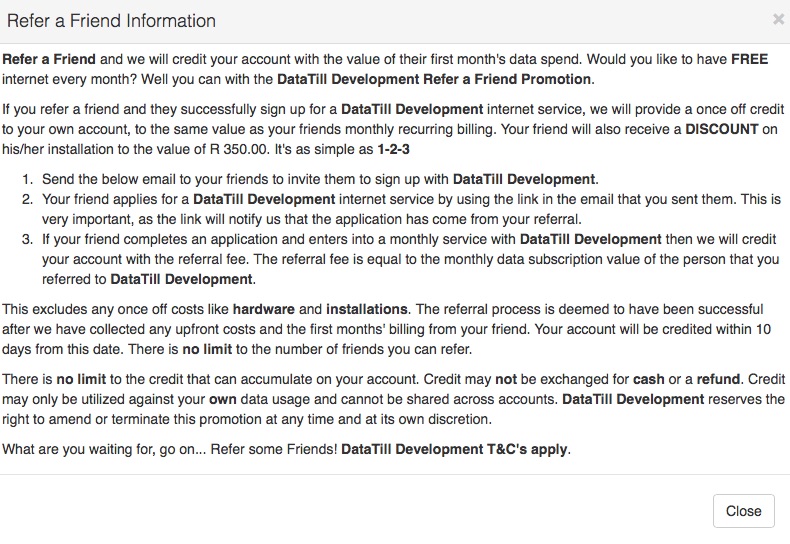
After clicking on the “Refer a Friend” button, you will see the following screen giving you a breakdown of how the refer a friend process works. If you have read through the information, click on the close button.
After clicking on the close button, you will see the following page:
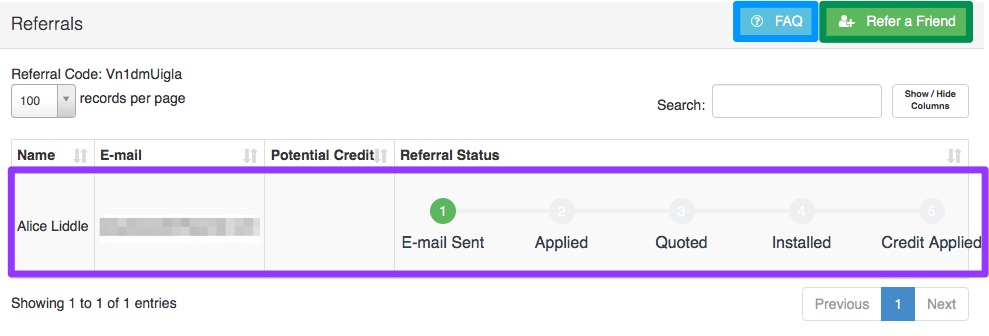
| Blue: | Click on the FAQ button to view the refer a friend information. |
| Purple: | If you have previously submitted any referrals, then you will be able to view and track their progress here. |
| Green: | If you have not previously referred any friends, click on the refer a friend button to submit your first referral. |
5.1.2. Customer Ratings
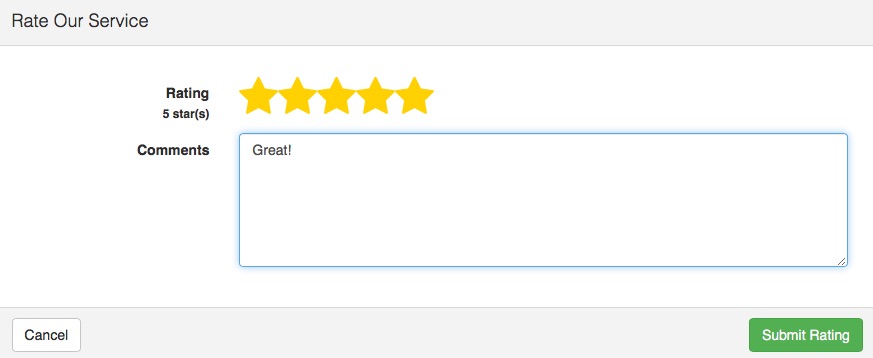
Customers who submit 4 or 5-star ratings will have the option to refer a friend. To do this, the customer will need to log into their portal and then click on the “Rate Our Service” button.

The customer will now need to give their rating and comments and then click on the “Submit Ratings” button.
After submitting the rating, the customer will see the following screen:
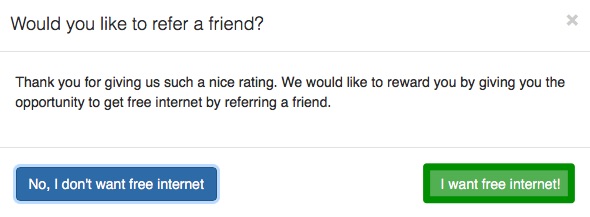
If the customer would like to refer a friend, they will need to click on the “I want free internet!” button.
5.1.3. Refer a friend
To refer a friend, click on the “Refer a Friend” button. You will now see the following page:
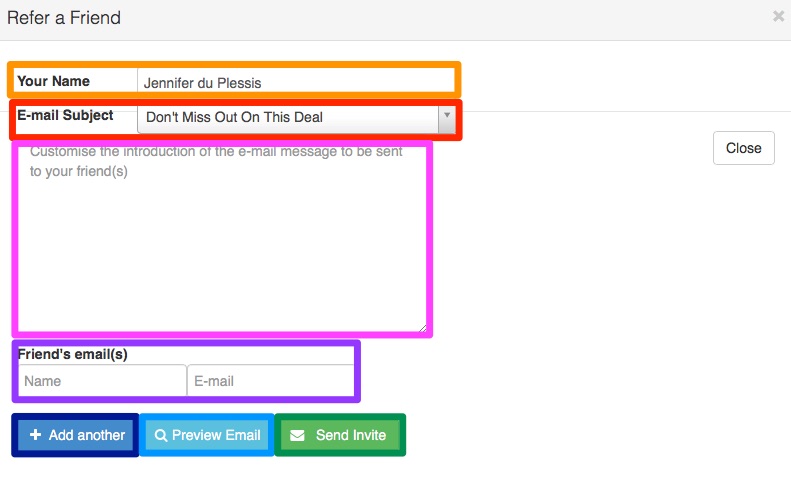
| Orange: | Your name will automatically be added in this field. |
| Red: | Here you can choose one of four email subjects. Click on the drop-down menu to choose the one that you want as your email subject. |
| Pink: | In this section, you will be able to add a personalised introduction in the email for your friend. |
| Purple: | Enter the names and e-mail address of the friends that you would like to refer here. |
| Dark Blue: | If you would like to refer more than one friend, click on the add another button and then enter their contact details. |
| Light Blue: | This button will allow you to view a preview of the message that will be sent to your friend. |
After you have completed the details as above, click on the “Send Invite” button.
5.1.4. Keeping track of your friend’s progress
Once the email has been sent to the customer, you will be able to keep track of their progress in your customer portal. You will be able to view the following:
- When the email has been sent
- When your friend has applied
- When your friend has been quoted.
- When their installation is done.
- And when credit is received.

5.2. Credits
5.2.1. If you referred a friend
When you refer your friend to us, you will be able to get credit. This is however depended on whether or not we can successfully provide them with our services. If we cannot complete the installation for the customer, you will not receive any credit. If we can successfully do the installation for the customer, then you will receive credit on your account.
5.2.1.1. How much credit will I get?
The amount of credit you receive will be determined by the data package that your friend chooses. For example: If your friend chooses a data package worth R749, you will receive a once off credit amount of R749.
5.2.1.2. What needs to happen before I can get my credit?
Before you can receive your credit the following needs to happen:
- Your friend’s installation needs to take place.
- Your friend needs to pay their installation invoice in full.
- You need to wait until the next monthly billing run.
- Once the billing run has been completed, your credit note will be generated.
- Then credit will be allocated to your account.
5.2.1.3. How will I know the credit has been allocated to my account?
After the credit has been allocated to your account, you will receive a credit note looking similar to the one below:
5.2.2. If you are being referred by a friend.
If you have signed up with our service provider and we are able to successfully complete your installation and provide you with our services, we will allocate some credit to your account. Please note that you will however only receive this credit once your installation invoice has been paid in full.
5.2.2.1. How much credit will I get?
Your service provider will pre-determine the amount of credit that they give to new customers who sign up through the refer a friend promotion. In the refer a friend email that your friend has sent you, you will be able to view the amount of credit that you can receive.
5.2.2.2. What needs to happen before I can get my credit?
Before you can get your credit applied to your account, the following will need to happen:
- You need to sign up using the link in the email.
- Your installation needs to take place successfully.
- You need to pay your installation invoice in full.
5.2.2.3. How will I know the credit has been allocated to my account?
After the credit has been allocated to your account, you will receive a credit note looking similar to the one below:
5.2.3. Viewing the customer’s credit balance
Should the customer contact you to ask how much credit they still have on their profile, then you will be able to view this on the customer’s profile. You will find the “Referrer Details” section underneath the recurring billing section.

Here you will be able to see the customer’s “Referral Code” as well as the “Referral Balance”.
Please note: Credit is only issued to the full amount of the customer’s current billing in consecutive order should their friend choose a package that is above their recurring monthly bill.
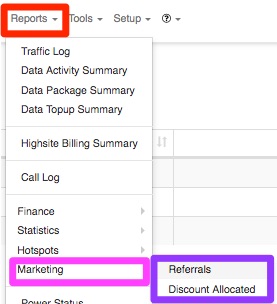
6. Reports
There are two reports that you can pull for the refer a friend module. To find these reports, go the “Reports” – “Marketing” and then click on either the “Referrals” or the “Discount Allocated” report.
6.1. Referrals
On this screen, you will be able to view a list of all referrals that have taken place. This list will provide you with customers who:
- Have received the email (invite sent)
- Application submitted
- Quote Accepted
- Installed
- And commission paid out.

| Yellow: | This filter function will allow you to filter the list per customer. |
| Orange: | Here you can search for names or email address etc. |
| Red: | This section will allow you to export the information of allow you to add additional information fields. |
| Pink: | Here you can see which customer it was that referred their friend. |
| Purple: | In this section, you can see the name of the friend that has been referred. |
| Dark Blue: | This section will give you the referee’s email address. |
| Light Blue: | Here you will be able to view the potential credit that will be given to the customer. |
| Light Green: | In this section, you will be able to view in which status the lead currently is. |
| Dark Green: | This section will enable you to view the workflow status. |
| Brown: | Here you can see whether the customer’s commission has been paid out. |
| Black: | If the button is green, it will take you to the original lead after you click on it. If the button is greyed out, it means that the referred potential customer has not yet accepted the invite that has been sent to them. |
6.2. Discount Allocated
This report will give a breakdown of all discount that have been allocated to customers because they referred a friend.

| Yellow: | This filter function will allow you to filter the list per customer. |
| Orange: | Here you can search for names or email address etc. |
| Red: | This section will allow you to export the information of allow you to add additional information fields. |
| Pink: | Here you can view the discount type. |
| Purple: | In this section, you can see to which customer the discount was granted. |
| Dark Blue: | Here you will be able to see the amount of discount allocated to the customer. |
| Light Blue: | This will indicate whether the discount has been allocated to a specific invoice or not. |
| Green: | In this section, you can see the date on which the discount was allocated. |
| Black: | These buttons will allow you to either view the discount or take you to the customer profile. |